Add a countdown timer
Use this guide to add a live, ticking countdown timer to a preorder's product page. By the end, customers will see a timer counting down to when the preorder opens, when it closes, or both, styled in your store's colors and translated into your storefront's languages.
Before you begin
| Requirement | Detail |
|---|---|
| Paid STOQ plan | The "Show countdown timer" option is disabled on the free plan. An upgrade prompt appears if you are not on a paid plan. |
| A preorder offer | The Countdown timer section lives inside the offer editor. See Set up preorders. |
| (Recommended) Offer schedule | To use the "Countdown to launch and deadline" mode, or to sync timer dates automatically, the offer must have a start date, end date, or both set in the Status section. See Schedule when an offer runs. |
Choose your setup
STOQ offers three countdown modes. It only shows the modes that make sense for your offer's current schedule, for example "Before preorder opens" only appears when the offer is disabled or has a scheduled start date.
- Before preorder opens: counts down to the date the preorder becomes available. Shown when the offer is disabled, or has a scheduled start date.
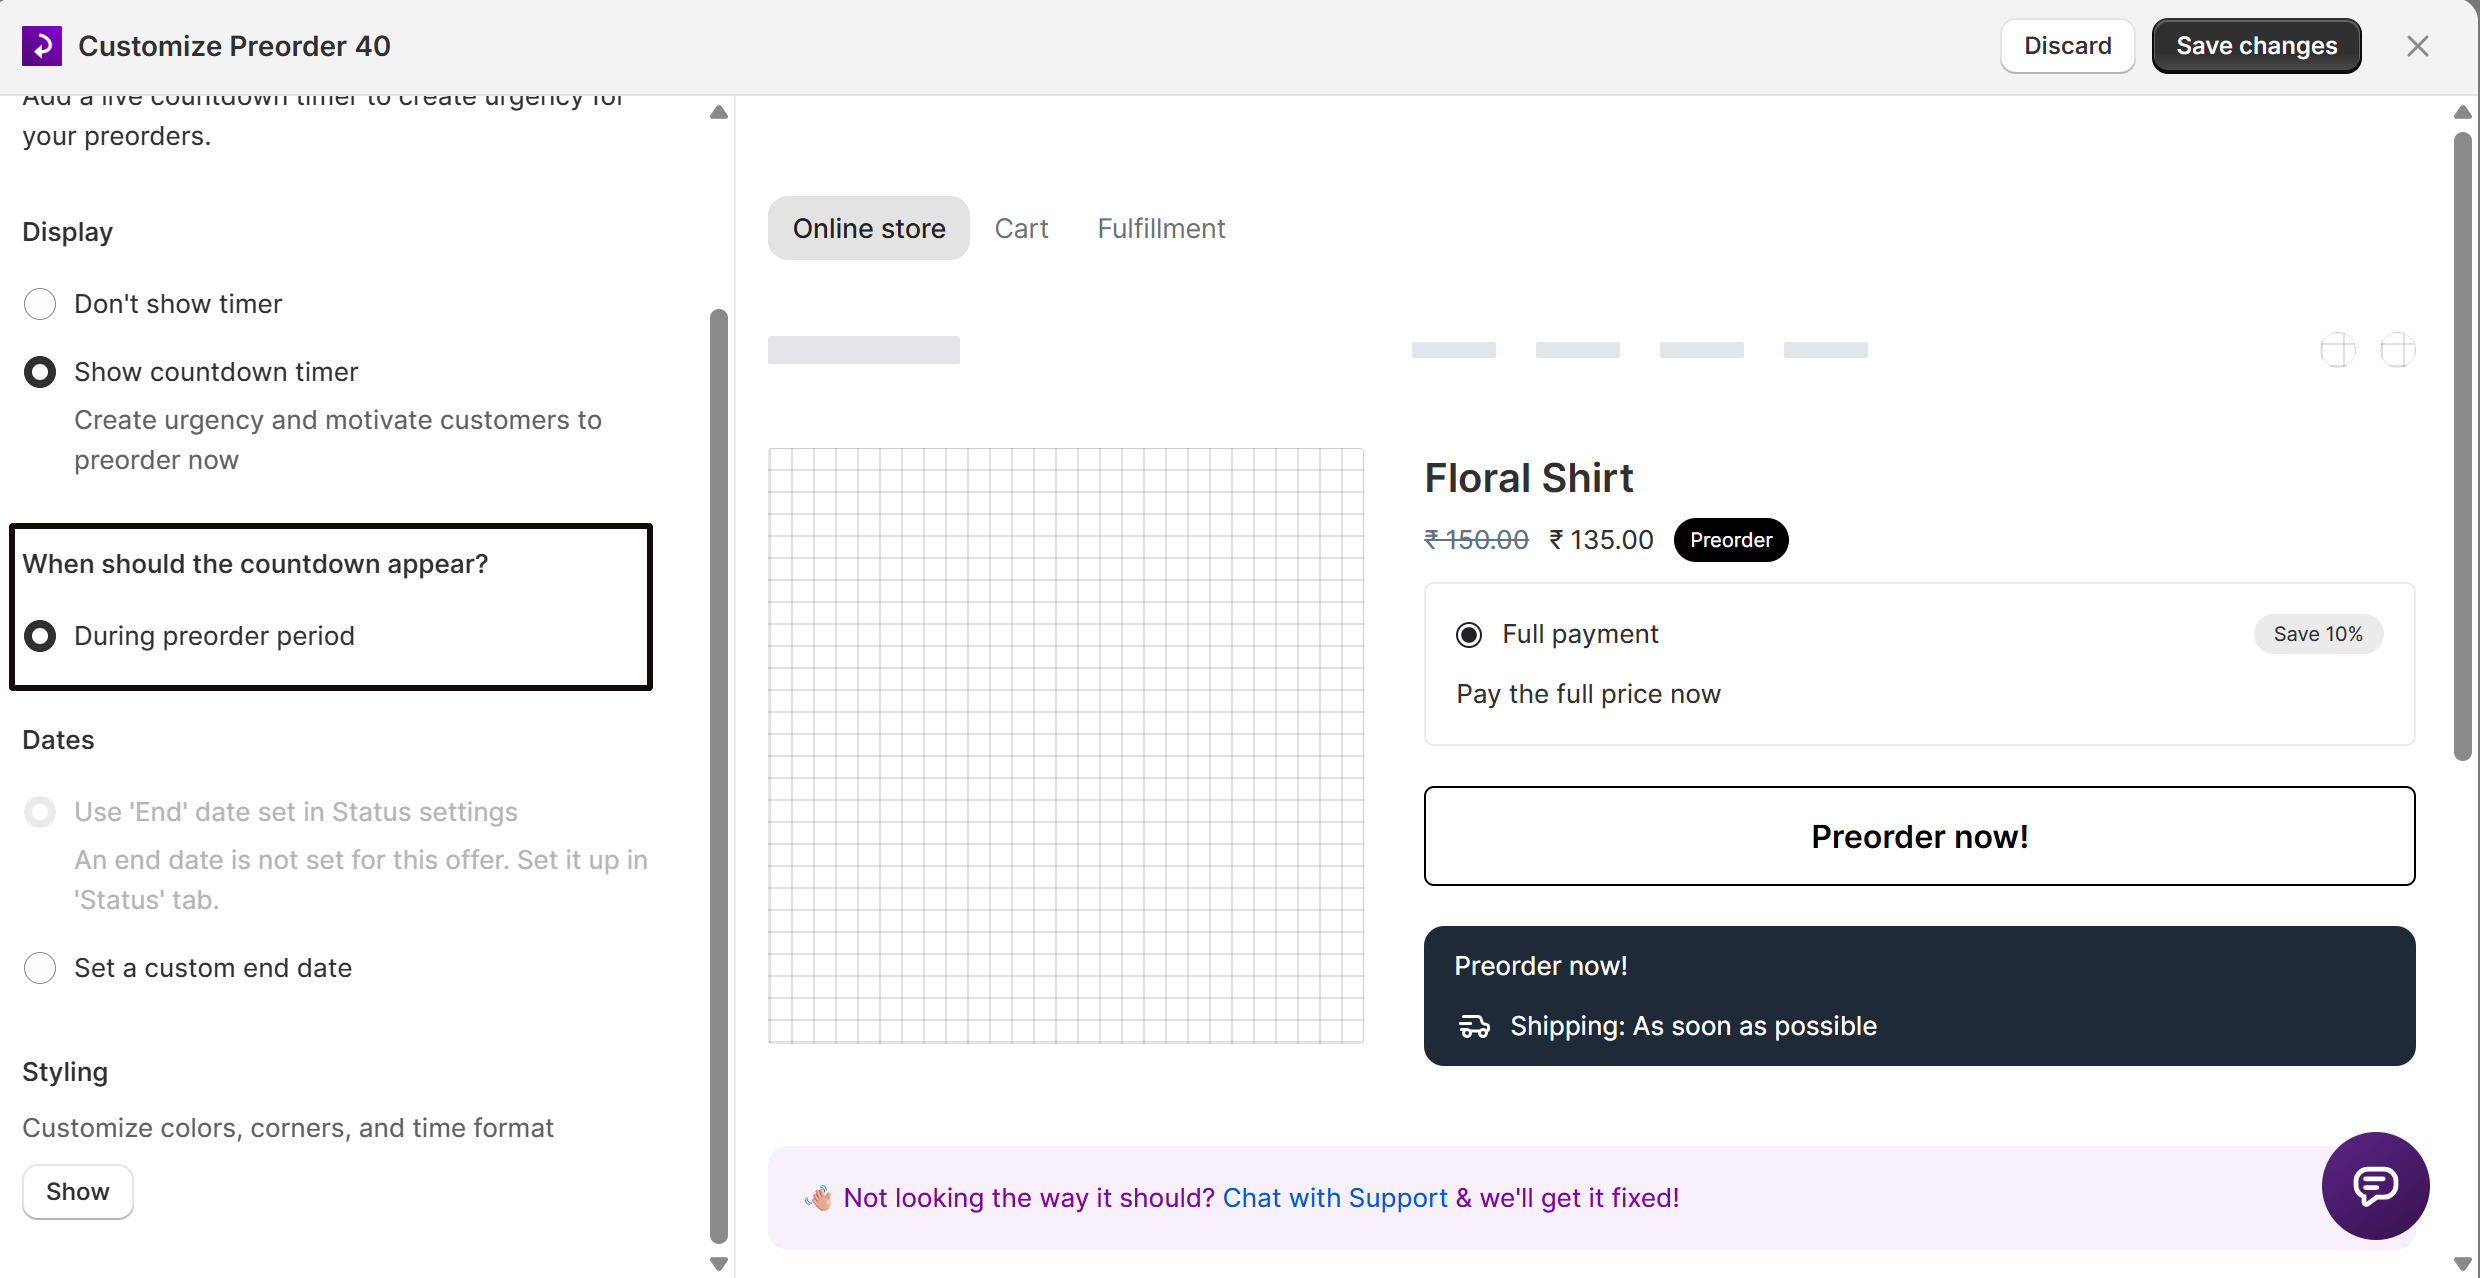
- During preorder period: counts down to the date the preorder closes. Shown when the offer is live, or has a scheduled end date.
- Countdown to launch and deadline: switches from the pre-launch countdown to the deadline countdown at the start date. Shown only when the offer has both a scheduled start date and end date.
See the FAQ below for guidance on which mode to pick.
What customers will see
When you use Before preorder opens or Countdown to launch and deadline mode on a scheduled offer, the storefront behaves differently before and after the start date.
Before the start date: the countdown timer shows, but the preorder button, badge, discounted price, and payment info do not, because the offer isn't enabled yet. The add-to-cart button falls back to your theme's default out-of-stock state, typically "Sold Out". The timer renders independently of the preorder button, so it's visible even though the button isn't active.
Shopify controls the "Sold Out" button and the locked product page, not STOQ, so STOQ can't change the button text or make the product purchasable before the offer's start date.
After the start date: STOQ activates the preorder widget, adding the button text, badge, discounted price, and payment description, and, if you also configured During preorder period mode, switches the countdown to count down to the end date.
Set it up
On a phone, this menu is collapsed. In the Shopify mobile app, tap the STOQ logo at the top of the screen to open it, then choose the section named below. There is no hamburger icon. See Finding the STOQ menu.
Open the offer editor
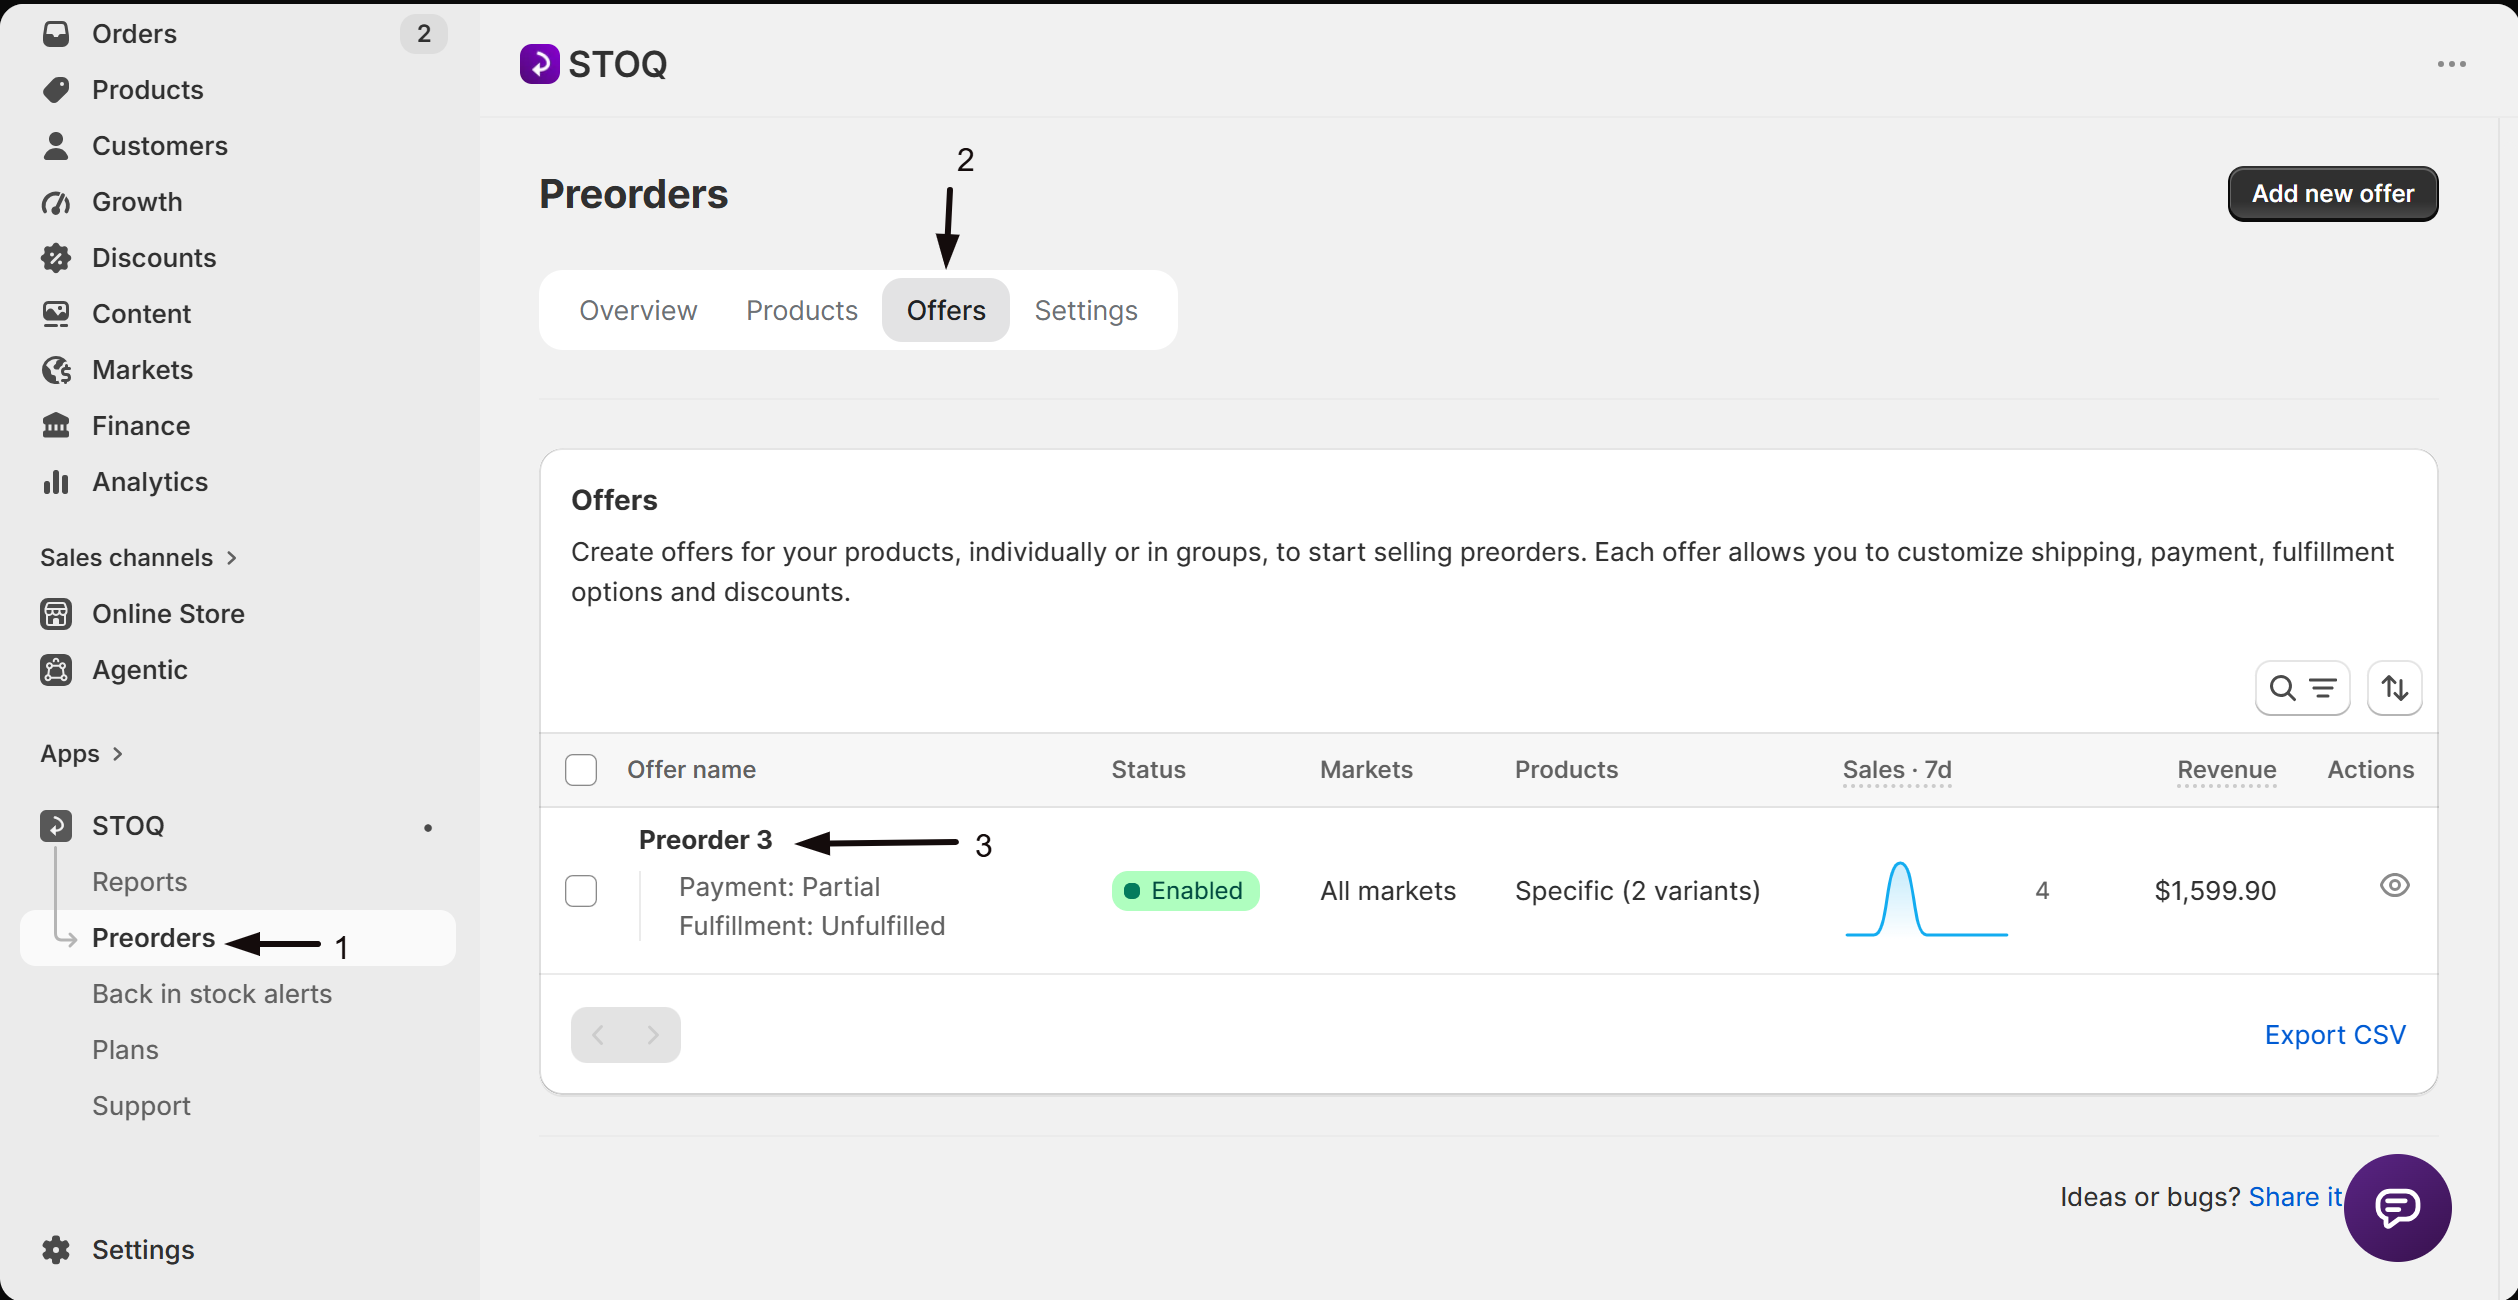
- In the left menu bar of the STOQ app, click Preorders.
- Click the Offers tab.
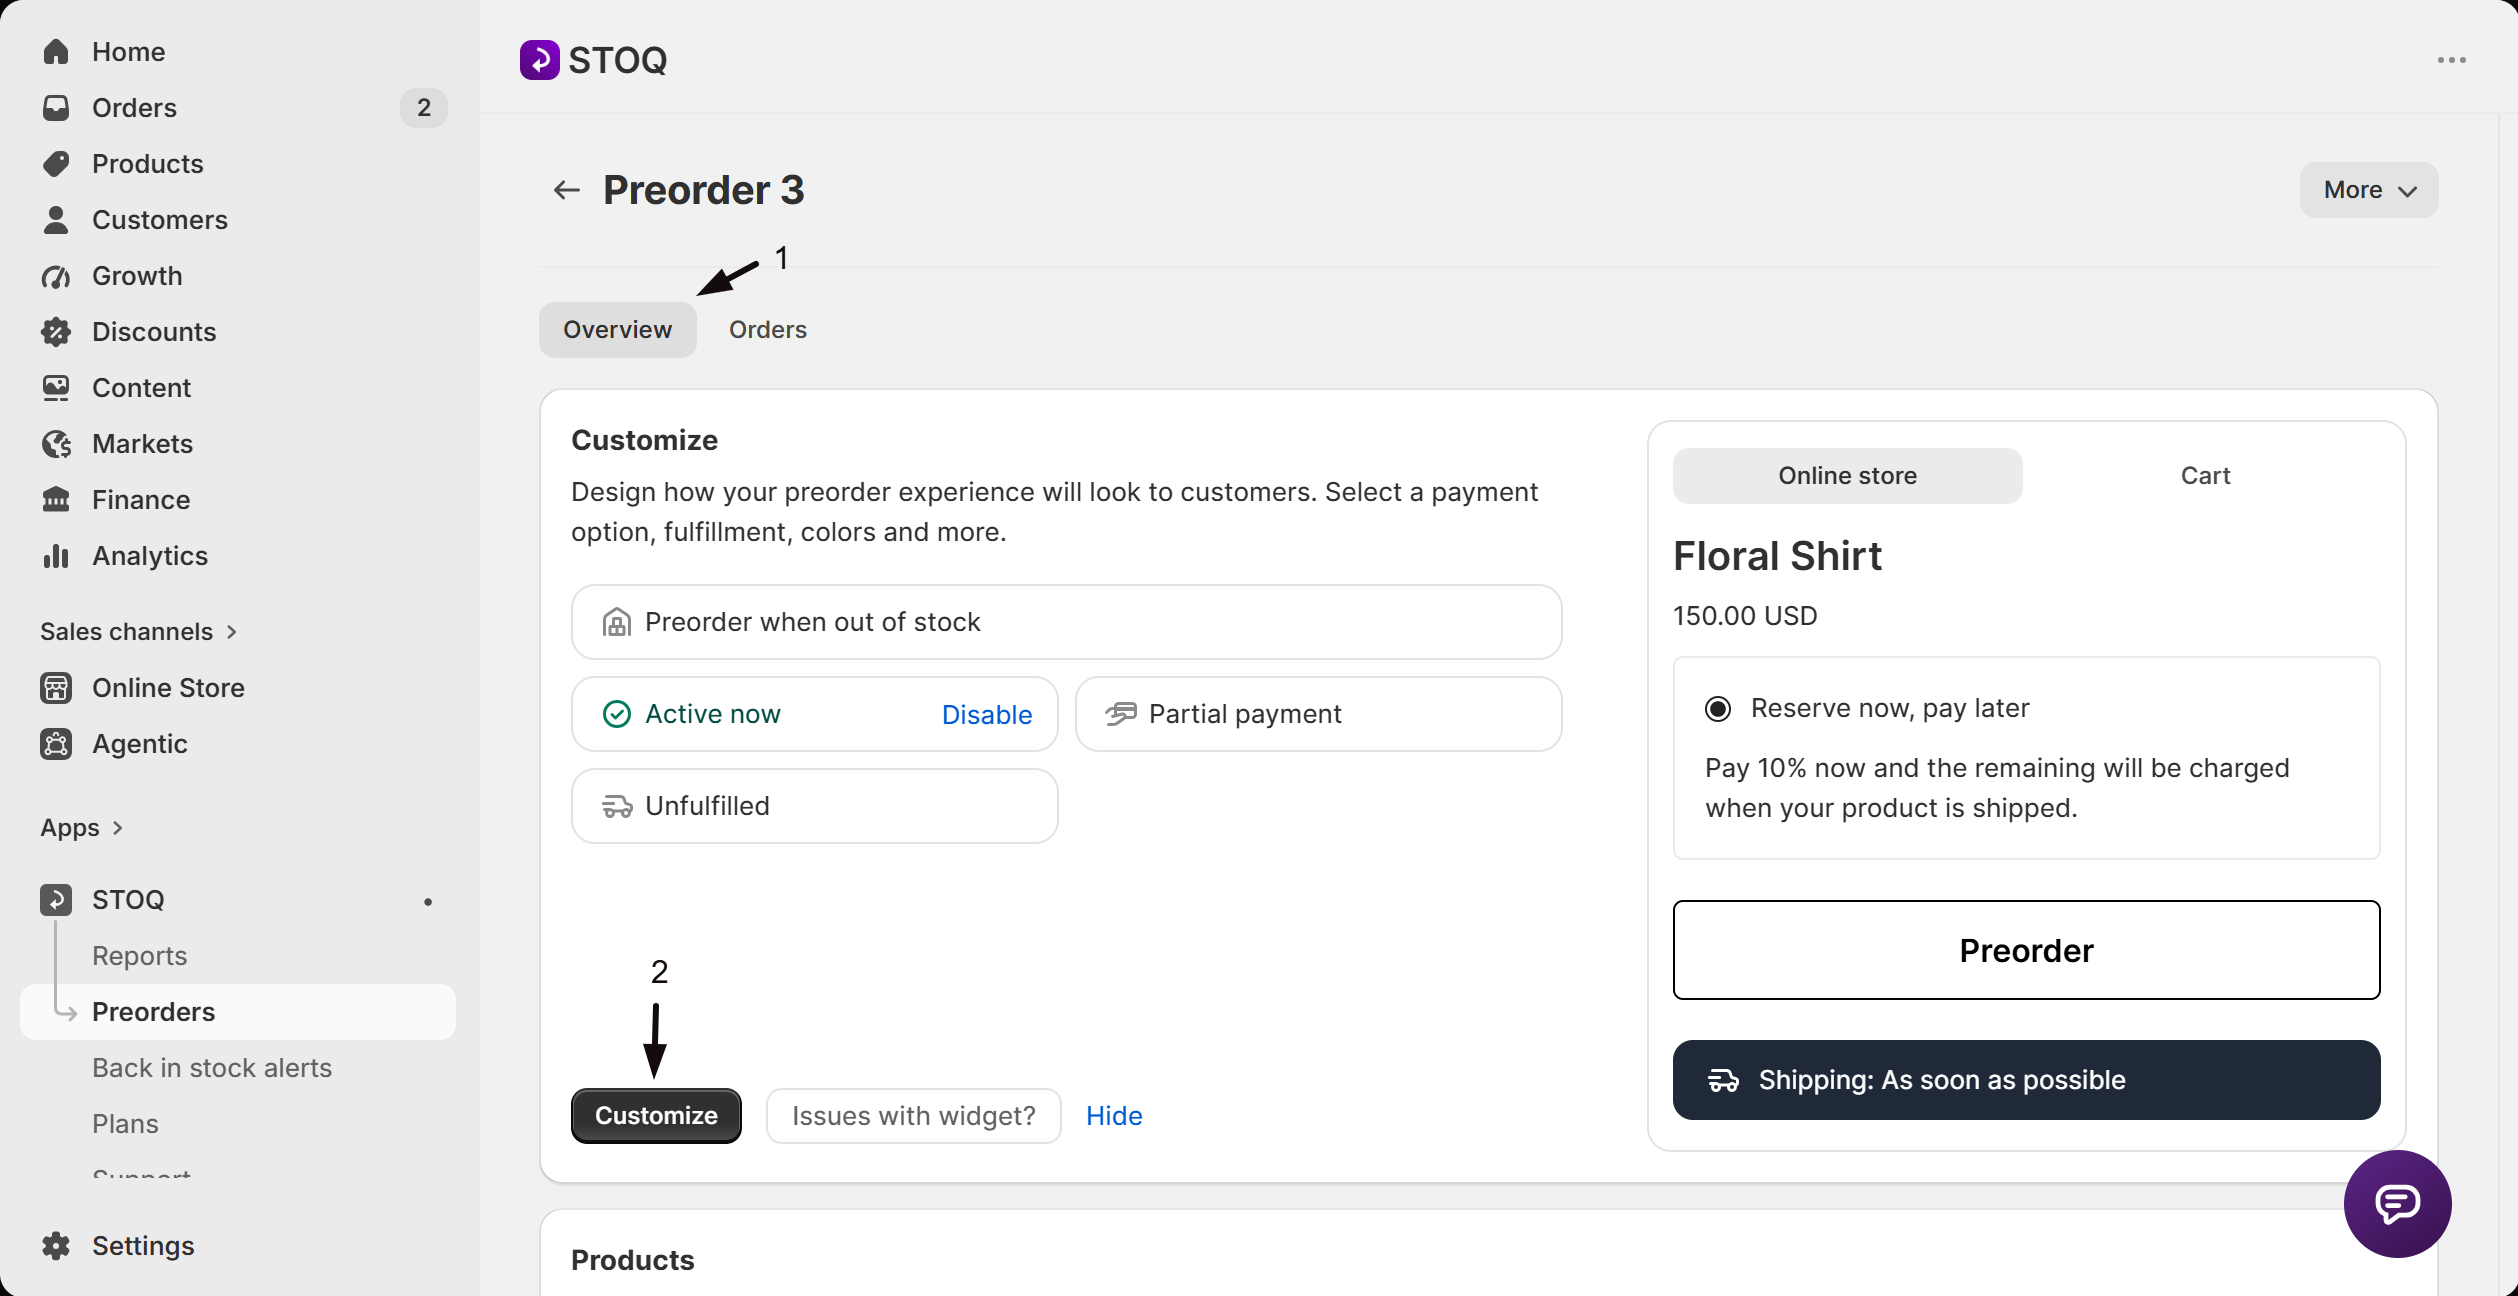
- Click the offer you'd like to edit. Its Overview tab opens, showing the Customize button, a live preview, and the offer's Products section.
- Click the Customize button to open the editor.
Open the Countdown timer section
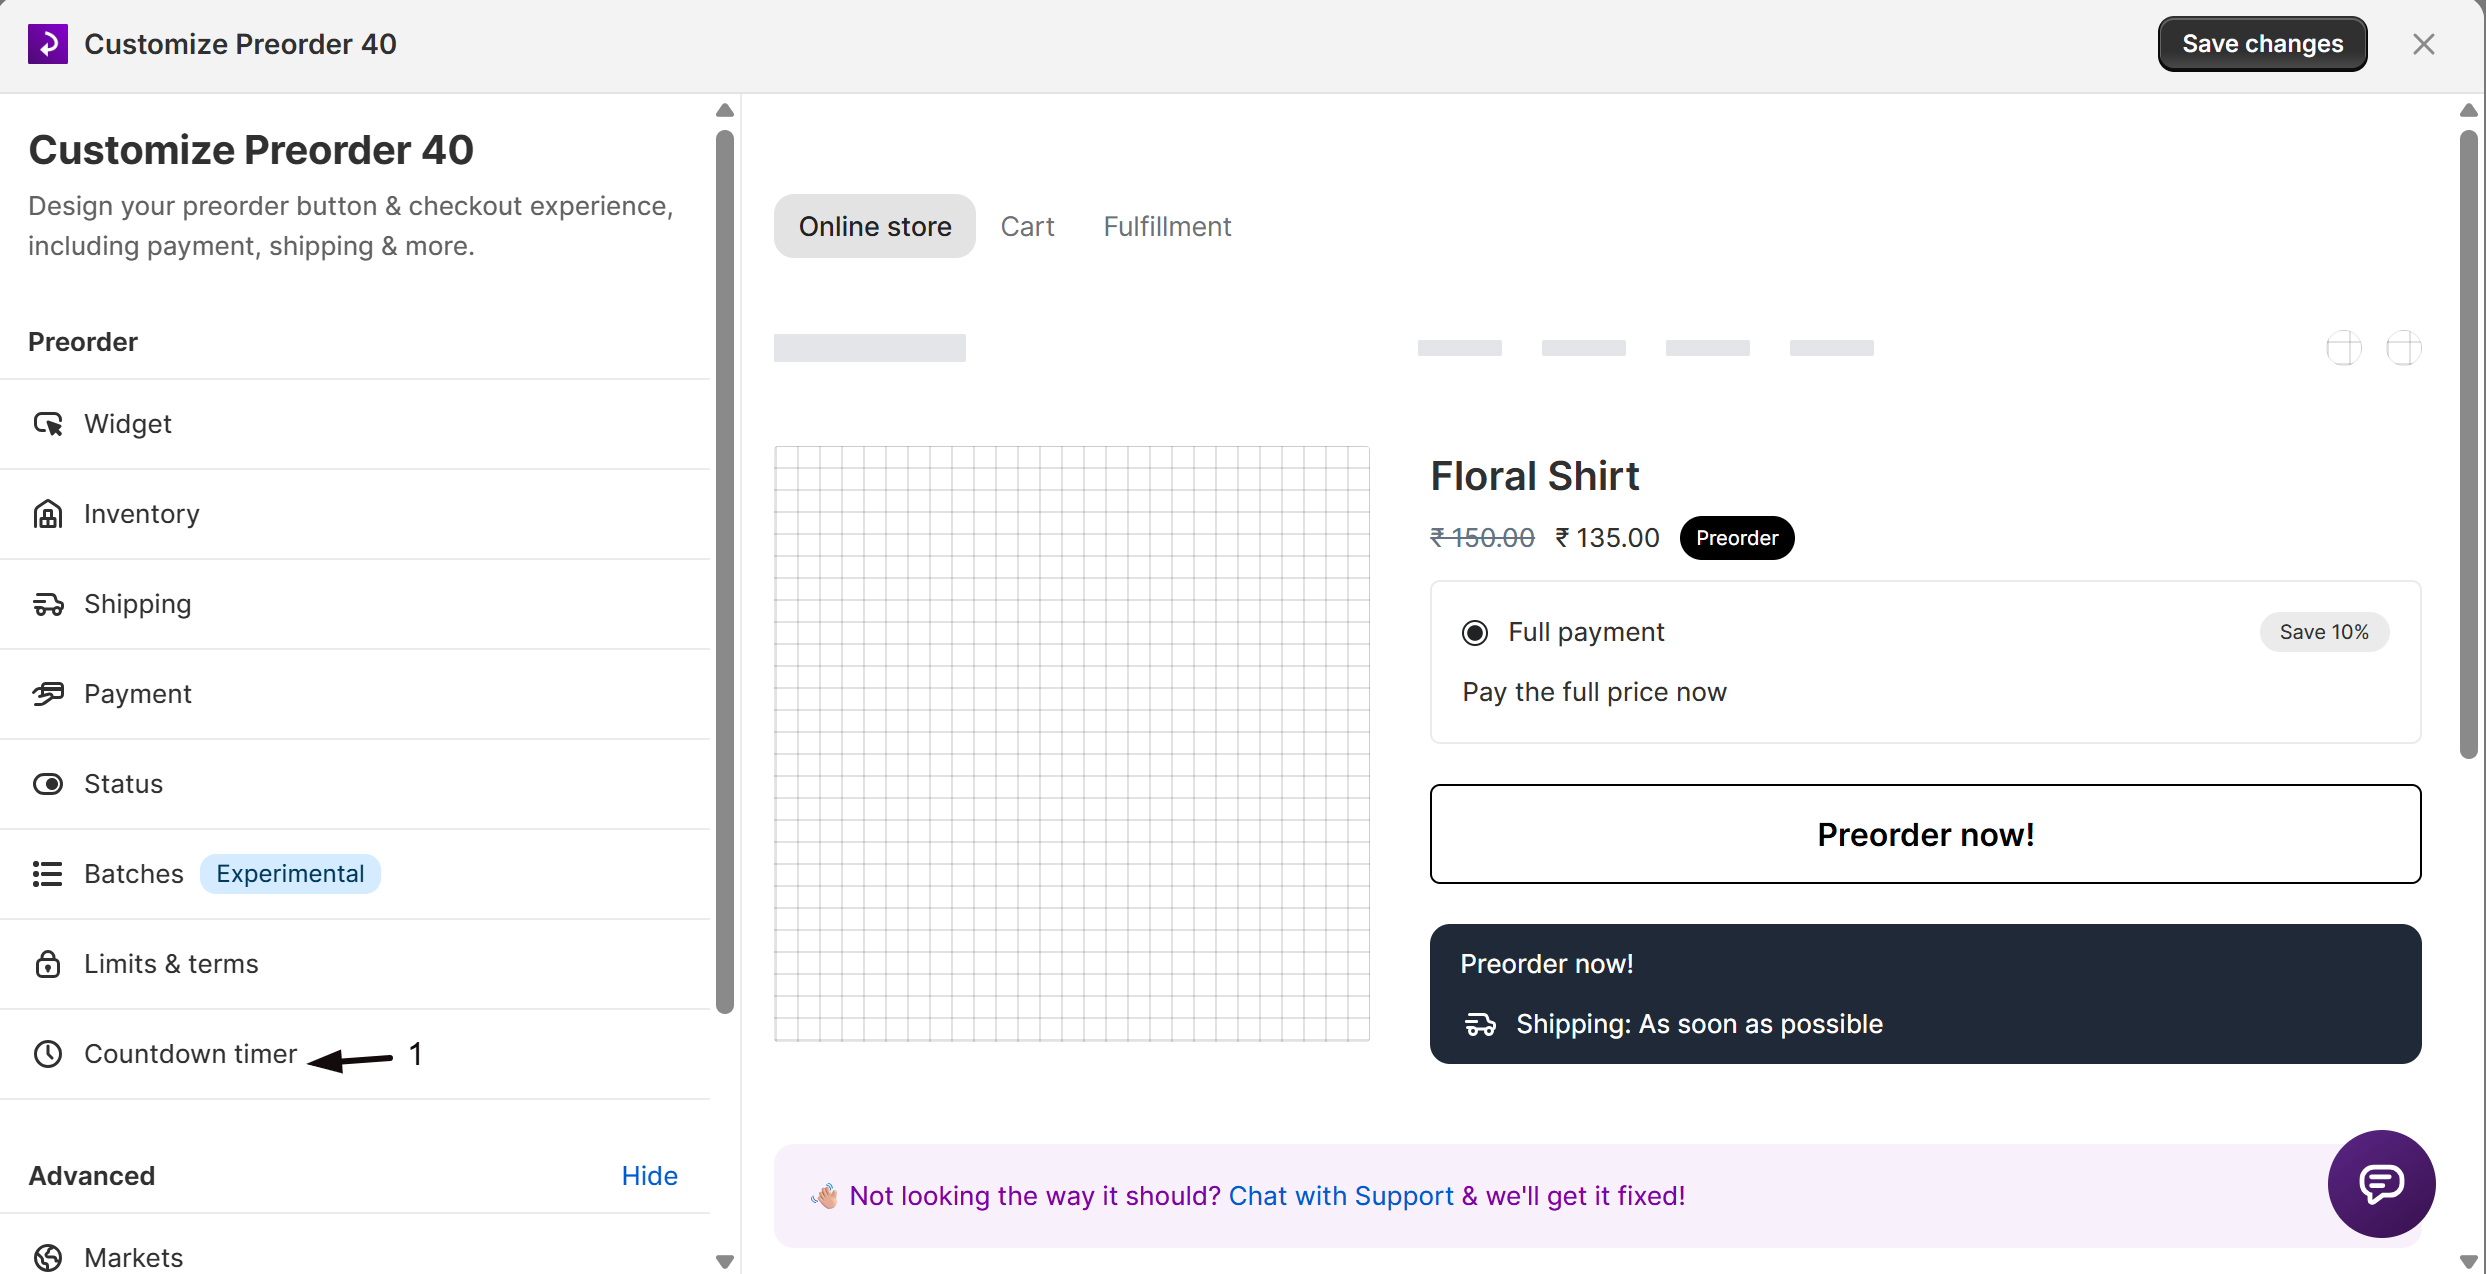
In the editor sidebar, click Countdown timer.
Enable the timer
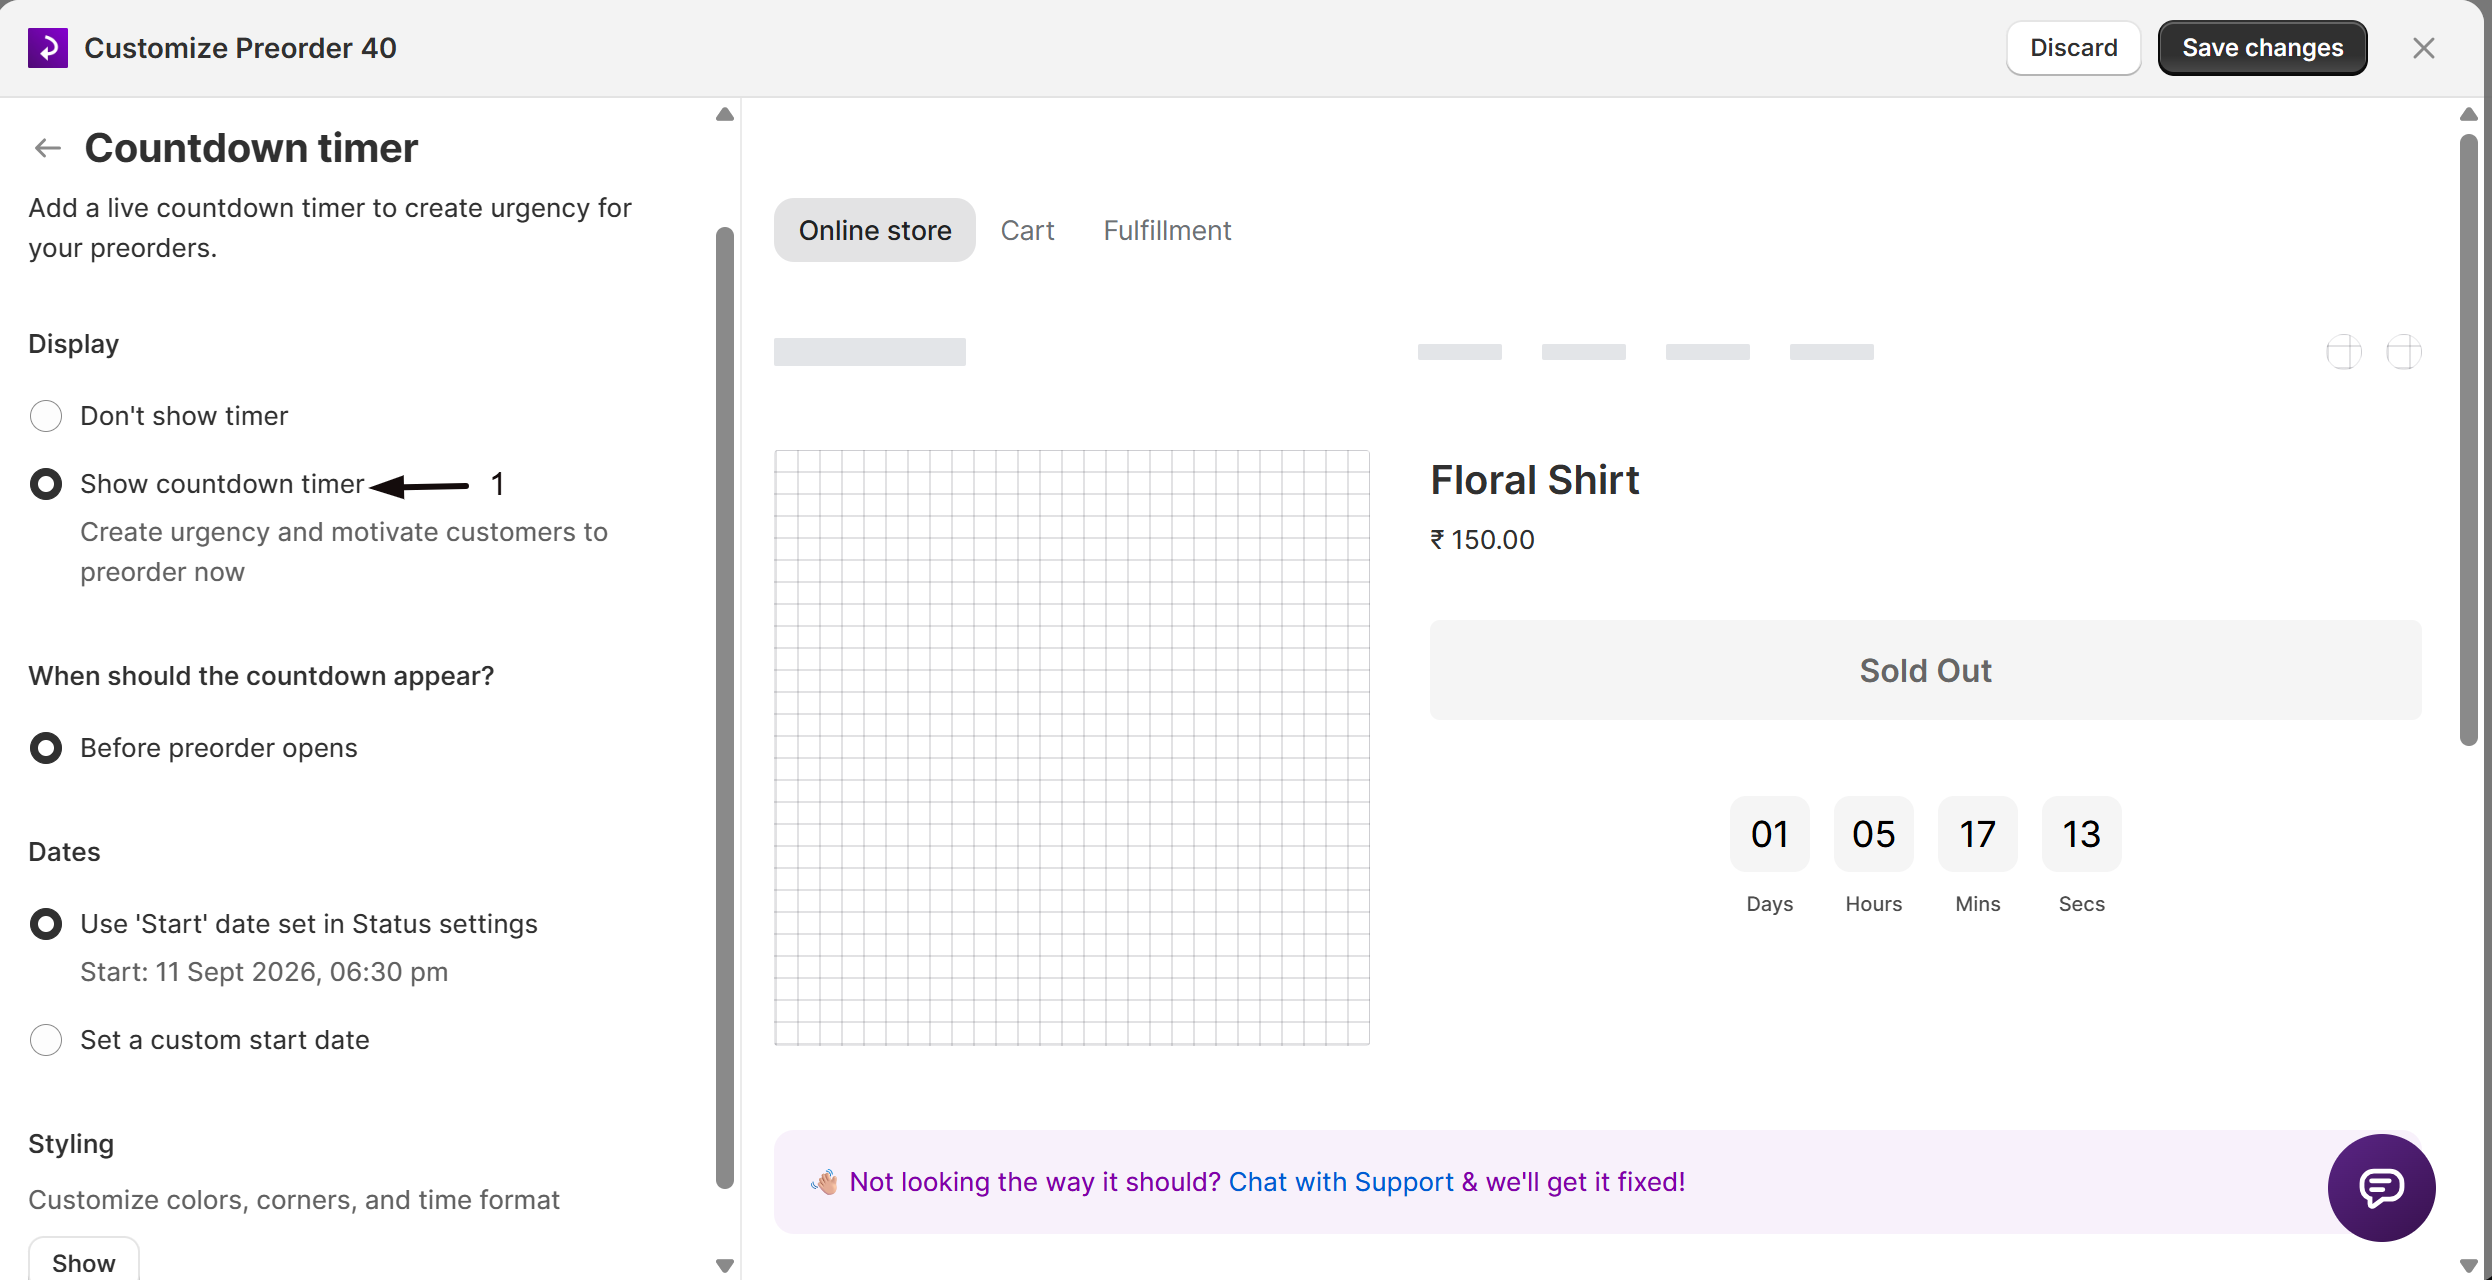
Under Display, select Show countdown timer. The option is grayed out on the free plan: click the upgrade badge to upgrade.
Choose when the countdown appears
Once enabled, a When should the countdown appear? section appears. Select the mode you want; see Choose your setup above for what each mode does. STOQ only shows the modes that apply to the offer's current schedule.
Set the timer dates
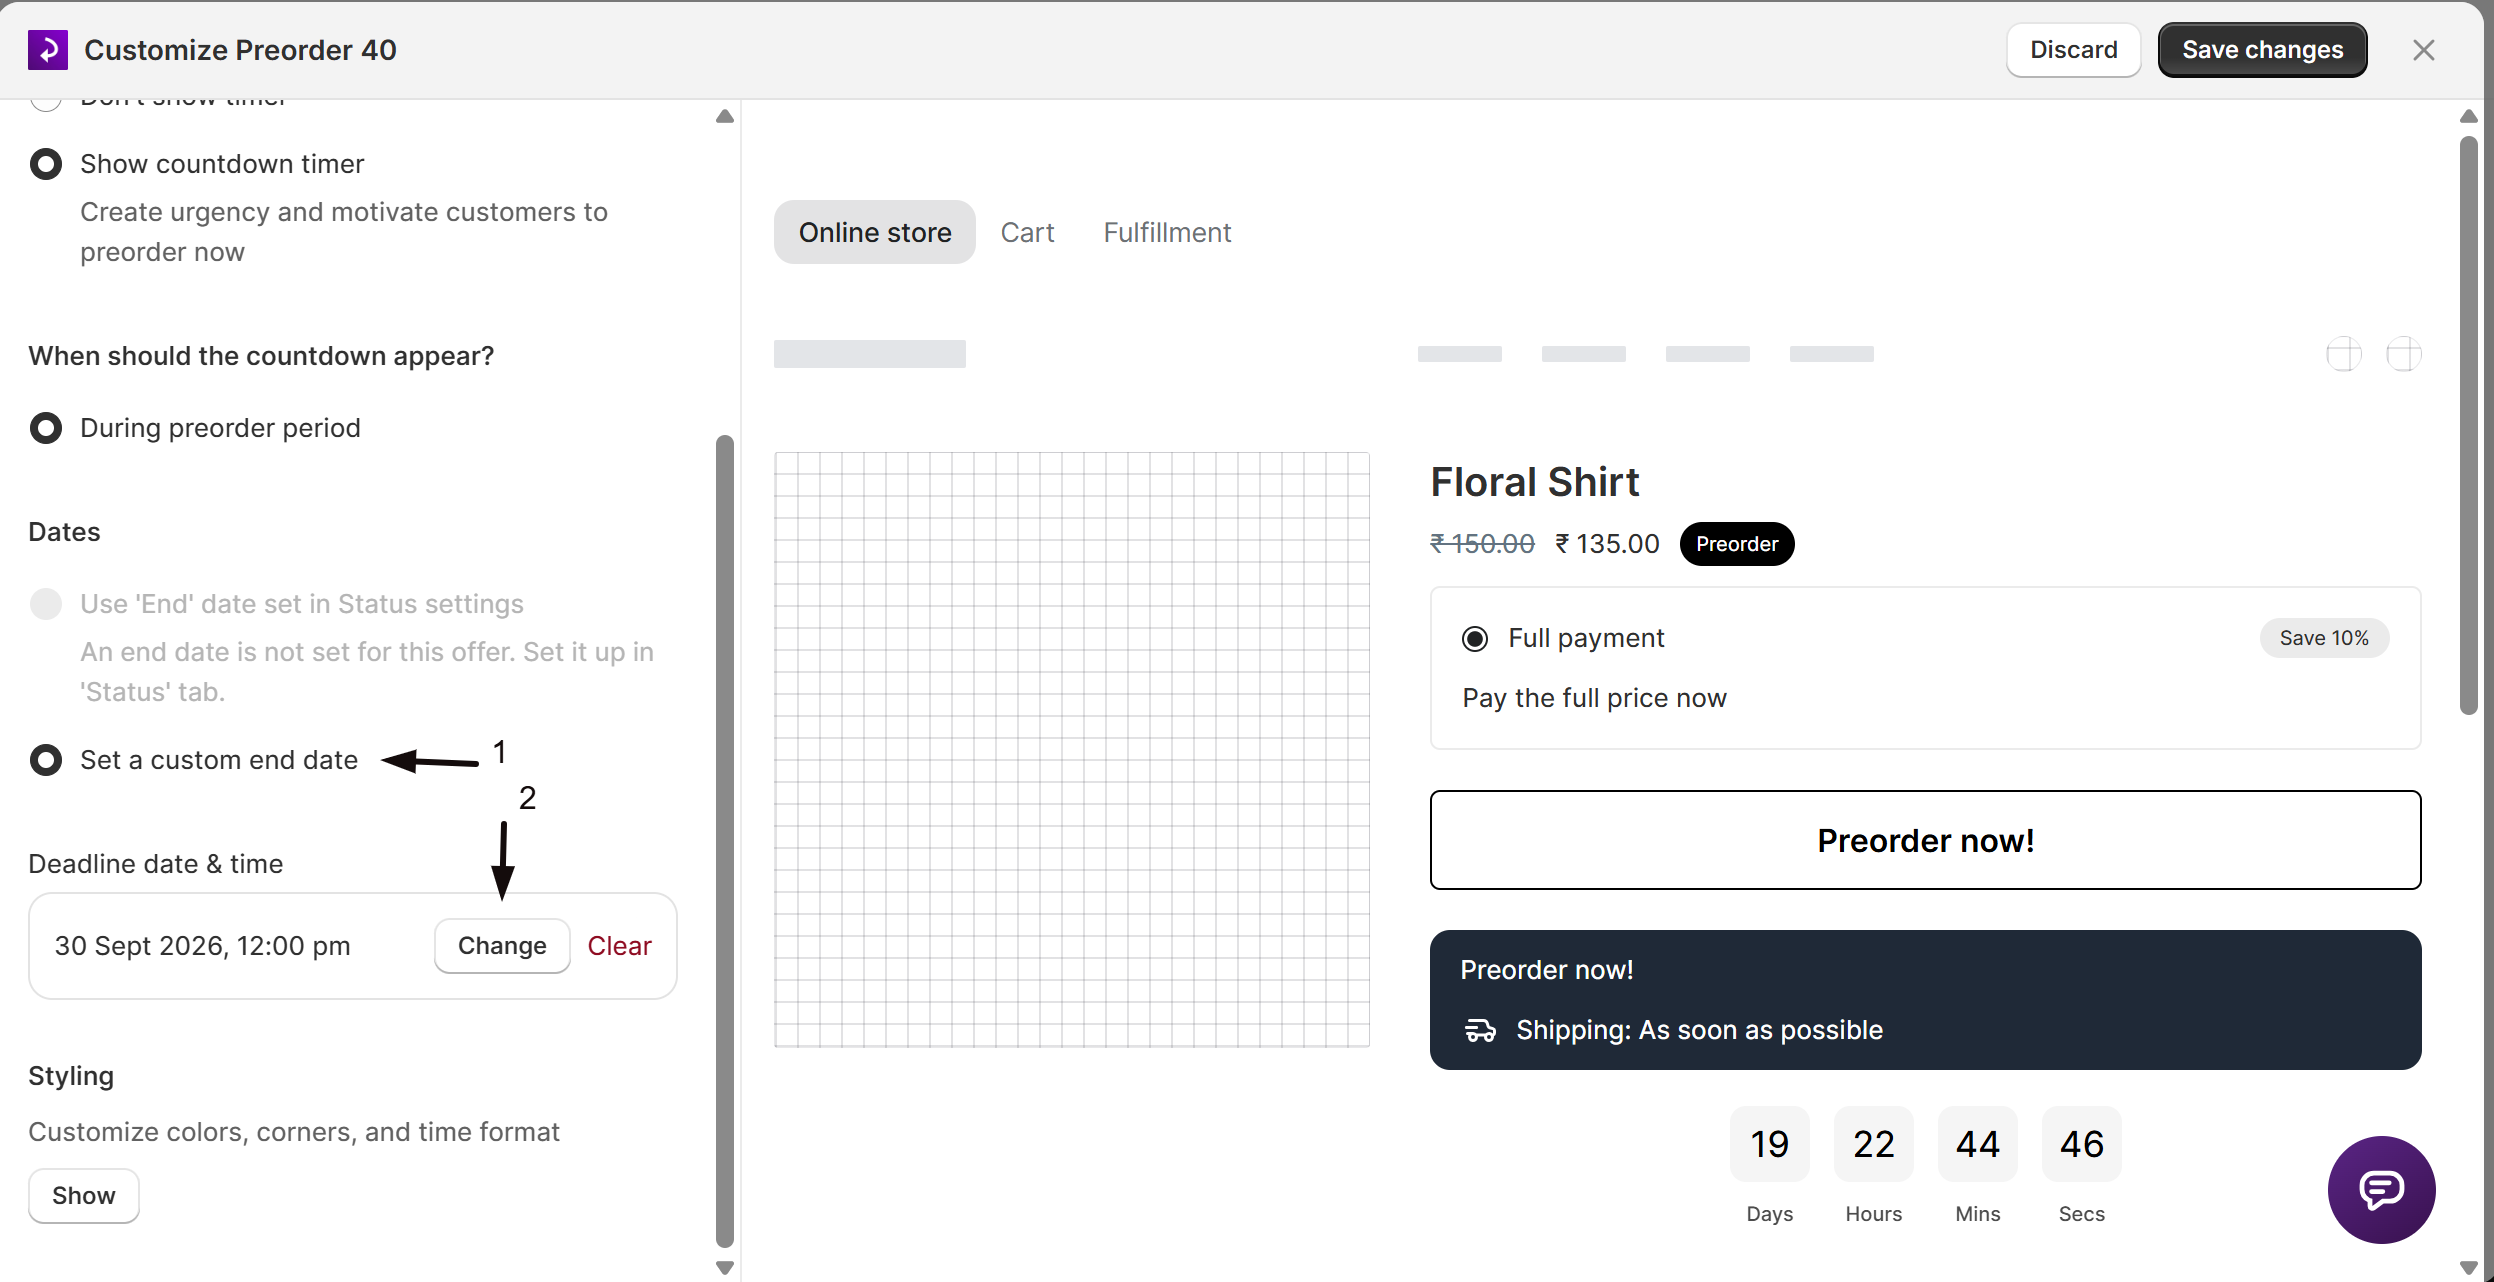
For Before preorder opens and During preorder period modes, choose a date source:
- For Before preorder opens:
- Use 'Start' date set in Status settings: syncs to the start date you set in the offer's Status section. Disabled if no start date is set there.
- Set a custom start date: opens a date and time picker, in 30-minute increments, independent of the offer schedule.
- For During preorder period:
- Use 'End' date set in Status settings: syncs to the end date you set in the offer's Status section. Disabled if no end date is set there.
- Set a custom end date: opens a date and time picker, in 30-minute increments, independent of the offer schedule.
For Countdown to launch and deadline mode, dates are always pulled from the offer schedule automatically. A banner shows the start and end dates in use; click Edit dates in Status tab to change them.
(Optional) Customize the styling
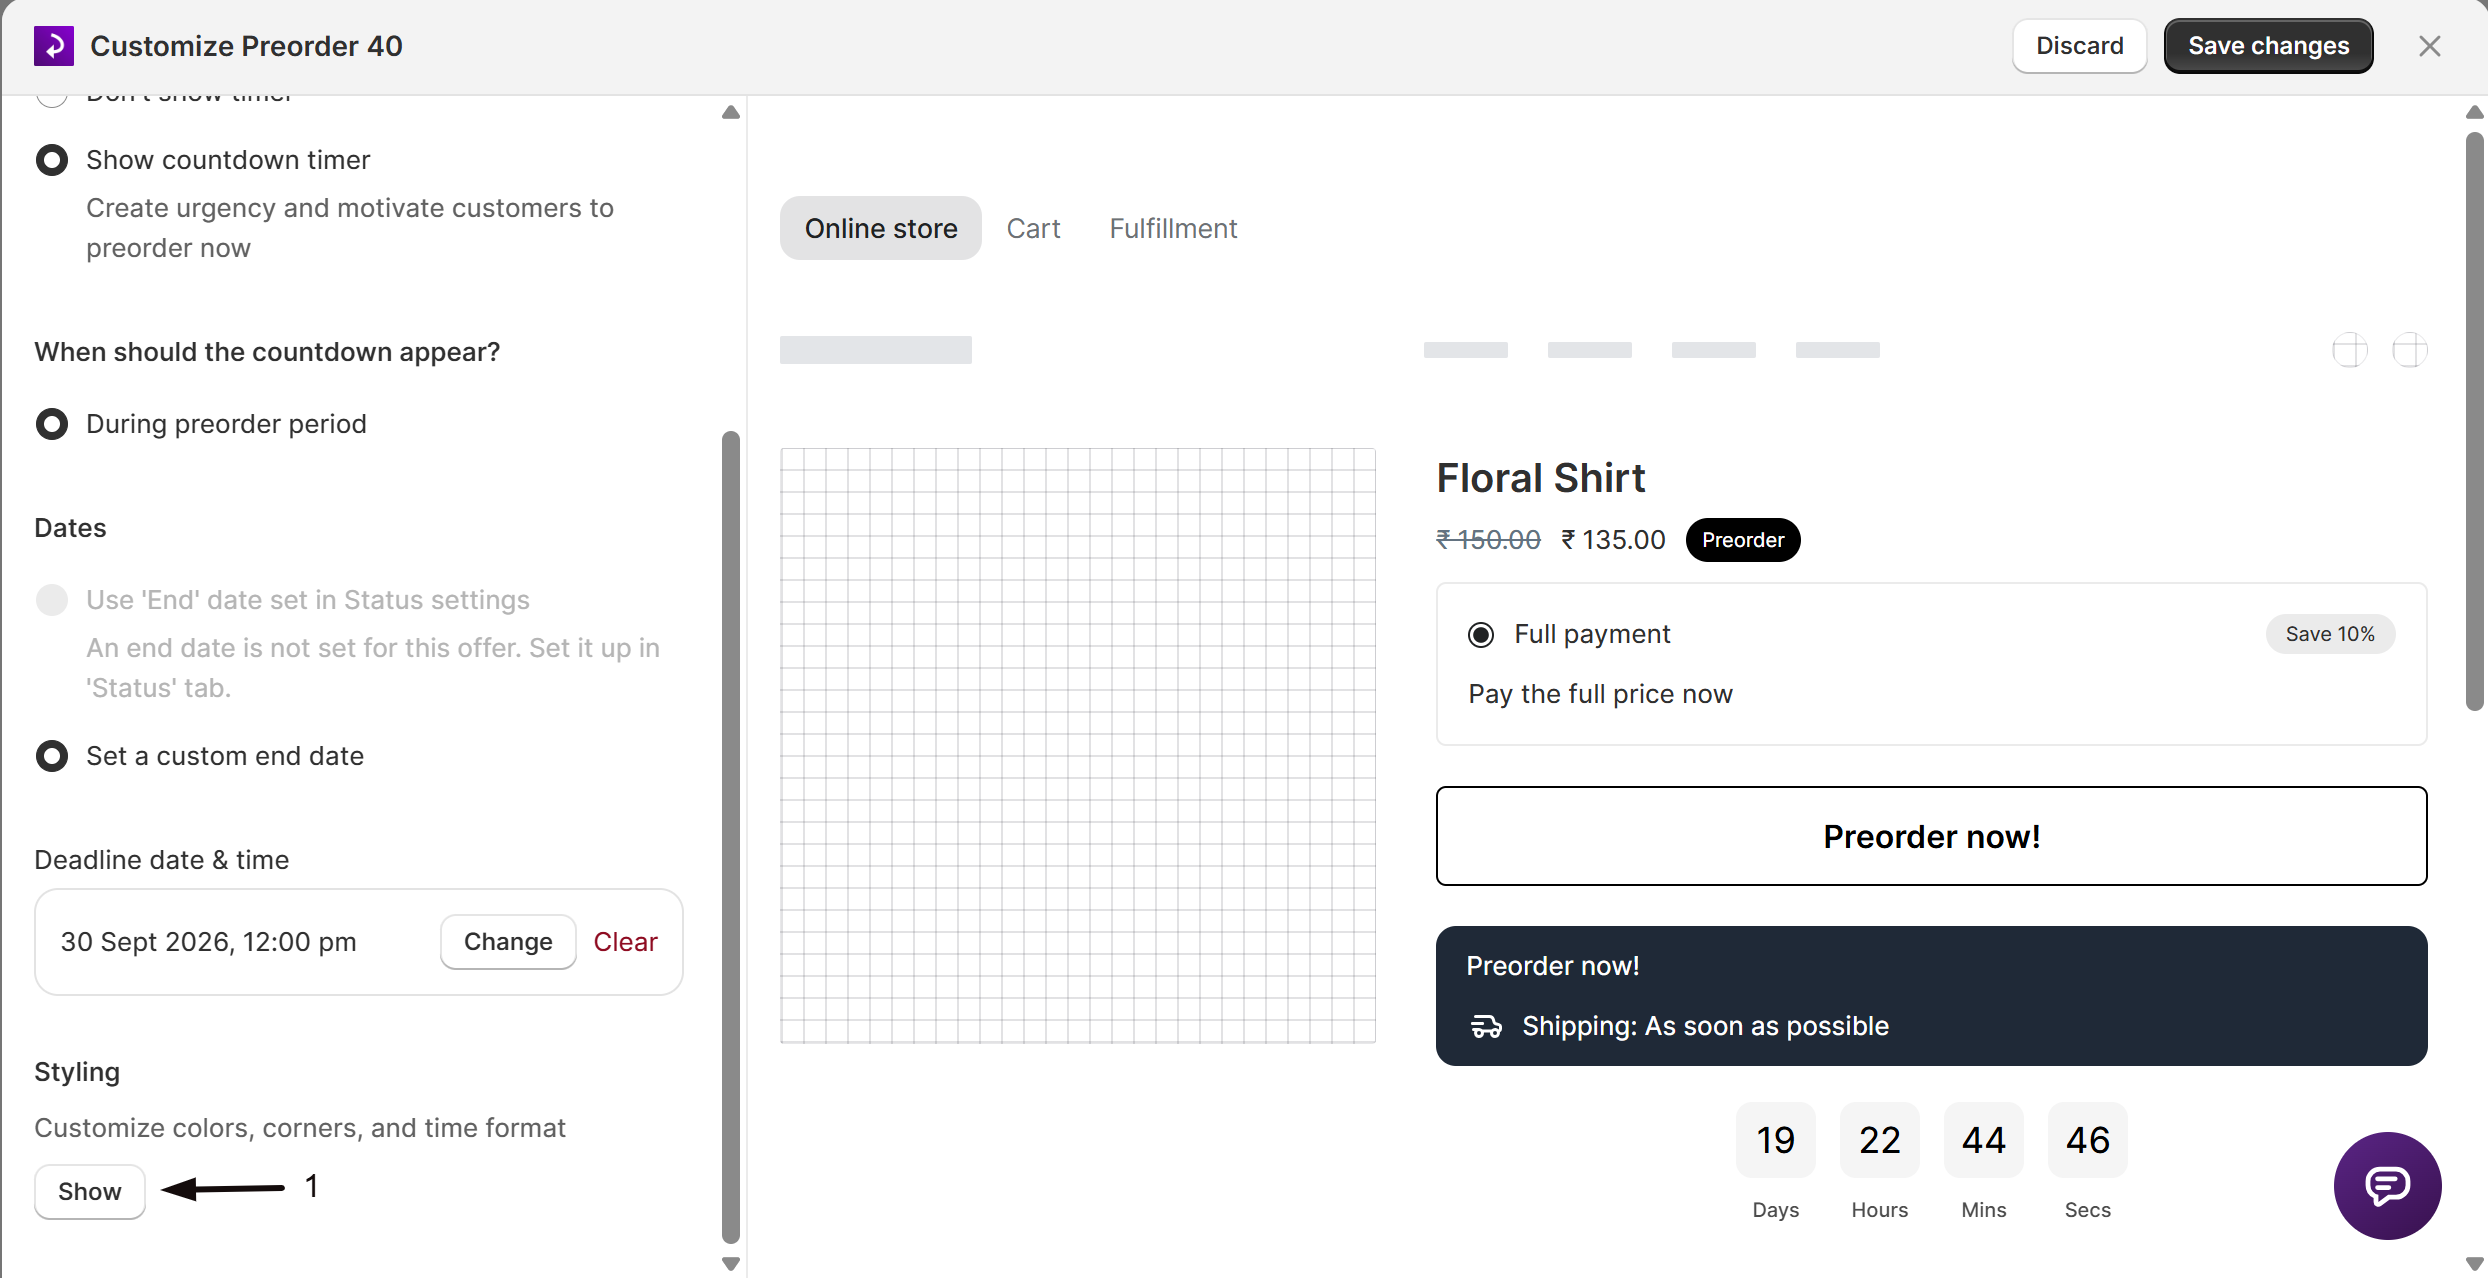
Under Styling, click Show to expand the styling options:
- Heading - before launch: text shown above the timer before the offer opens (placeholder: "Preorder starts in"). Only shown for Before preorder opens and Countdown to launch and deadline modes.
- Heading - during preorder: text shown above the timer while the offer is active (placeholder: "Preorder ends in"). Only shown for During preorder period and Countdown to launch and deadline modes.
- Text color and Background color: click the color swatch to open a color picker.
- Corners: border radius in pixels (0-50 px; default 8 px).
- Time units to display: check or uncheck Days, Hours, Minutes, Seconds (default: all four).
- Unit labels: customize the label under each unit (defaults: Days, Hours, Mins, Secs). These labels are translatable, see Multi-language preorders.
Save changes
Click Save changes in the top right of the offer editor. The timer appears on the product page for this offer immediately. Preview the storefront to confirm.
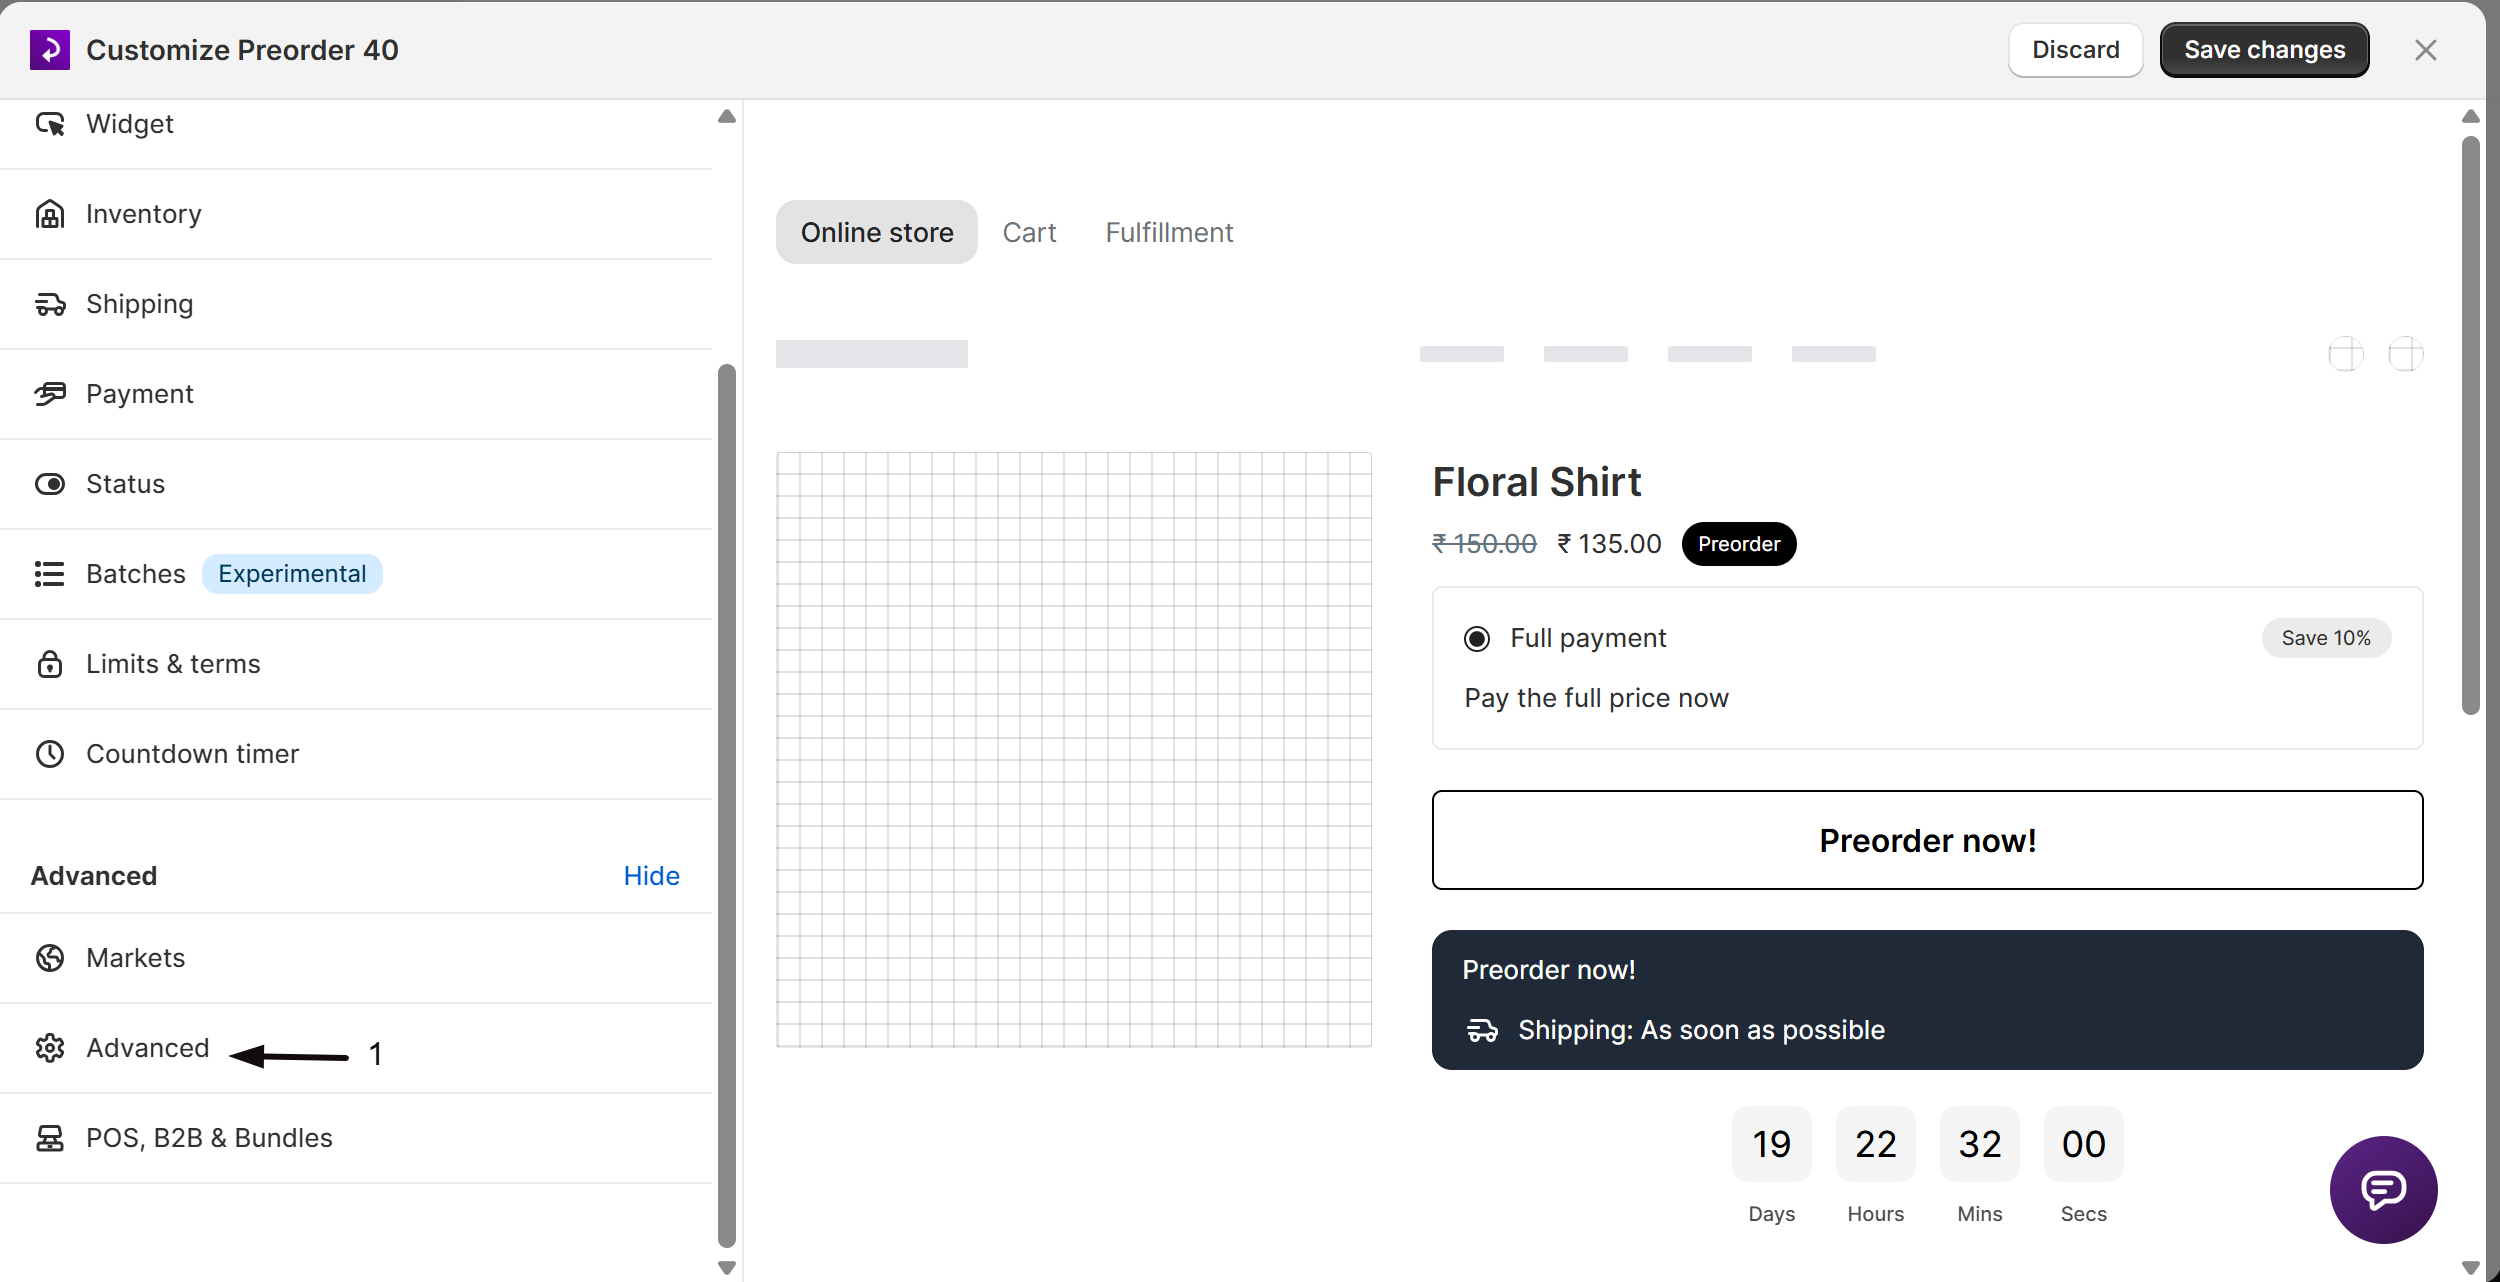
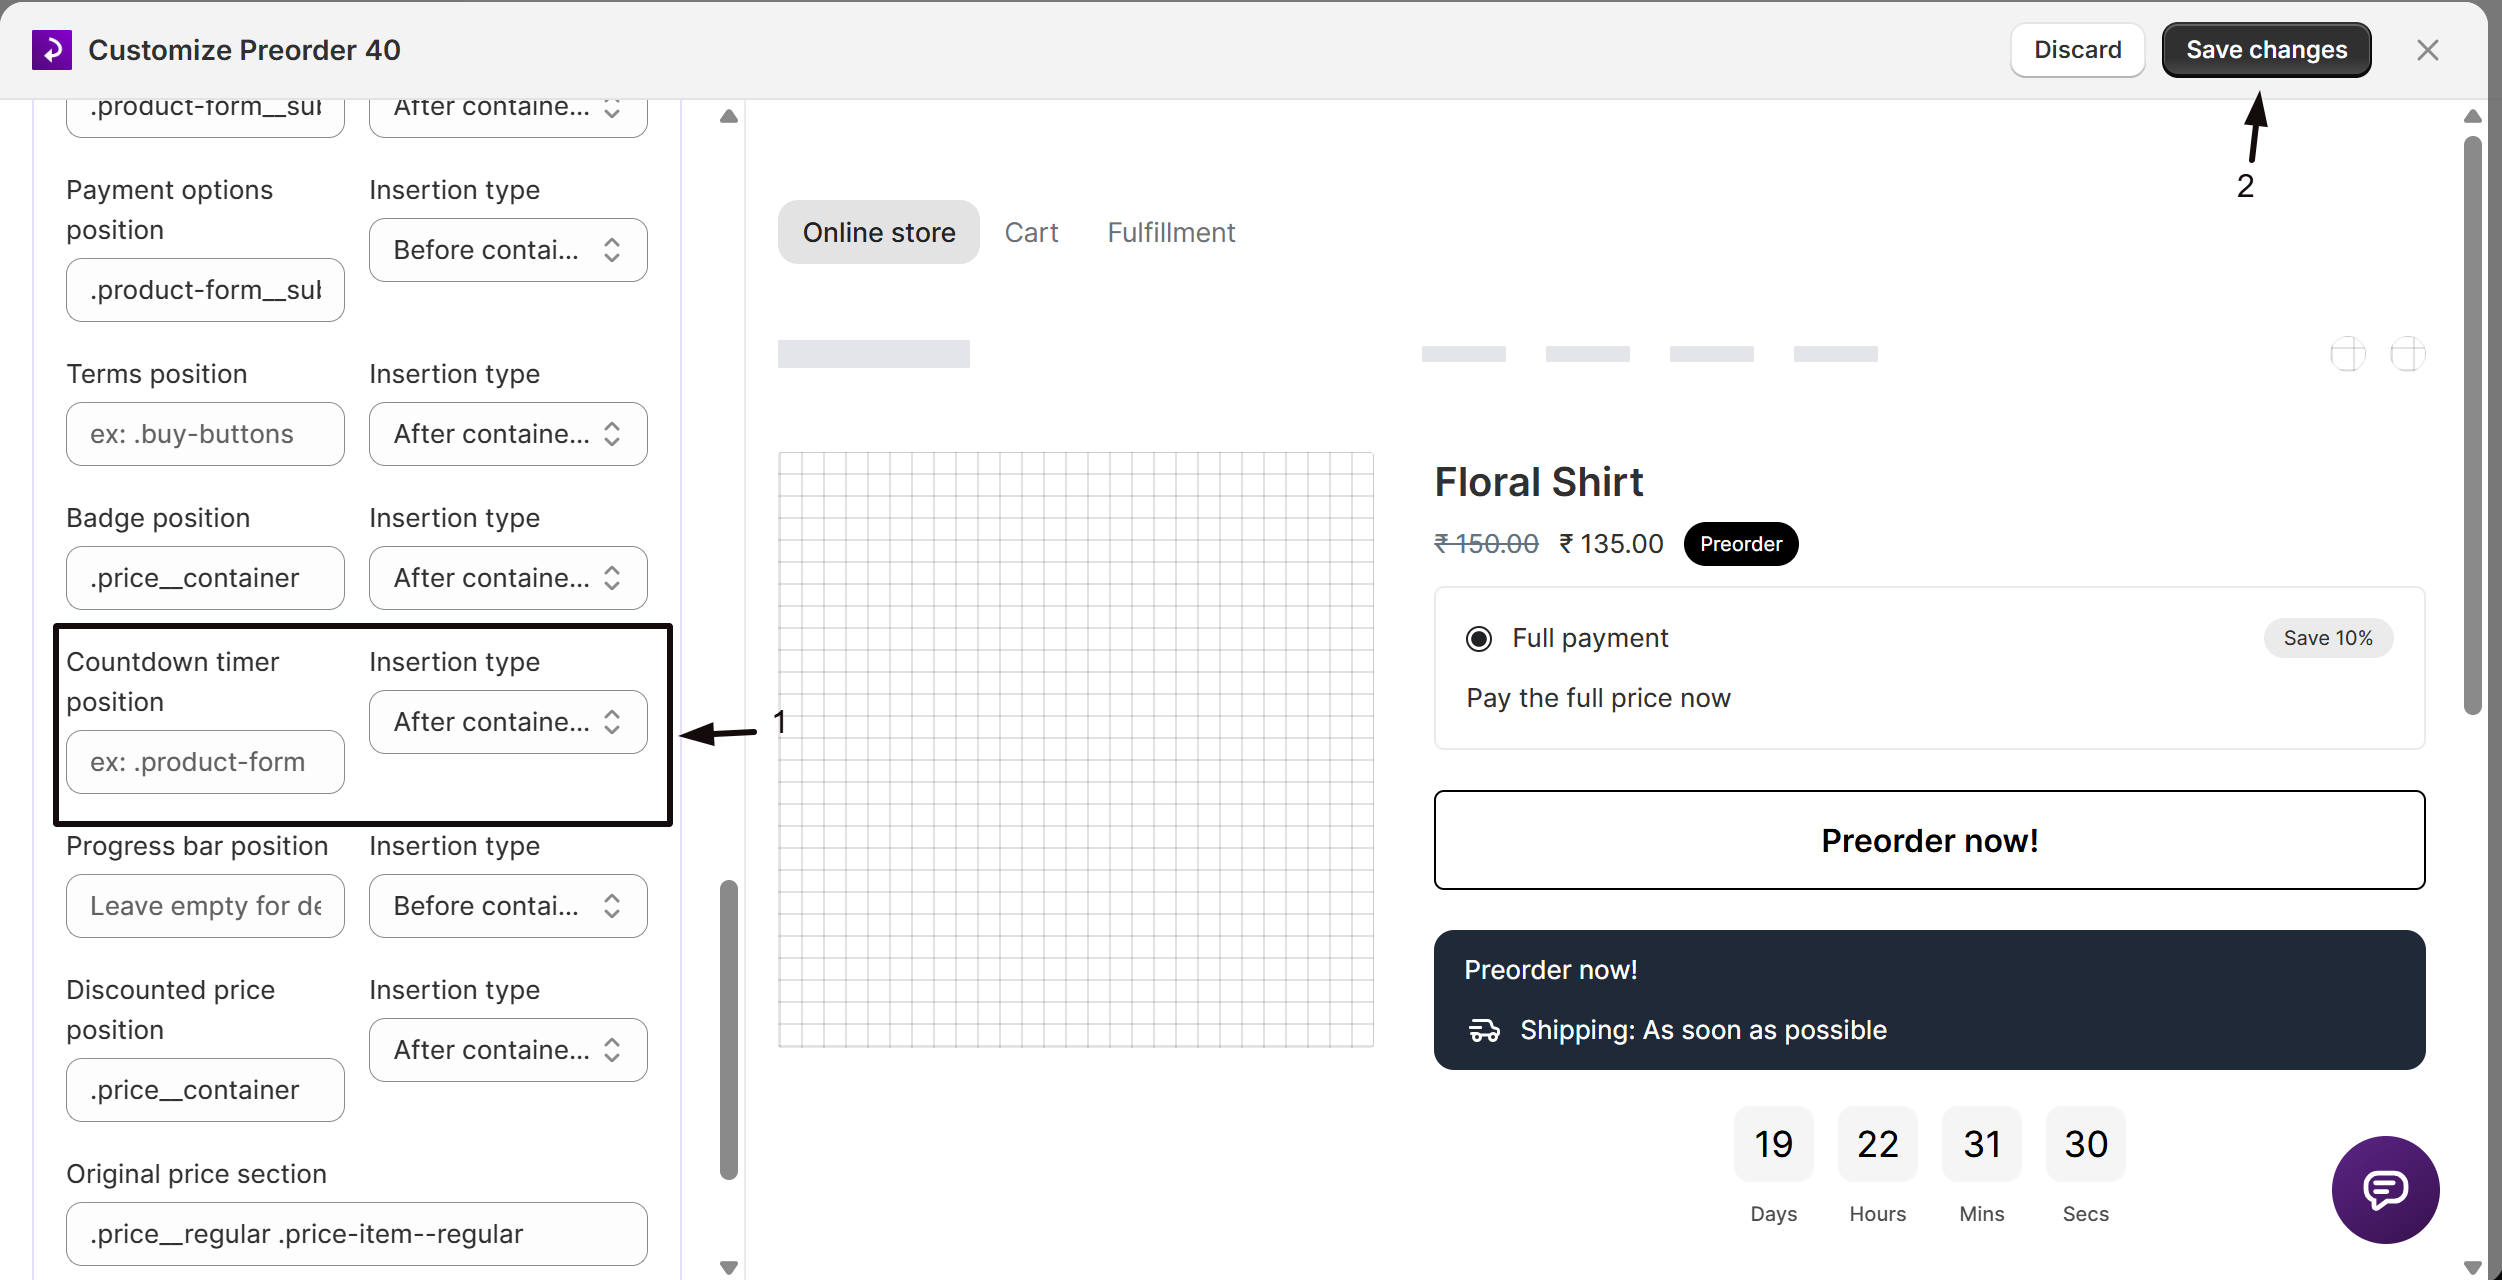
Change the timer's placement (advanced)
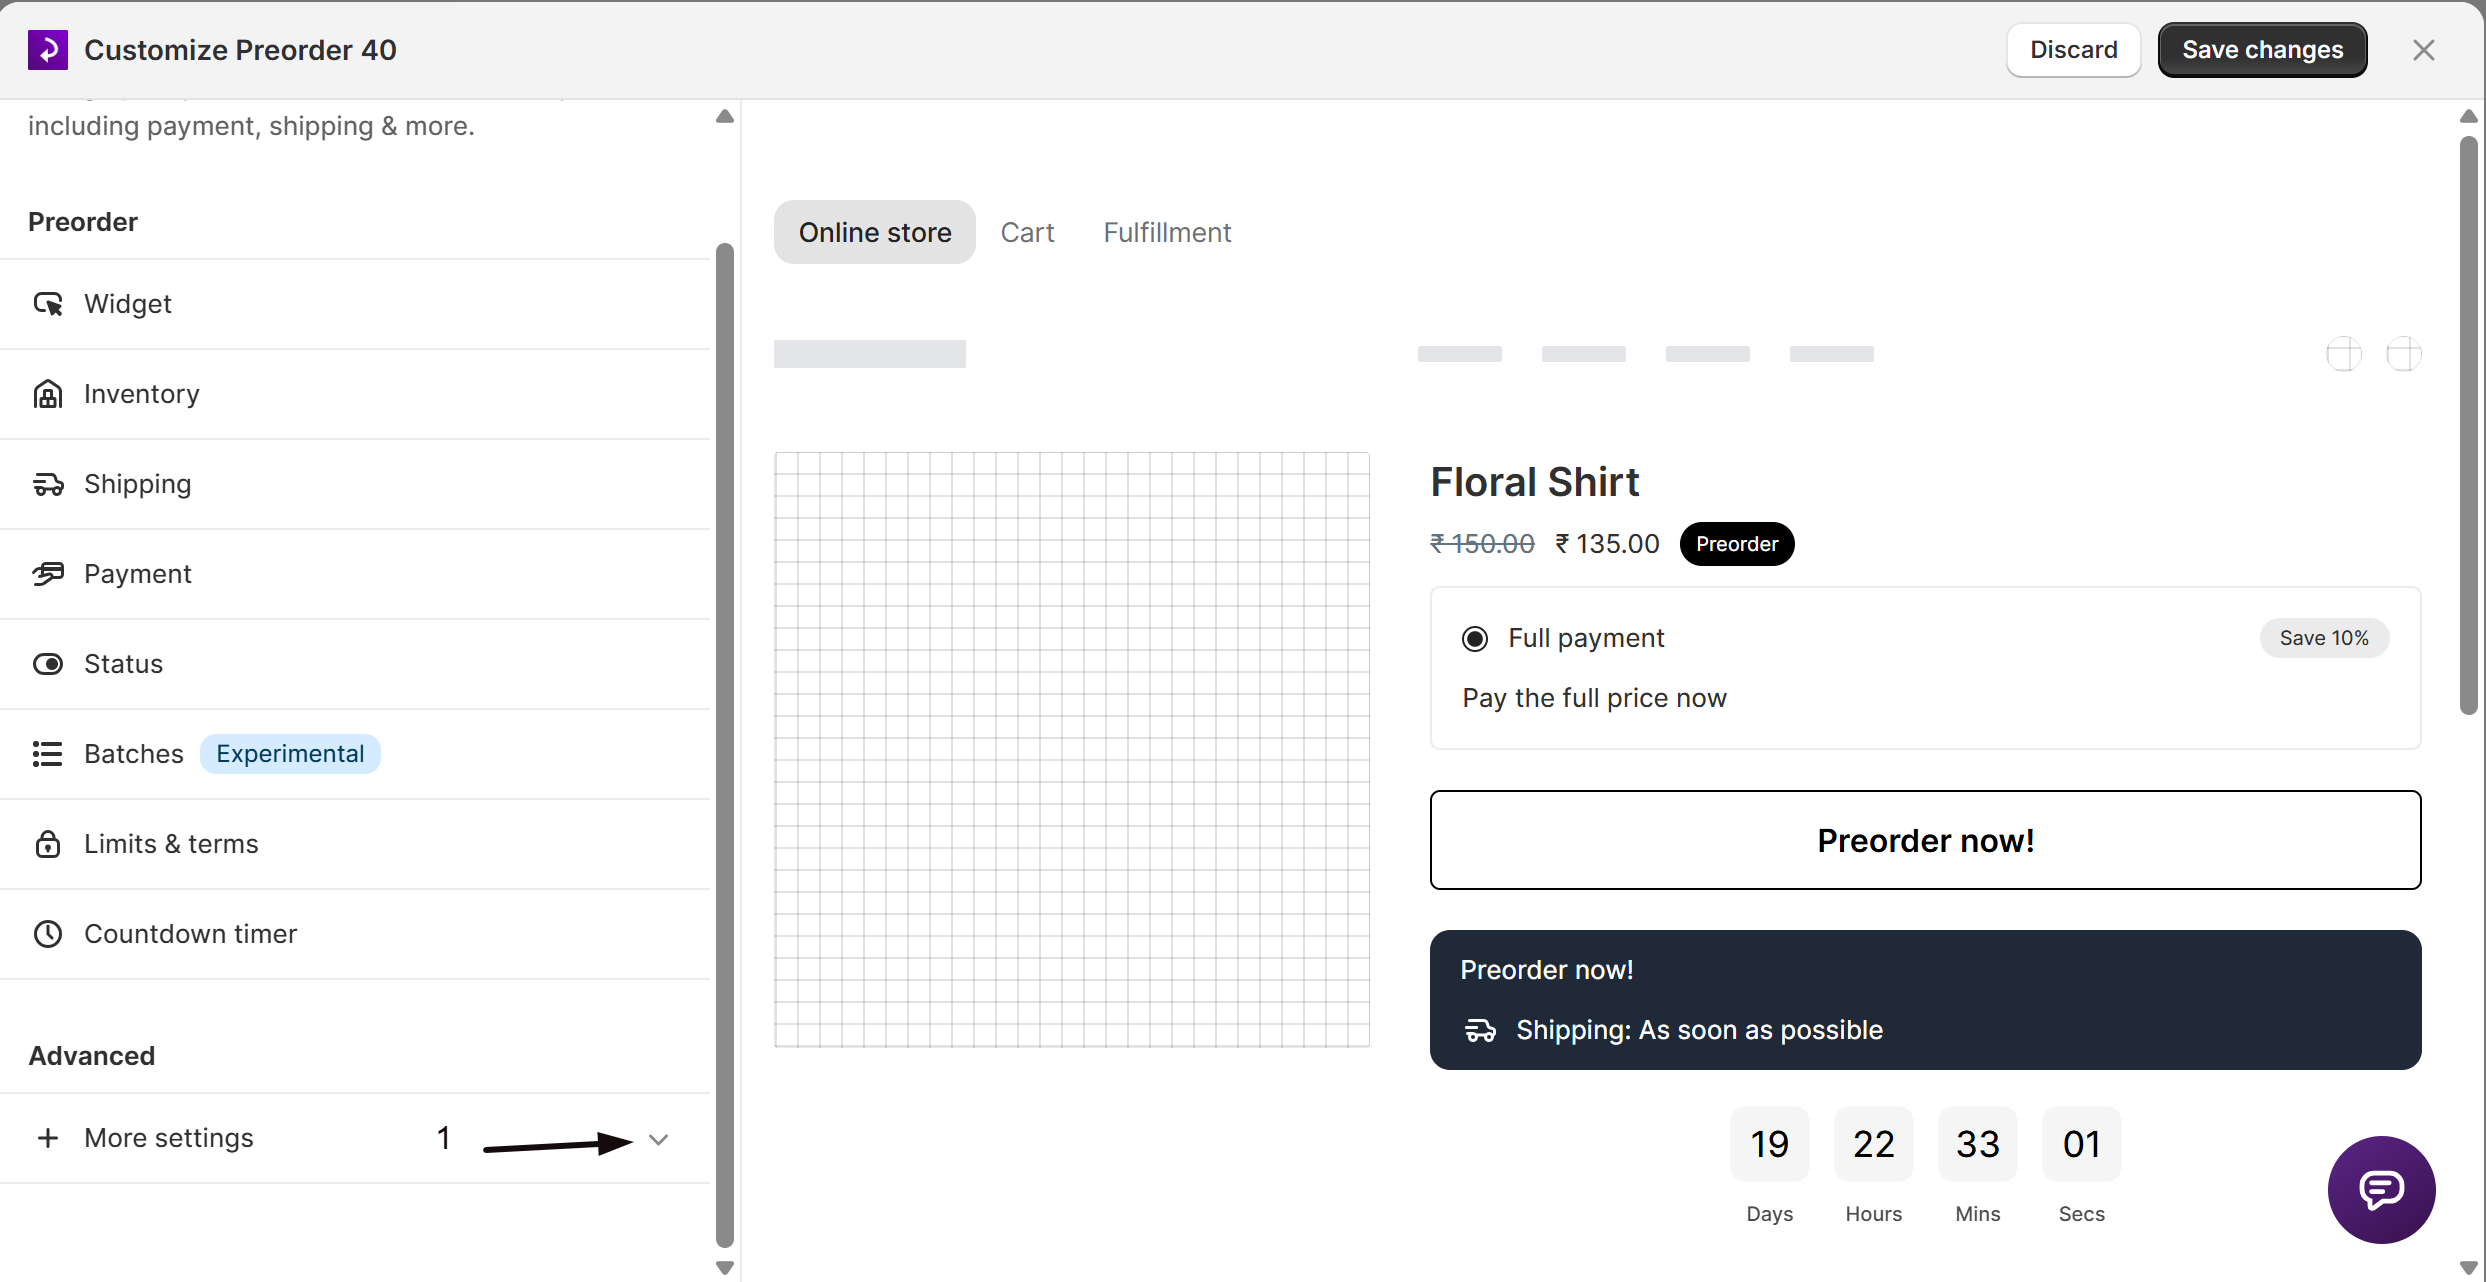
By default, STOQ inserts the countdown timer in a standard position relative to the preorder widget. To place it elsewhere, open the offer editor (Preorders in the left menu → Offers tab → open your offer → Customize), click More settings in the settings list to expand it and choose Advanced, then turn on Dev mode under Developer settings. Find Countdown timer position in the Product page settings that appear, enter the CSS selector for the target element, and choose how the timer is inserted:
| Insertion type | Behavior |
|---|---|
| After element (default) | Inserts the timer after the closing tag of the target element |
| Before element | Inserts the timer before the opening tag of the target element |
| Inside element (at end) | Appends the timer inside the target element |
| Inside element (at start) | Prepends the timer inside the target element |
This setting is shop-wide: changing it affects the timer's placement on all offers, not just this one.
Check your setup
Open one of the offer's products on your live storefront. The countdown timer should appear in the position you configured, with days, hours, minutes, and seconds ticking down.
Troubleshooting
The timer doesn't appear on the product page
Confirm:
- The offer is saved with Show countdown timer selected.
- A date (schedule or custom) is set for the mode you chose.
- The date hasn't already passed.
Show countdown timer is grayed out
The countdown timer requires a paid STOQ plan. Click the upgrade badge to see upgrade options.
Countdown to launch and deadline isn't showing as an option
This mode only appears when the offer has both a start date and an end date set in the Status section. Open Status, set both dates, then return to the Countdown timer section.
The product still shows "Sold Out" while the timer is visible
This is expected before the offer's start date. See What customers will see above.
The timer is in the wrong place on the page
Reposition it from the offer editor's Advanced settings. See Change the timer's placement above.
FAQ
Which mode should I use?
It depends on your offer's schedule and what you want to communicate. Use Before preorder opens to build anticipation before a launch date, During preorder period to show customers how long they have left to order, or Countdown to launch and deadline for a seamless handoff between the two, if your offer has both a start and an end date.
What happens when the countdown reaches zero?
The timer stops displaying on the storefront. STOQ does not automatically close the offer or change any order-taking behavior when the timer expires: the offer's enabled/disabled state is controlled separately from the timer date.
Can I set a timer date that's different from the offer schedule?
Yes, for Before preorder opens and During preorder period modes. Select Set a custom start date or Set a custom end date and pick any date and time. The custom date is stored independently from the offer's schedule and doesn't affect when the offer turns on or off.
Why does the product still say 'Sold Out' while the timer is showing?
Before the offer's start date, the offer isn't enabled yet, so STOQ hasn't activated the preorder button, badge, or discounted price: Shopify's native out-of-stock state shows instead. The countdown timer renders independently, so it's visible even though the rest of the preorder widget isn't active yet. Once the start date passes, STOQ replaces the Sold Out button with the full preorder widget.
Can the timer heading text be different in different languages?
Yes. The heading text fields (Heading - before launch and Heading - during preorder) and the unit labels (Days, Hours, Mins, Secs) are translatable. Configure translations in Multi-language preorders.
Related guides
Schedule when an offer runs
Set start and end dates for your offer, required for most countdown timer modes.
Design the preorder widget
Customize the look of the preorder button and surrounding widget.
Preorder advanced settings
CSS selectors, custom attributes, and other developer settings including timer placement.
Multi-language preorders
Translate countdown timer labels and headings for international customers.