Sync signups to Mailchimp
STOQ can add each customer who signs up for a back in stock alert to a Mailchimp audience, as soon as they register. You pick which of your existing audiences receives them. Use this if you run campaigns from Mailchimp and want new signups added as contacts without exporting anything.
Before you begin
| Requirement | Detail |
|---|---|
| A paid plan | The sync toggle is disabled on the free plan. |
| A Mailchimp API key | Generate one in Mailchimp and copy the whole key, including the data center suffix at the end, for example -us21. STOQ uses that suffix to reach your account. |
| An audience in Mailchimp | Create the audience you want signups added to in Mailchimp first, then select it in STOQ during setup. |
Get your Mailchimp API key
Before you connect STOQ to Mailchimp, generate a private API key in your Mailchimp account. You'll paste it into STOQ in the next section.
Log in to Mailchimp
Log in to your Mailchimp account.
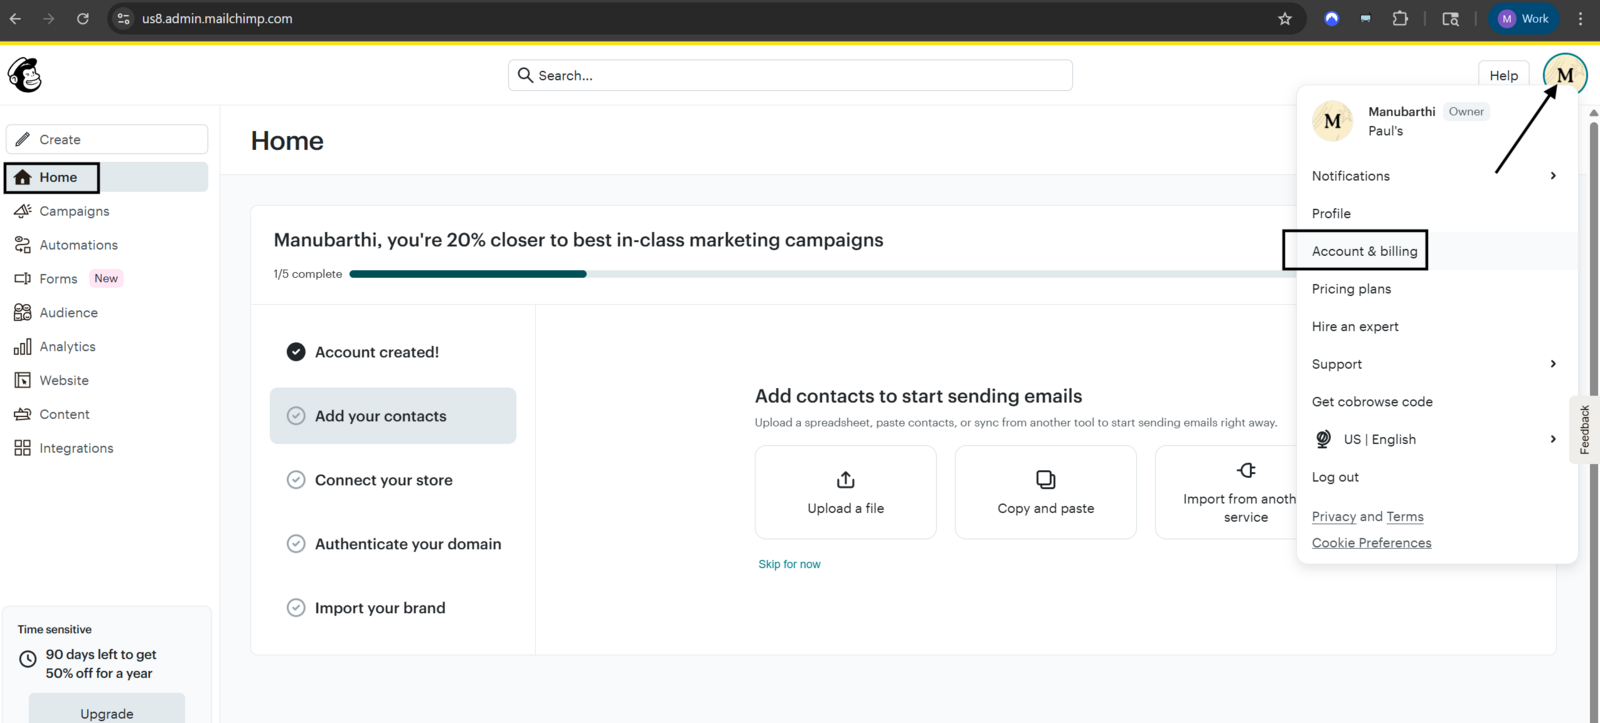
Open your account menu
Click your profile icon in the top-right corner.
Open Account & Billing
Select Account & Billing.
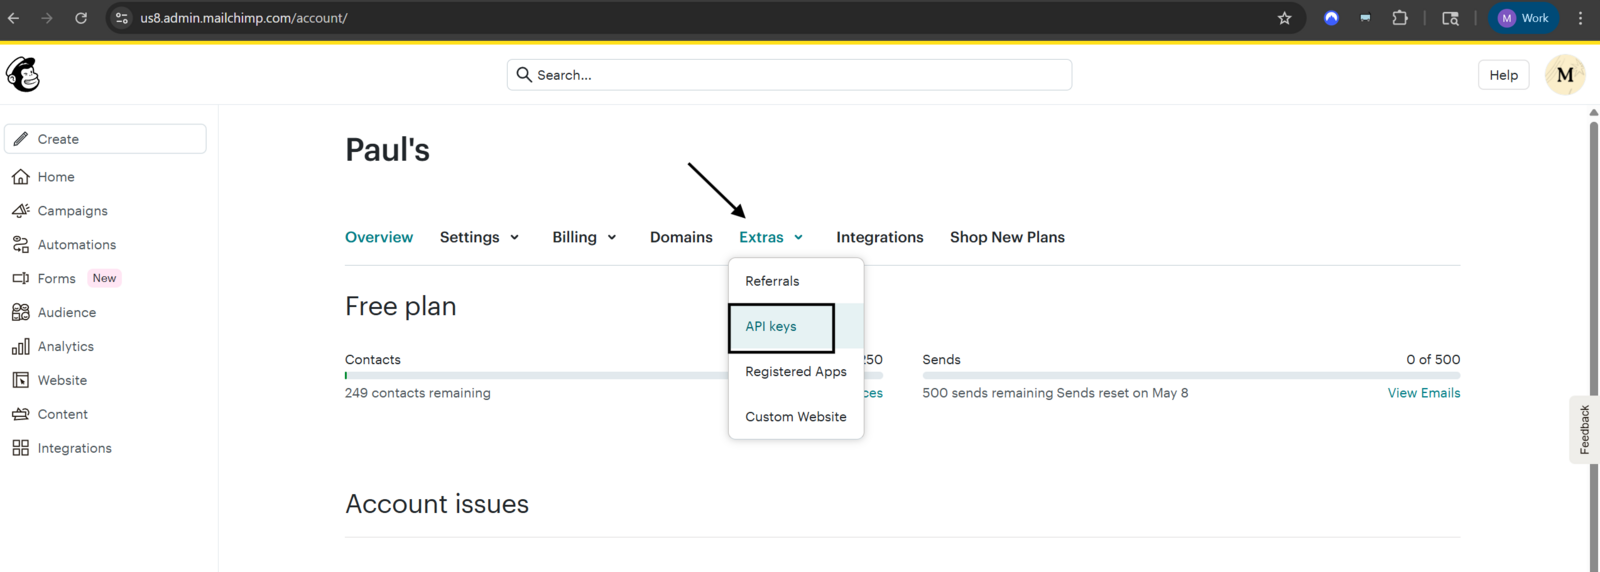
Go to API keys
Go to Extras > API keys.
Create a new key
Click Create New Key.
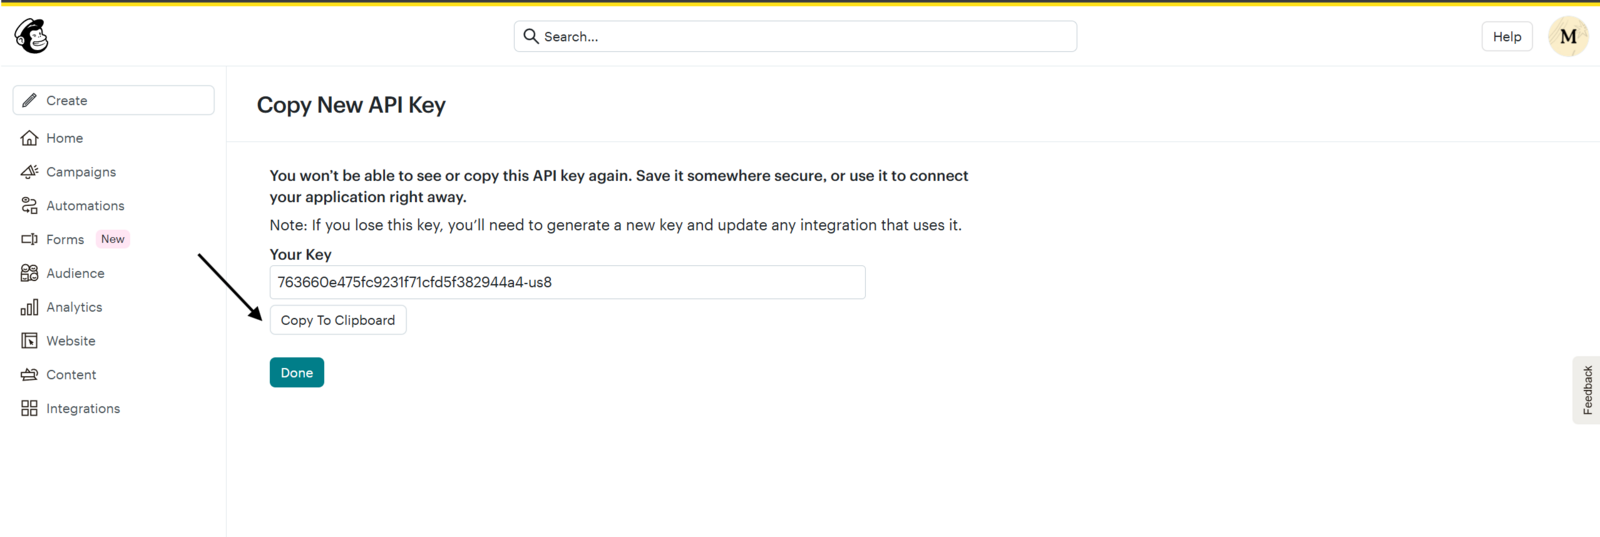
Copy the key
Copy the generated API key and keep it somewhere safe. You'll need it in the next section.
Set it up
On a phone, this menu is collapsed. In the Shopify mobile app, tap the STOQ logo at the top of the screen to open it, then choose the section named below. There is no hamburger icon. See Finding the STOQ menu.
Open the Mailchimp integration
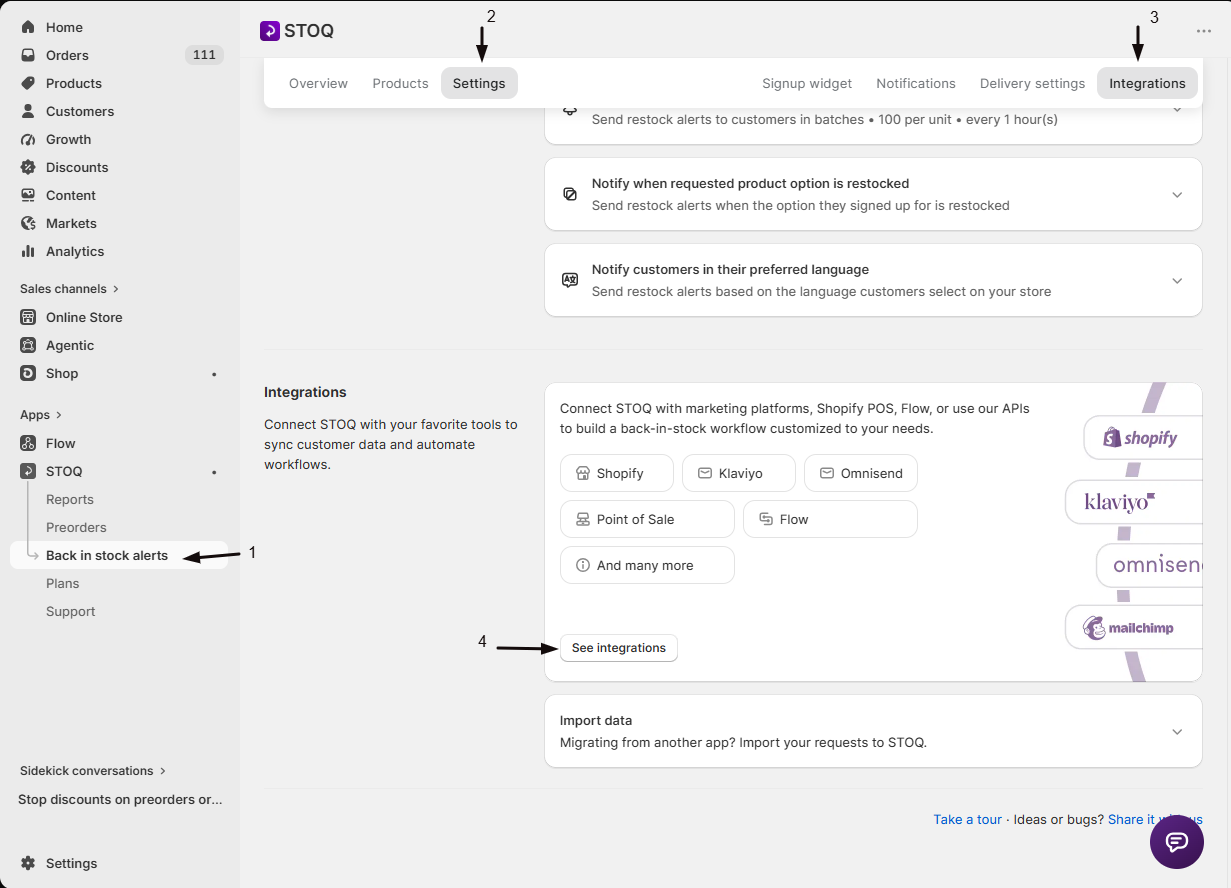
- In the left menu bar of the STOQ app, click Back in stock alerts.
- Click the Settings tab, then open the Integrations sub-tab.
- Click See integrations to open the full Integrations page.
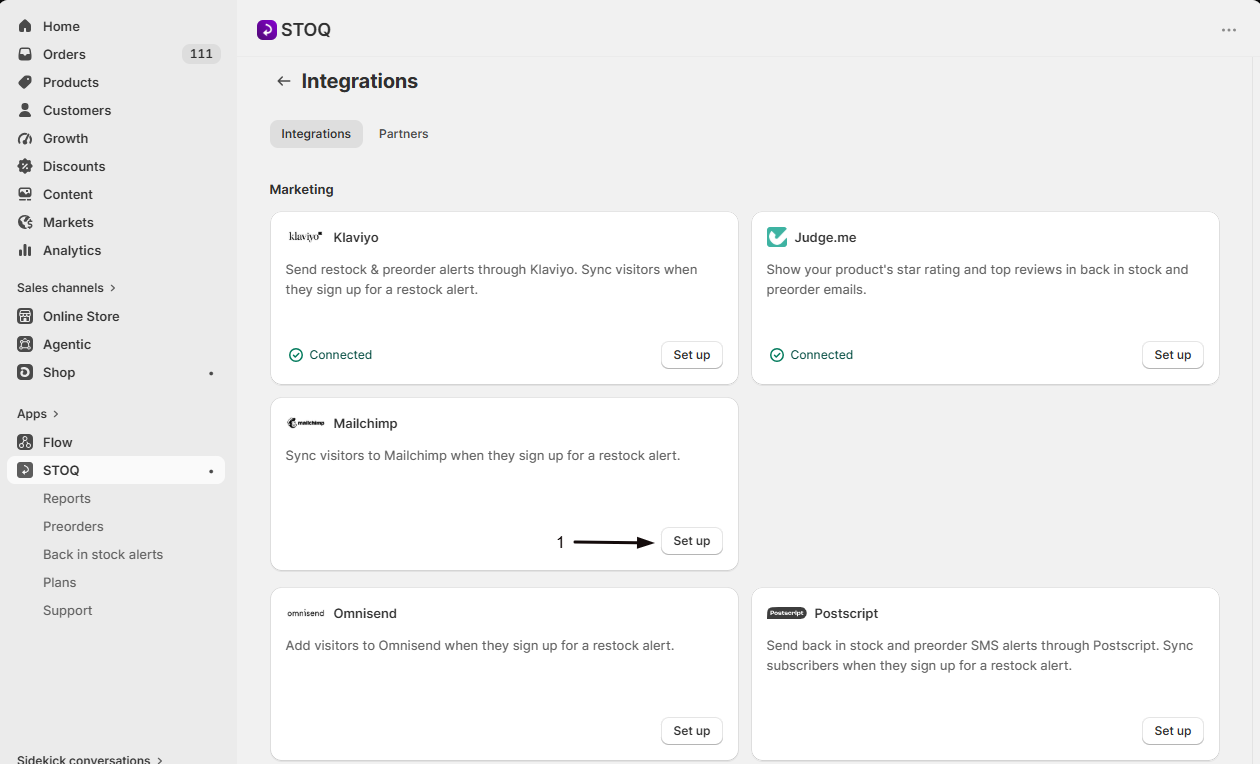
- In the Marketing section, find the Mailchimp card and click Set up.
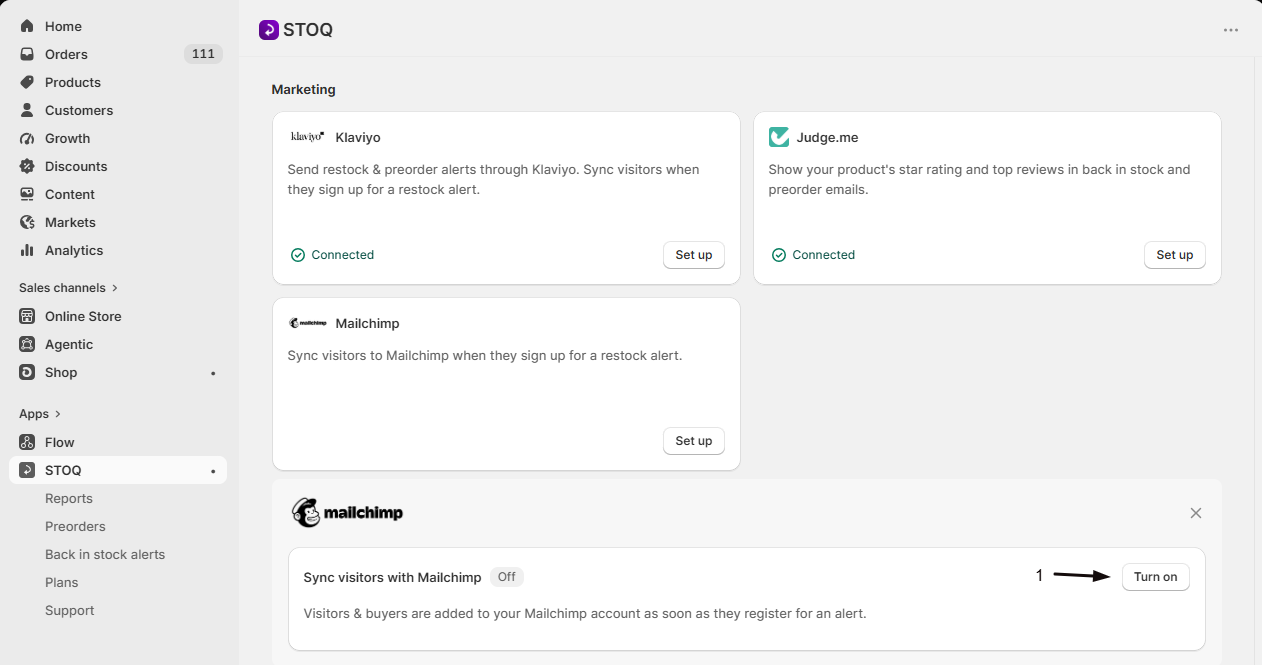
Turn on the sync toggle
Enable Sync visitors with Mailchimp.
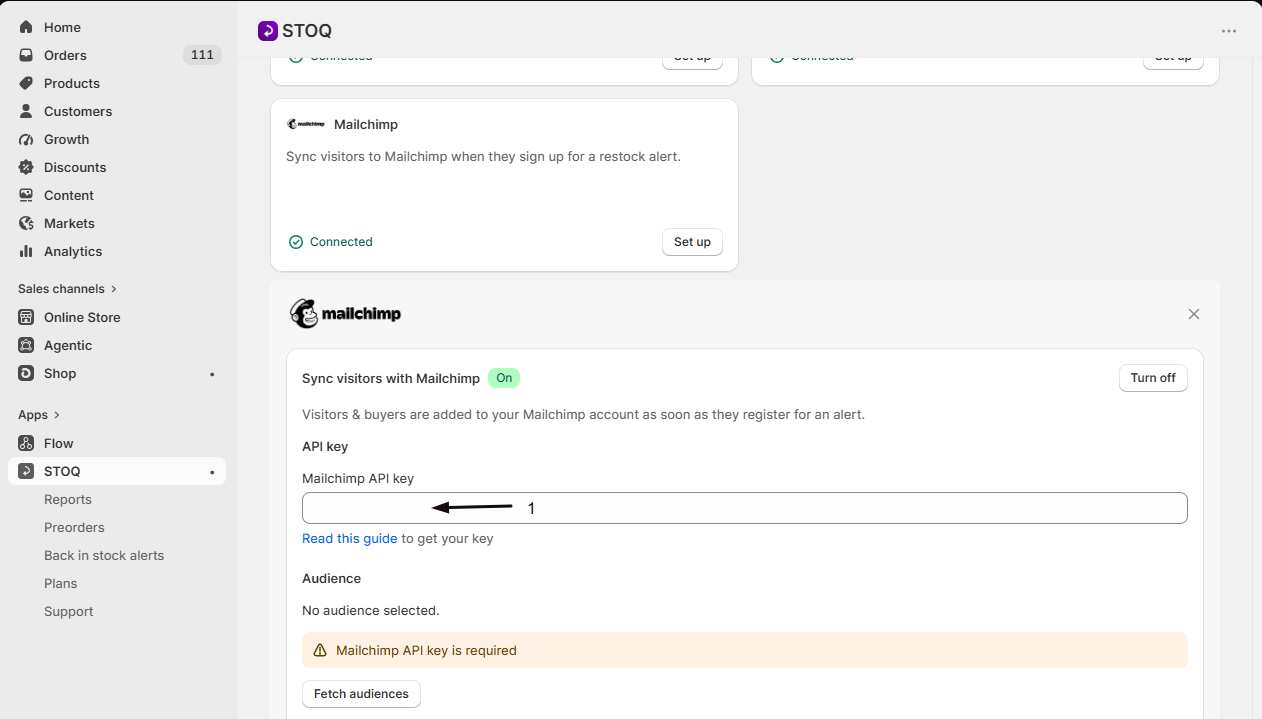
Add your Mailchimp API key
Paste your key into the Mailchimp API key field under API key. Once saved, the card reads "Your Private API key is configured", with a Change link to update it later. If you don't have a key yet, see Get your Mailchimp API key above.
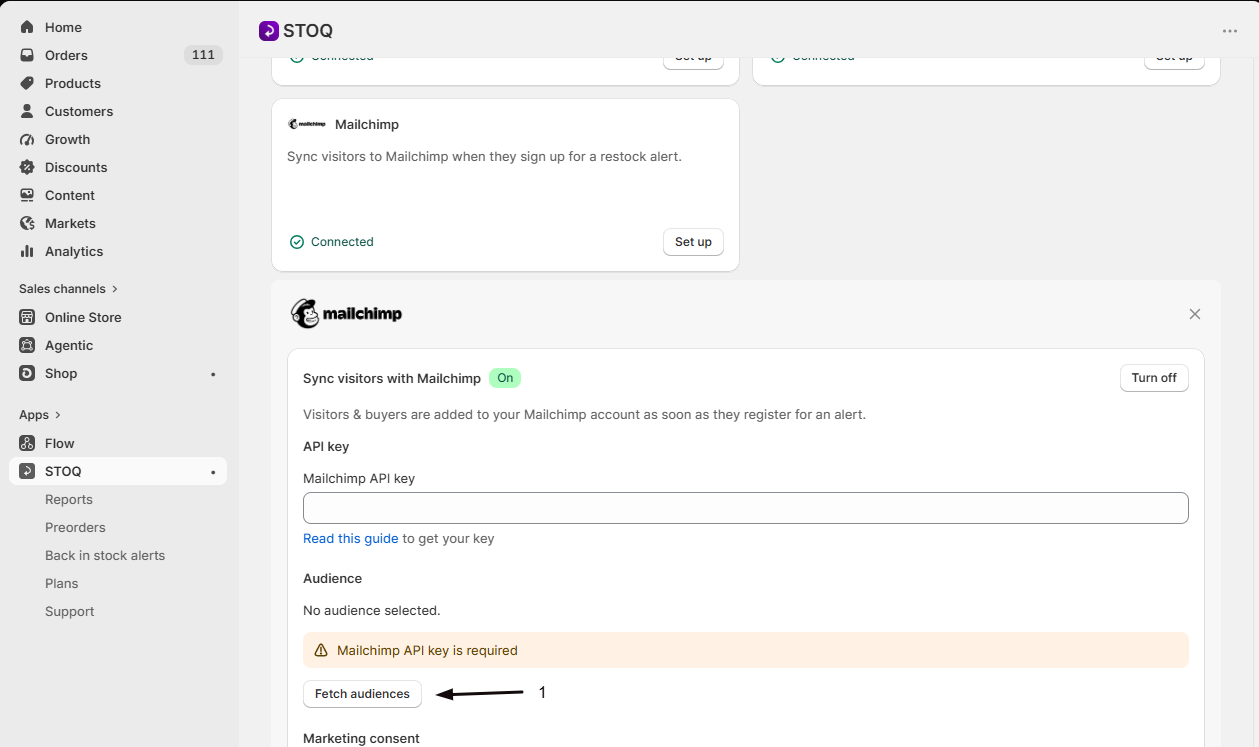
Choose the audience
Under Audience, click Fetch audiences, then pick the one you want in the Select audience dropdown. Each option shows the audience name and its contact count. The card then reads "STOQ syncs profiles to the [name] audience/list on your Mailchimp account", with a Change link if you need to switch later.
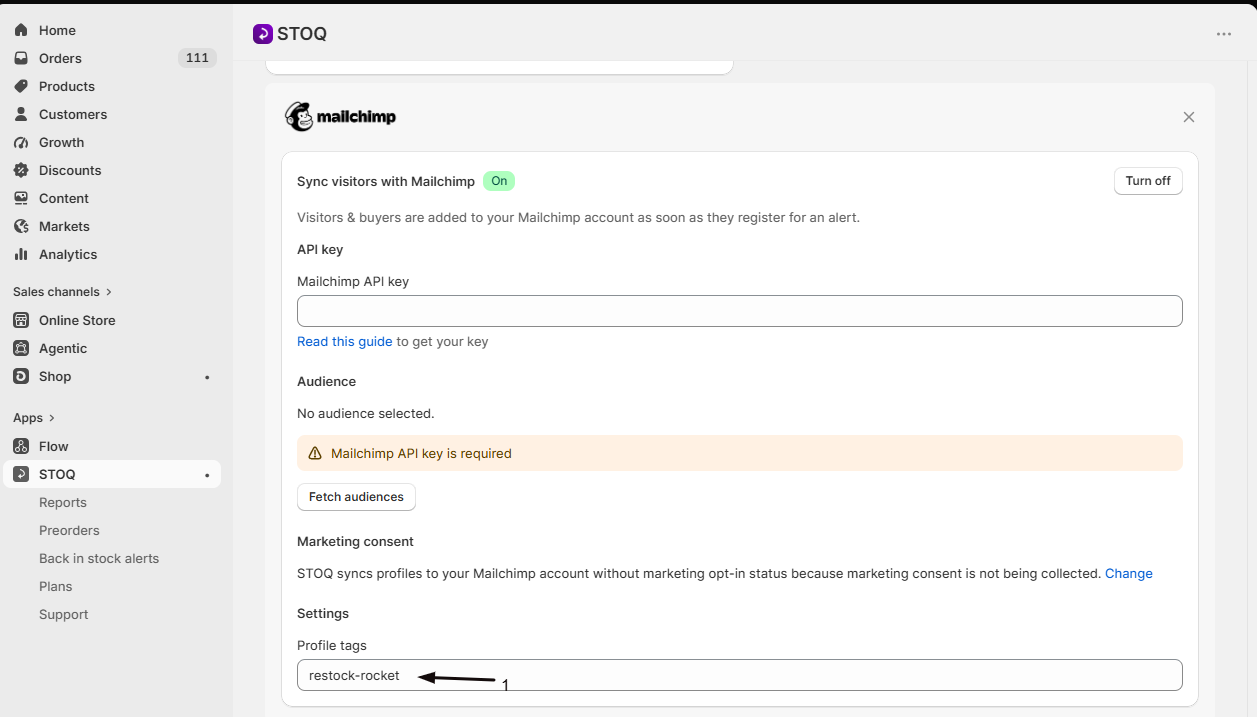
Set a profile tag (optional)
Enter a tag in the Profile tags field, shared with Shopify, Klaviyo, and Omnisend.
Save
Click Save in the save bar at the top of the page.
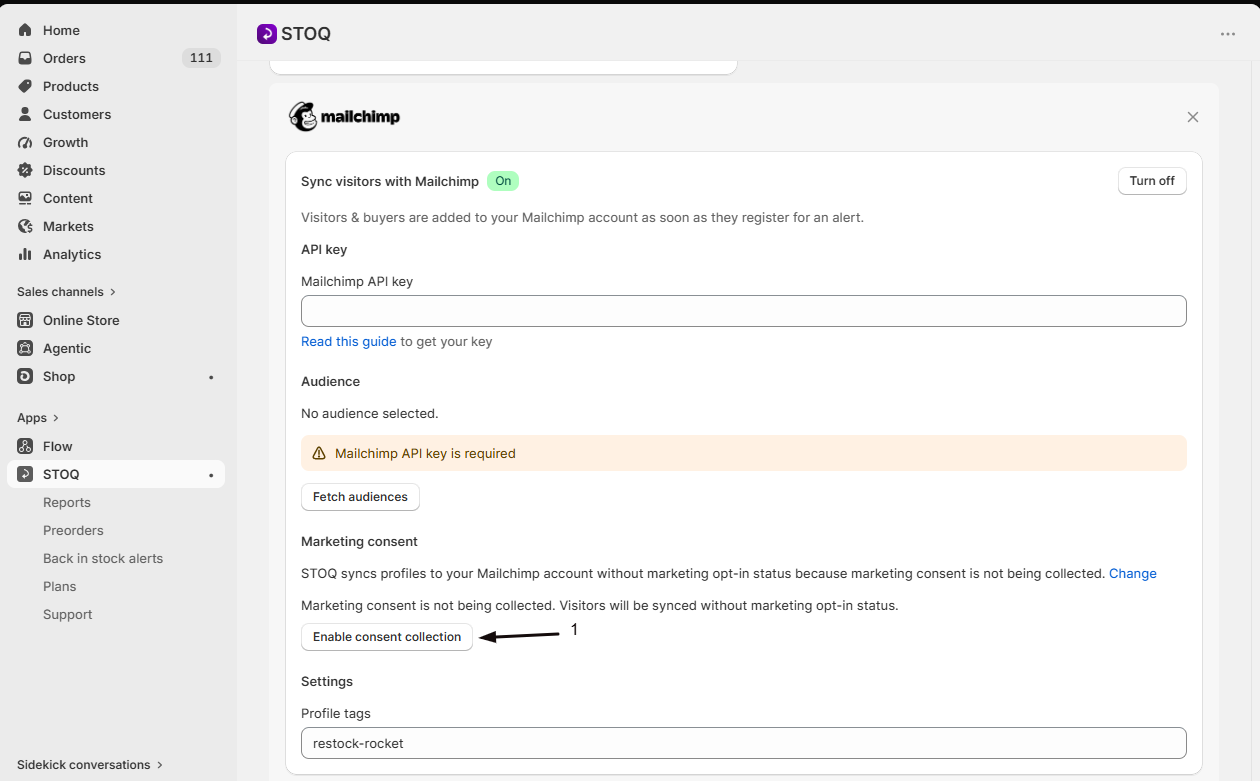
Once connected, the card shows a Marketing consent summary. If you collect marketing consent on the signup form, Mailchimp treats the profile as subscribed only when the customer opted in.
Check your setup
- Sign up for a restock alert yourself with a test email. See Test back in stock alerts.
- Open the audience you selected in Mailchimp and confirm the test contact appears.
Troubleshooting
Fetch audiences returns no lists or a warning banner
The banner text comes straight from Mailchimp. Check the key is correct, still valid, and includes its data center suffix, then click Fetch audiences again. If audiences load but yours isn't among them, it belongs to a different Mailchimp account than the key does.
The Mailchimp toggle switched itself off
STOQ turns the sync off and clears the API key and selected audience when Mailchimp rejects a request as an invalid key or as an action the key isn't permitted to take. Generate a new API key in Mailchimp, turn Sync visitors with Mailchimp back on, enter the key, then select the audience again.
A signup didn't sync
Confirm the toggle is on and saved, an audience is selected, and the API key still shows as configured. Signups without an email address are skipped, since Mailchimp needs one.
The toggle is greyed out
It's a paid-plan feature. Upgrade to unlock it.
FAQ
Does this sync my existing waitlist too?
No. Only new signups sync, from the moment you turn the toggle on. Contact STOQ support to backfill existing customers.
What happens if I don't choose an audience?
STOQ falls back to the first audience in your Mailchimp account, and if the account has none, it tries to create one named "Stoq!". Mailchimp accounts that restrict who can create audiences reject that request, and signups then fail to sync, so pick an audience yourself.
Does a customer need to opt in to marketing first?
No. Every signup syncs. Consent only affects whether Mailchimp treats the profile as subscribed to campaigns.