Design the signup form
Use this guide to customize the signup form customers fill in to join the waitlist for a sold-out product, its heading, description, fields, button, colors, and whether it opens as a popup or sits directly on the page. By the end, customers who click Notify me will see the exact form, fields, and messages you set here.
Before you begin
| You'll need | Why |
|---|---|
| Access to the Back in stock alerts section | The signup widget editor opens from its Settings tab → Signup widget sub-tab |
| A paid plan (for some options) | Quantity selection, quick resubscribe, and the on-page form layout require a paid plan |
Choose your setup
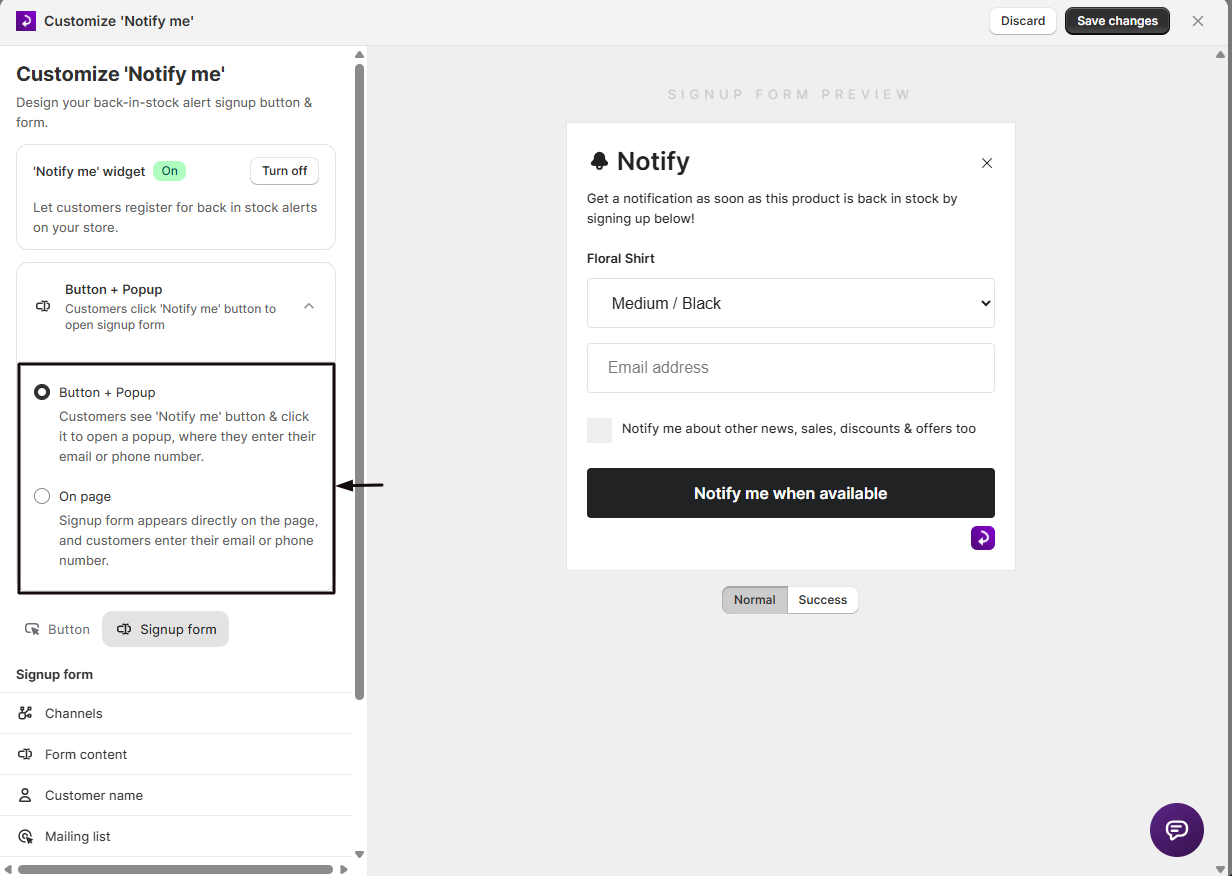
At the top of both the Button and Signup form tabs, a shared control lets you choose how the form appears to customers:
- Button + Popup: customers see a Notify me button and click it to open the signup form in a popup. This is the default and is available on all plans.
- On page: the signup form appears directly on the page, with no button and no popup. This requires a paid plan. STOQ shows a note that the on-page layout may need additional setup, with a chat link if you run into issues.
Switching to On page turns off Show product image in Form content, since the on-page layout doesn't display it.
What customers will see
- In Button + Popup mode: the customer clicks the Notify me button, and a popup opens with your header, description, optional product image, the email/SMS fields you've enabled, an optional quantity stepper, your terms message, and the submit button. After submitting, they see your success message.
- In On page mode: the same content appears directly embedded on the page, with no button, no popup, and no product image option.
- If a customer submits without entering required info, they see your empty-registration error message. If they try to register twice for the same product, they see your duplicate-registration error message.
Set it up
On a phone, this menu is collapsed. In the Shopify mobile app, tap the STOQ logo at the top of the screen to open it, then choose the section named below. There is no hamburger icon. See Finding the STOQ menu.
Open Form content
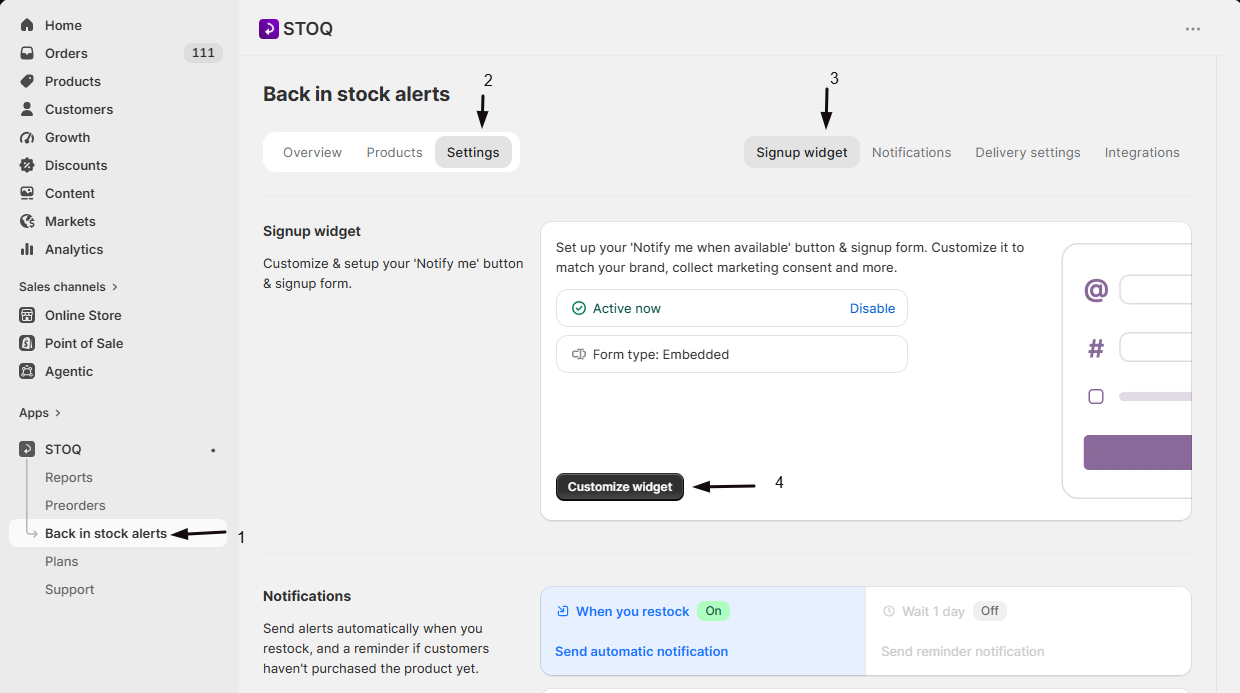
- In the left menu bar of the STOQ app, click Back in stock alerts.
- Click the Settings tab.
- Open the Signup widget sub-tab.
- Click Customize widget.
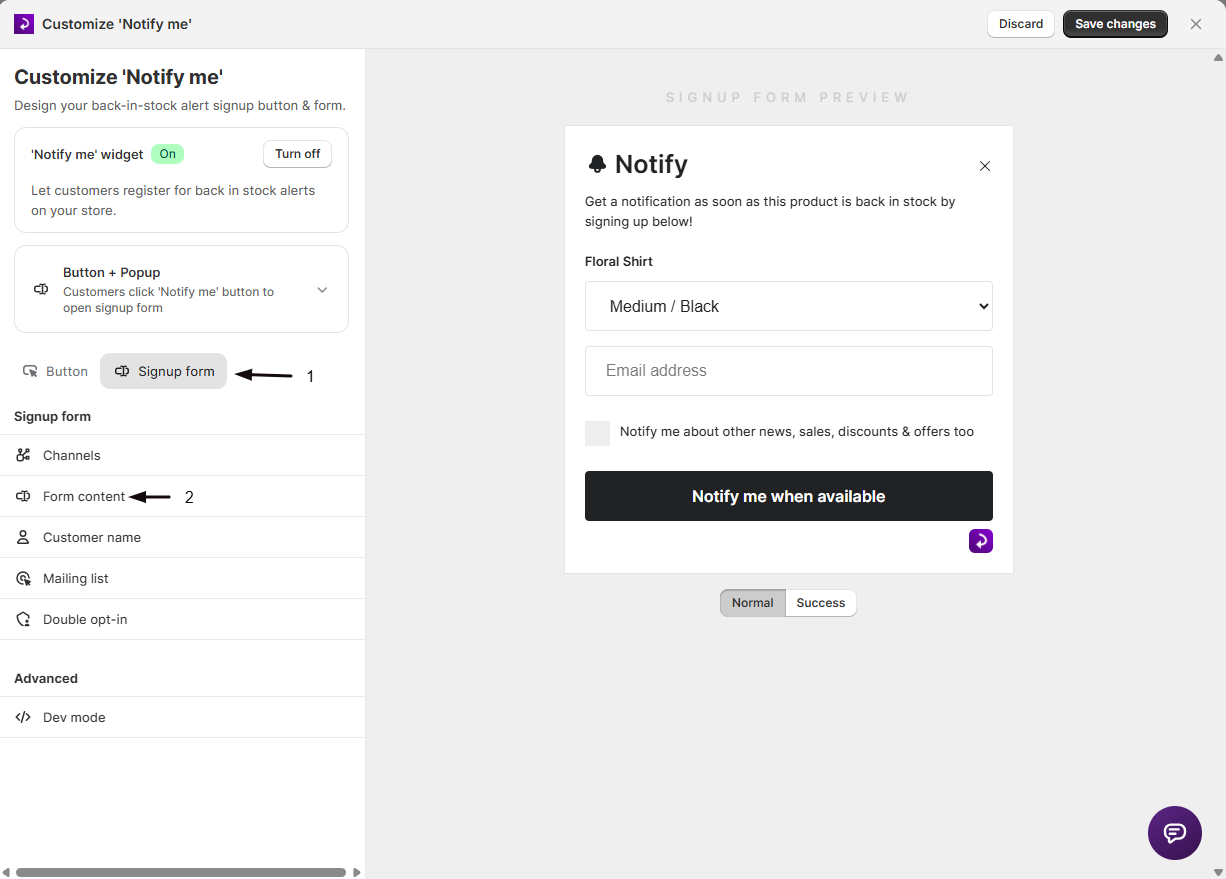
- Open the Signup form tab, then choose Form content from the sidebar.
Choose Button + Popup or On page
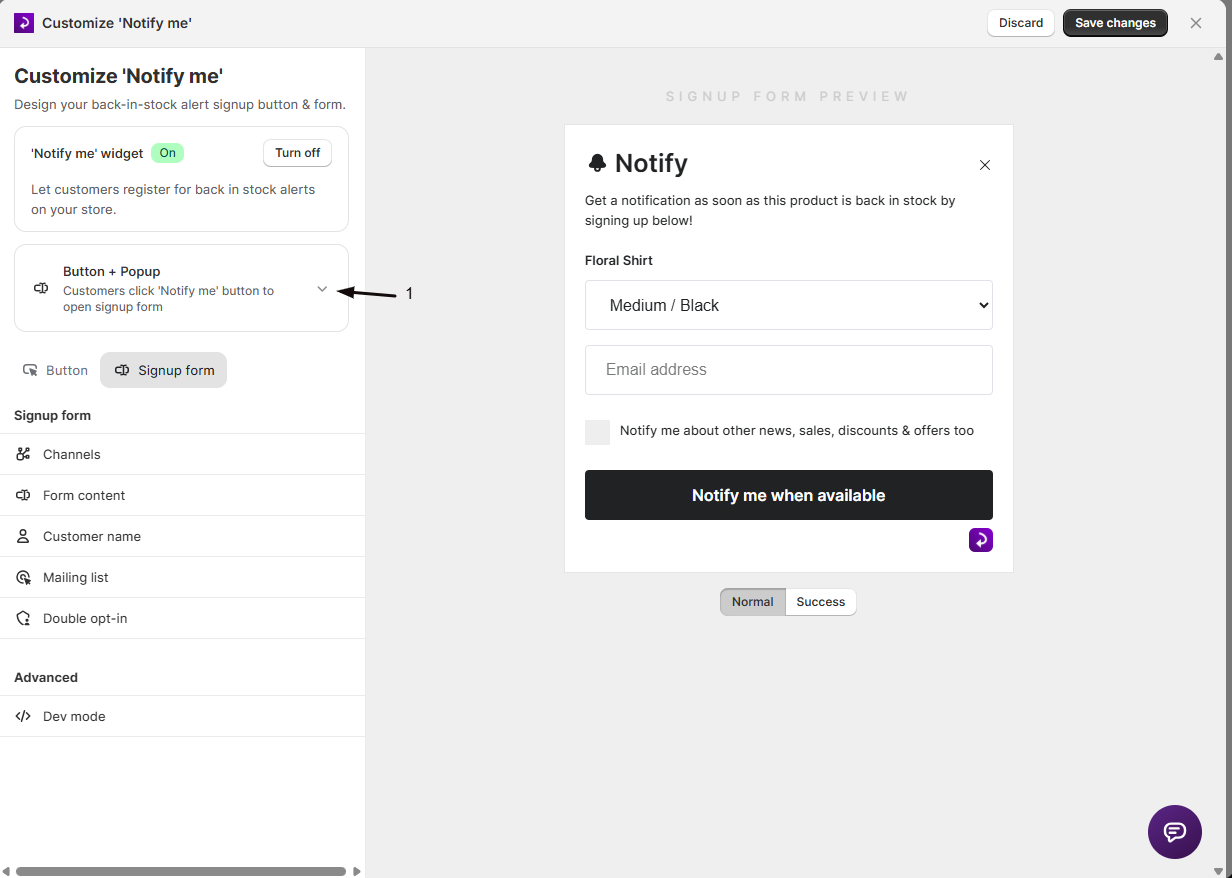
- At the top of the panel, expand the form-appearance summary.
- Pick Button + Popup or On page.
Set the Header and Description
Enter the heading customers see at the top of the form (default: "Notify me") and the description text below it (default: "Get a notification as soon as this product is back in stock by signing up below!"). The description field supports HTML.
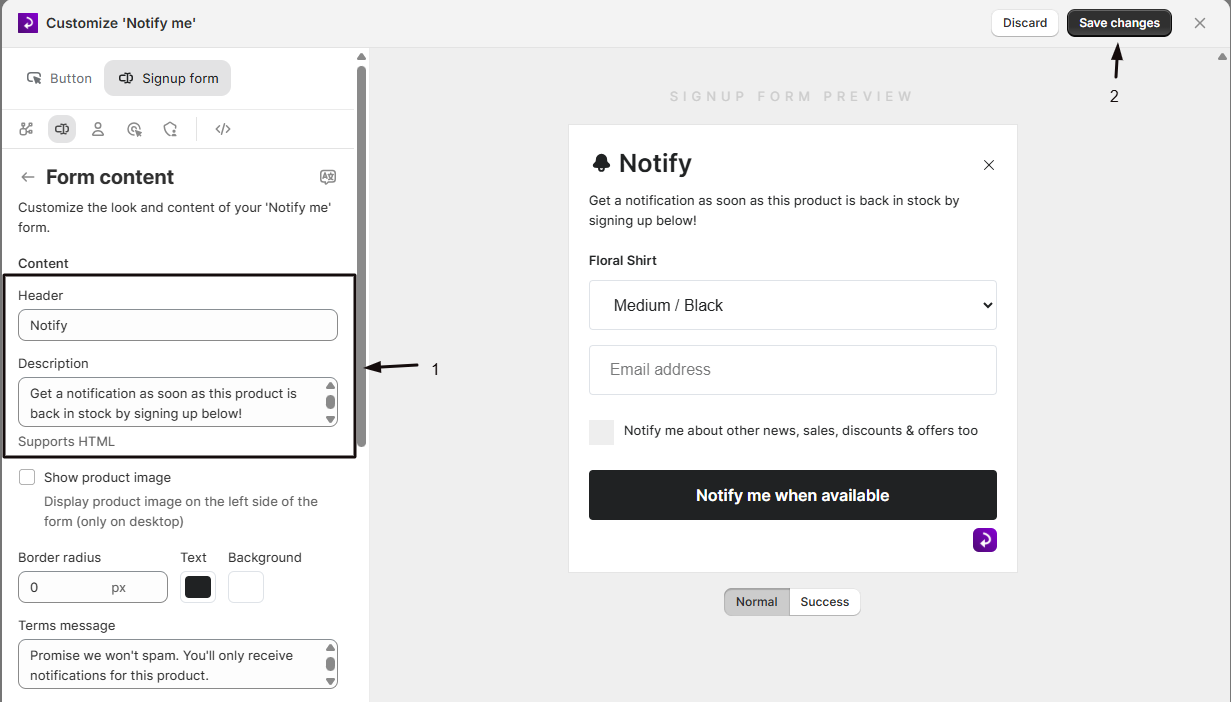
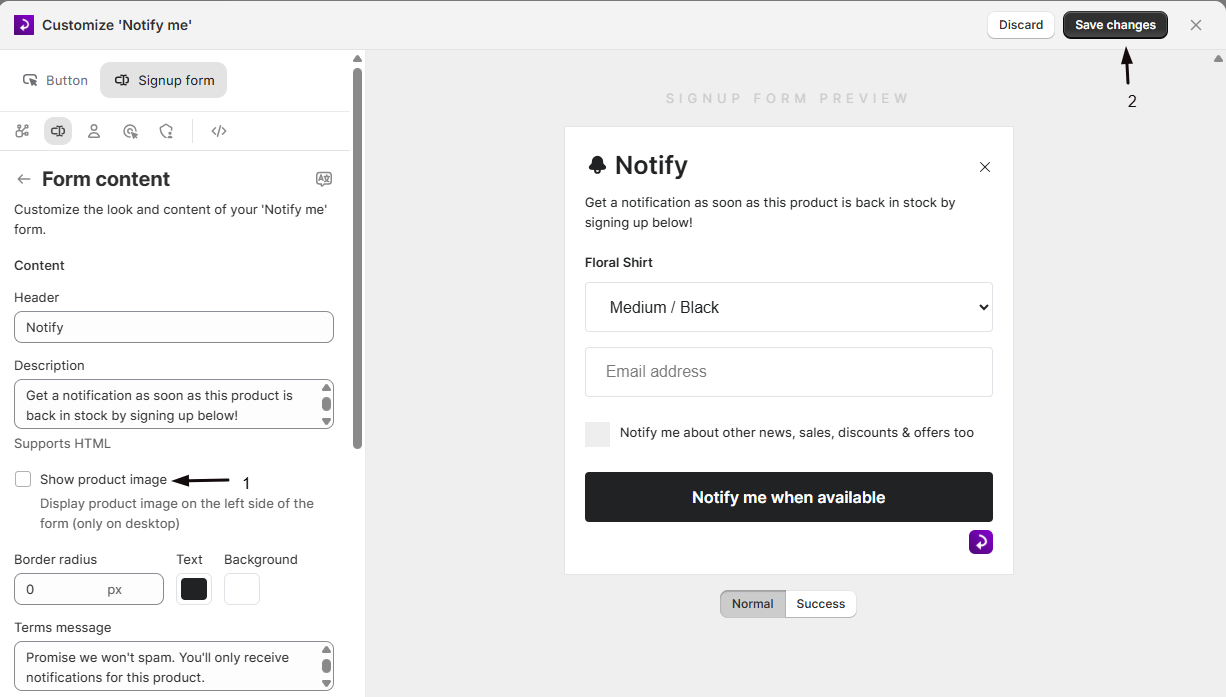
(Optional) Show a product image
In Button + Popup mode, check Show product image to show the product's image on the form (desktop only). See Show a product image on the signup form.
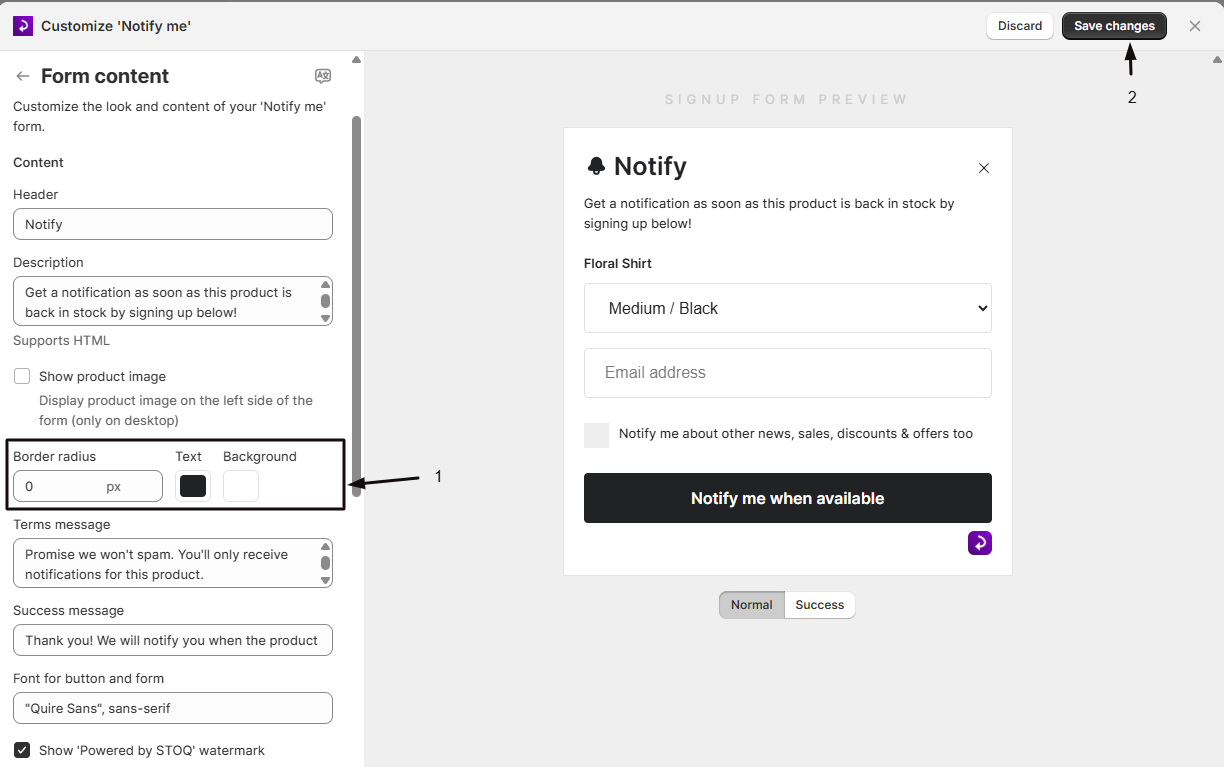
Set colors and border radius
Set the form's Border radius (in pixels), its Text color, and its Background color.
Customize the Terms message and Success message
The Terms message appears under the button (default: "Promise we won't spam. You'll only receive notifications for this product."). The Success message appears after a customer successfully signs up (default: "Thank you! We will notify you when the product is available.").
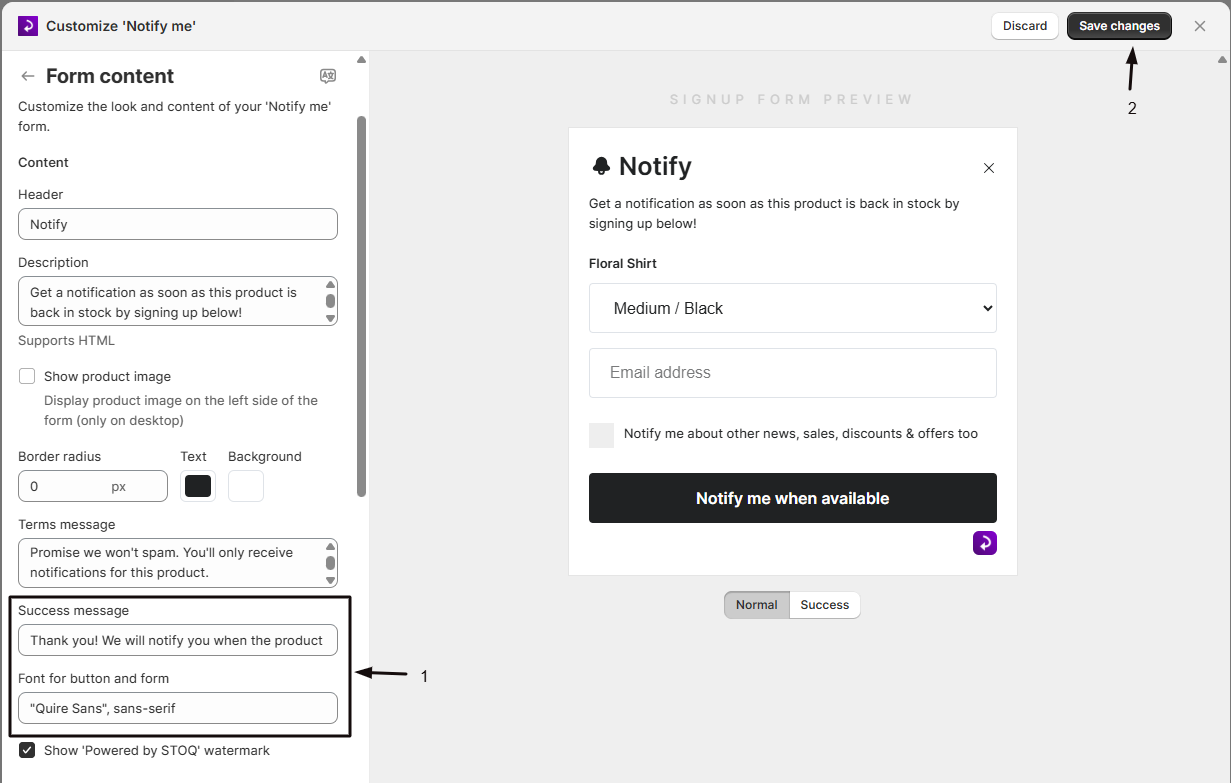
Set the font
Enter a font name in Font for button and form (default: OpenSans). This applies to both the button and the form, so save your changes and check your storefront to confirm the font loads as expected.
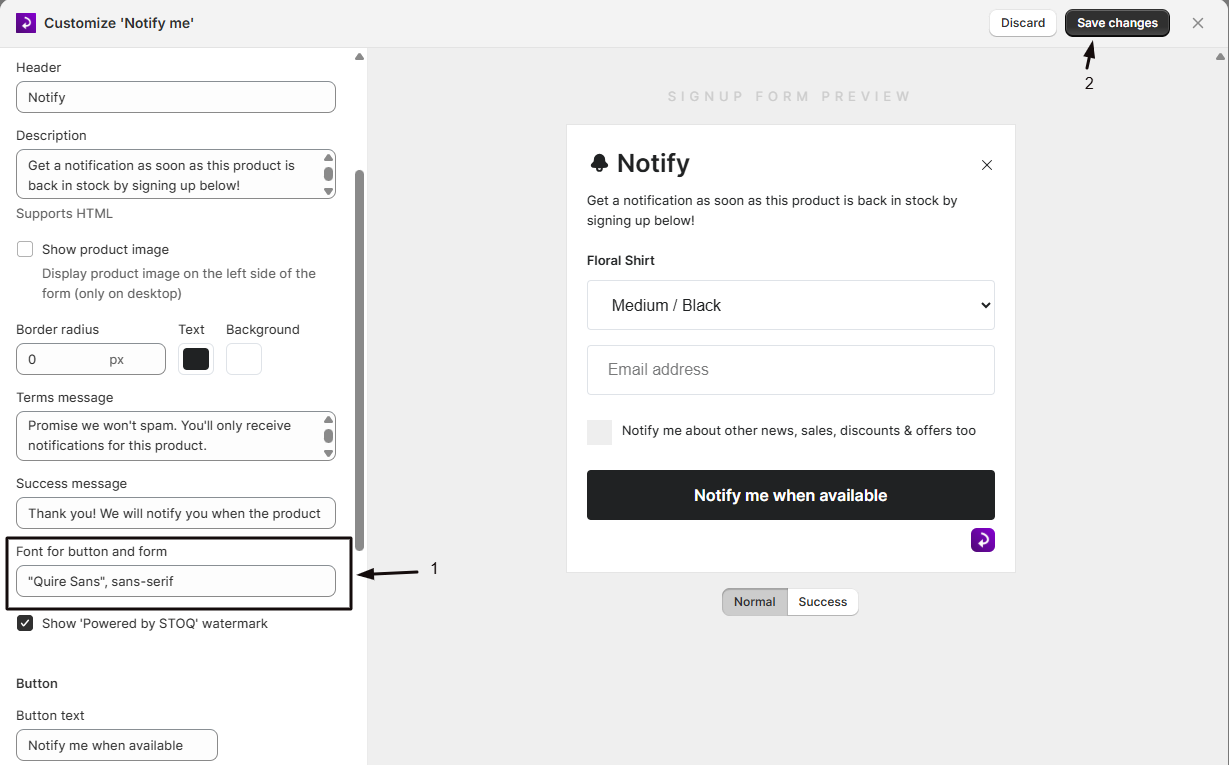
Customize the button
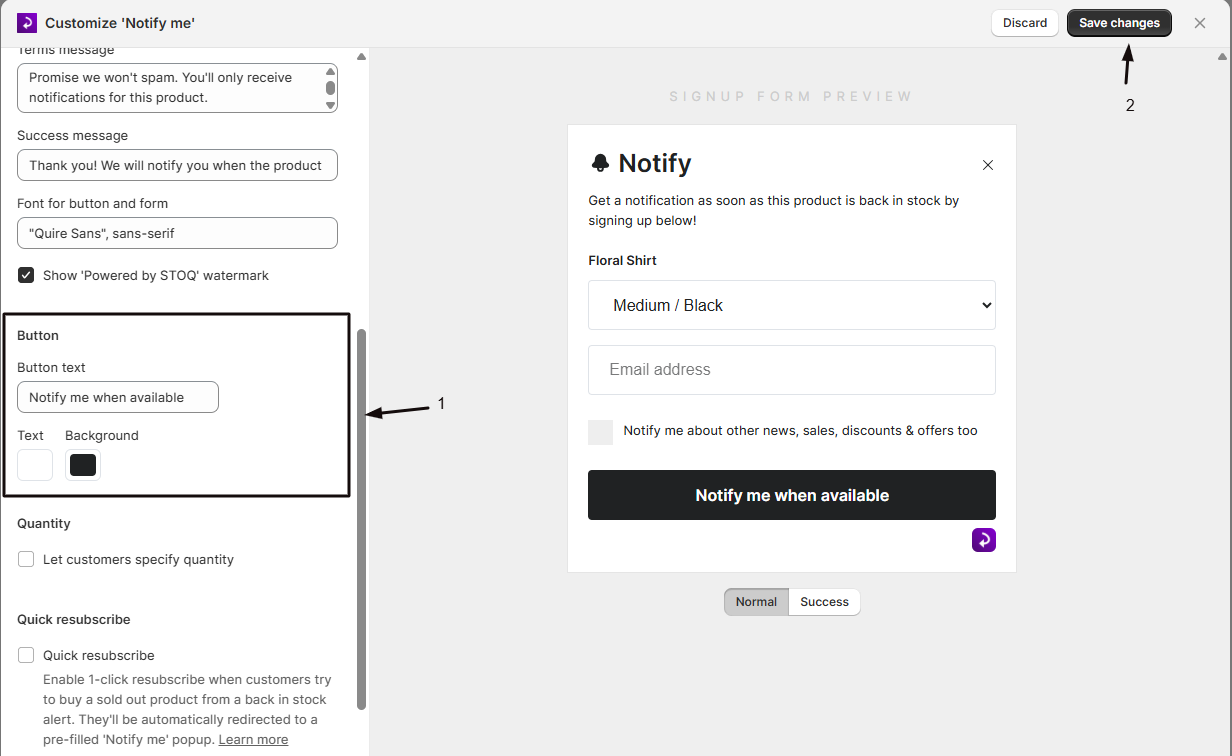
Under Button, set the Button text (default: "Notify me when available") shown inside the form, plus its Text and Background colors. This is the form's submit button, separate from the standalone "Notify me" button that opens the form.
Turn on quantity selection (optional)
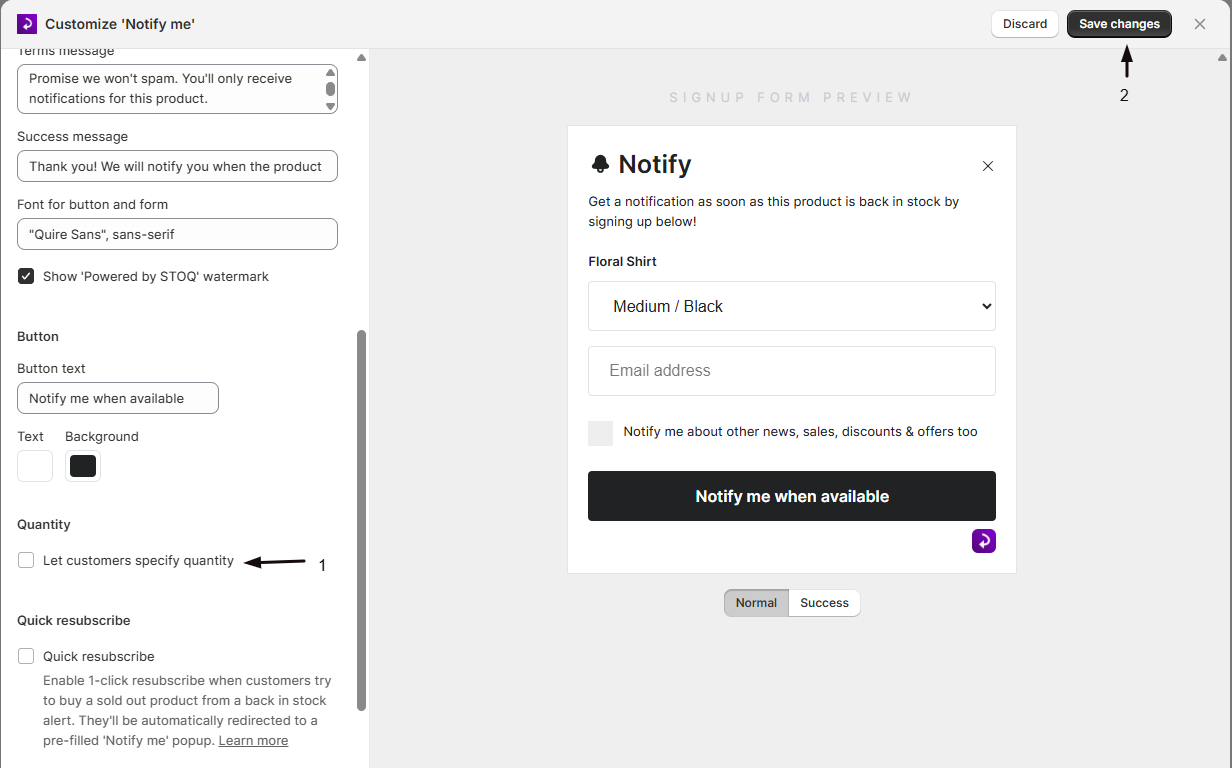
Under Quantity, check Let customers specify quantity to let shoppers choose how many units they want to be notified about. When enabled, set the Quantity field label shown above the quantity stepper (default: "Quantity").
Turn on quick resubscribe (optional)
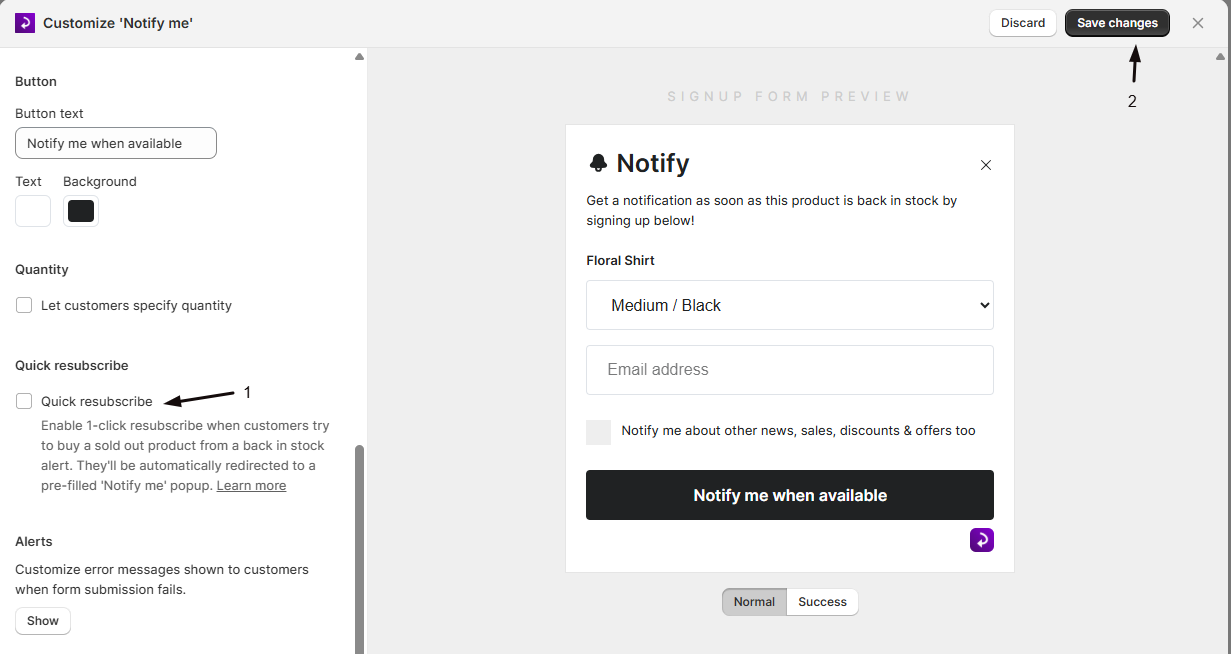
Under Quick resubscribe, check the Quick resubscribe box to let customers who try to buy a sold-out product get redirected straight into a pre-filled "Notify me" popup with one click. When enabled, customize the Banner text shown in that flow.
Customize alert messages (optional)
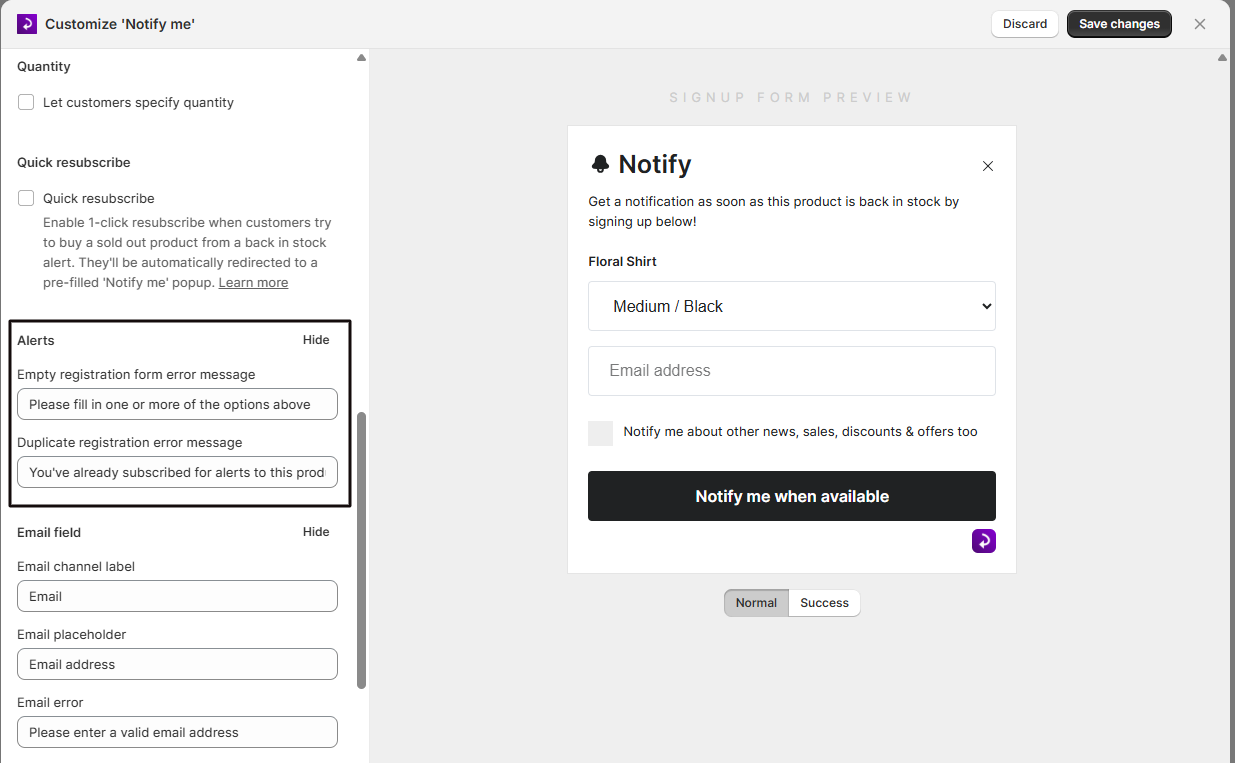
Select Show under Alerts to edit the Empty registration form error message and the Duplicate registration error message shown when a submission fails.
Customize the email field (optional)
Select Show under Email field to edit the Email channel label, Email placeholder, and Email error message.
Customize the phone number field (optional)
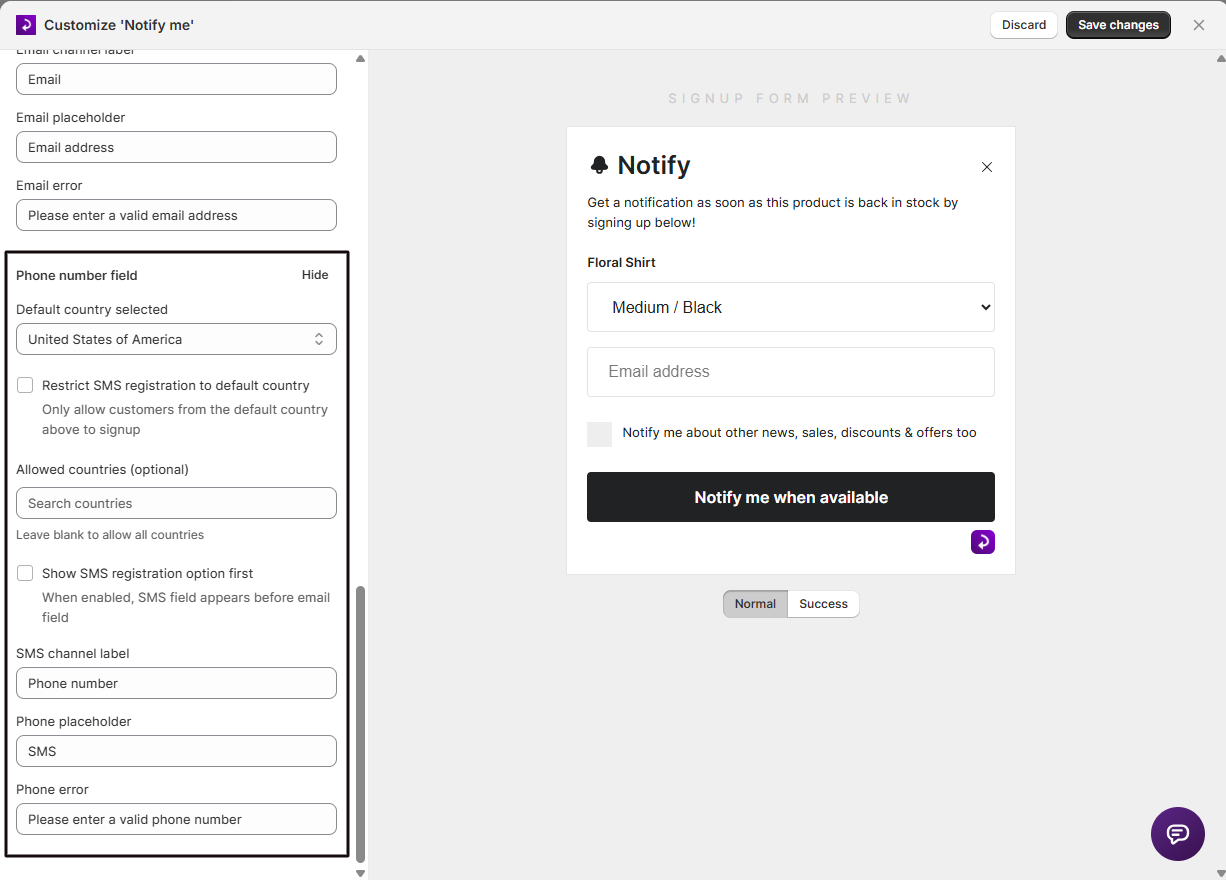
Select Show under Phone number field to set the Default country selected, optionally restrict signups to that country or to a specific list of Allowed countries, choose whether the SMS field should appear before the email field, and edit the SMS channel label, Phone placeholder, and Phone error message.
Save your changes
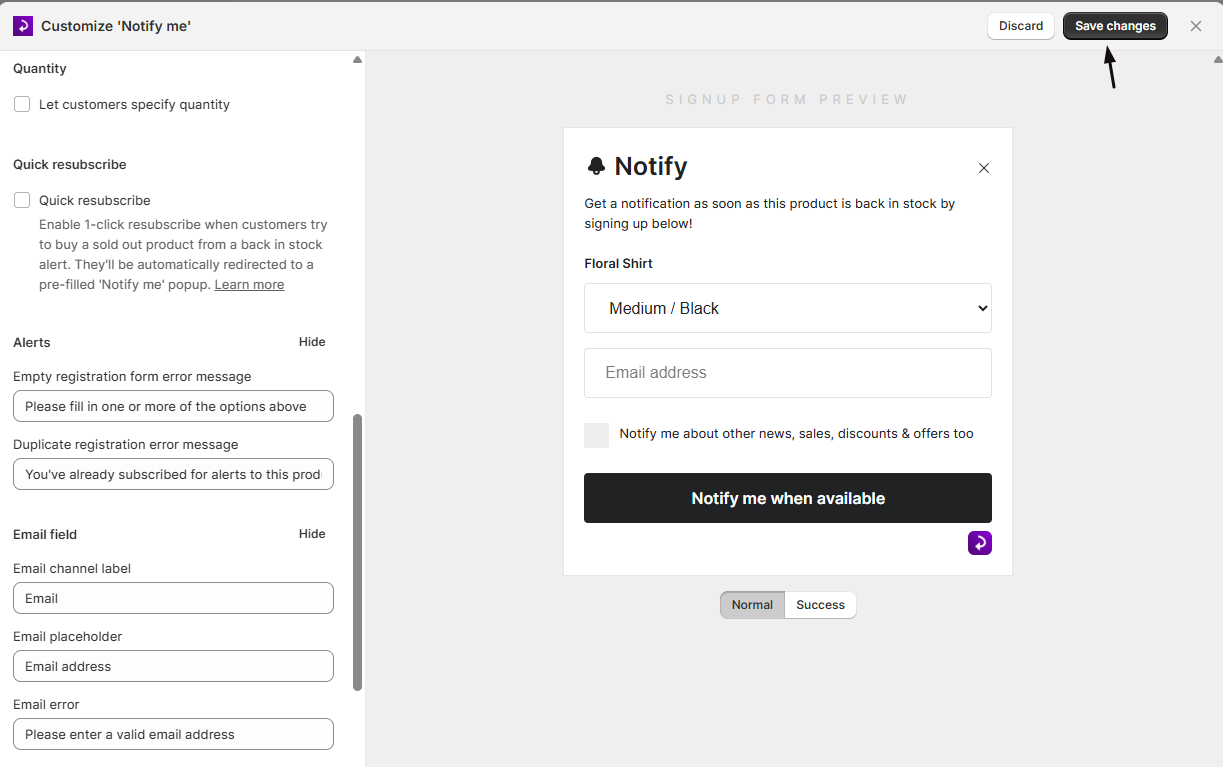
Save, then visit your storefront (or use the live preview) to confirm the form looks and reads the way you expect.
Check your setup
- Open a sold-out product on your storefront.
- Confirm the form heading, description, and button text match what you set.
- Submit the form once to confirm the success message displays.
- Submit again with the same details to confirm the duplicate-registration error message displays.
- If you enabled quantity selection, confirm the quantity stepper and its label appear.
Troubleshooting
Show product image is missing or greyed out
It's only available in Button + Popup mode. Switching to On page turns it off automatically, since the on-page layout can't display a product image.
Quantity selection is greyed out
Let customers specify quantity requires a paid plan. Upgrade your plan to unlock it.
A font change doesn't show up in the admin preview
Save your changes and check your live storefront. The admin preview doesn't always reflect font updates right away.
On page shows an extra setup warning
STOQ flags that the on-page layout may need additional theme setup. Use the chat link in that message if you run into issues.
Limitations
The Header, Description, Terms message, and Success message set here apply to every product's signup form; there's no per-product override.
FAQ
Can I show a different form heading or description for different products?
No. The Header, Description, Terms message, and Success message set here apply to every product's signup form; there isn't a per-product override.
Does the Description field support formatting?
Yes, the Description field supports HTML, so you can add basic formatting or links.
What happens if a customer tries to sign up twice for the same product?
They see your duplicate-registration error message instead of a second signup being created.
Does changing the form settings affect customers who already signed up?
No. Editing the form only changes what future visitors see when they open it; customers who already signed up aren't affected.
Where do I edit the form text in other languages?
Use the language icon next to the Form content title, which opens the Translator to edit translations for other storefront languages.
How do I remove the bell icon in the signup popup?
The bell next to the form header is built into the popup and has no on or off setting. To hide it, add this to the widget's Custom CSS field:
#form-Header-Icon { display: none; }The Custom CSS field is in the widget editor under Dev mode, available on every plan. See Advanced placement and custom CSS for how to open it.
Related guides
Design the Notify Me Button
Customize the button that opens this form.
Collect Customer Names
Add a name field to the signup form.
Mailing List Opt-in
Let customers join your marketing list when they sign up.
Double Opt-in
Require customers to confirm their registration by email.
Set Up Back in Stock Alerts
The full setup walkthrough for Back in Stock alerts.