Connect AI assistants to STOQ
Connect Claude or ChatGPT to your store, or use the built-in Quinn and Sidekick assistants, from the AI connectors section in Integrations.
Last updated
STOQ has an AI connectors section where you can connect Claude or ChatGPT directly to your store, and where you’ll find the AI assistants already built in: Quinn (STOQ’s own in-app assistant) and Sidekick (Shopify’s assistant). Once an assistant is connected, you can ask about your live STOQ data or have it make changes for you, all from the same conversation.
What you can ask an AI assistant to do
Section titled “What you can ask an AI assistant to do”- Answer questions from your live data: a specific offer’s performance, who’s on a back in stock waitlist, an order’s status and payment state, or demand trends across products.
- Make changes for you: update shipping and payment settings, tag or release an order, or manage a waitlist signup.
The four assistants differ in where they run and whether they need any setup:
| Assistant | What it is | Setup |
|---|---|---|
| Claude | Anthropic’s assistant, connected to STOQ as a custom connector | Connect it yourself |
| ChatGPT | OpenAI’s assistant, connected to STOQ as a custom connector | Connect it yourself |
| Quinn | STOQ’s own in-app assistant | Already on, shows Connected |
| Sidekick | Shopify’s own assistant, inside Shopify admin | Already works with your STOQ data, shows Connected |
Open the AI connectors section
Section titled “Open the AI connectors section”On a phone, this menu is collapsed. In the Shopify mobile app, tap the STOQ logo at the top of the screen to open it, then choose the section named below. There is no hamburger icon. See Finding the STOQ menu.
-
Open the Integrations page
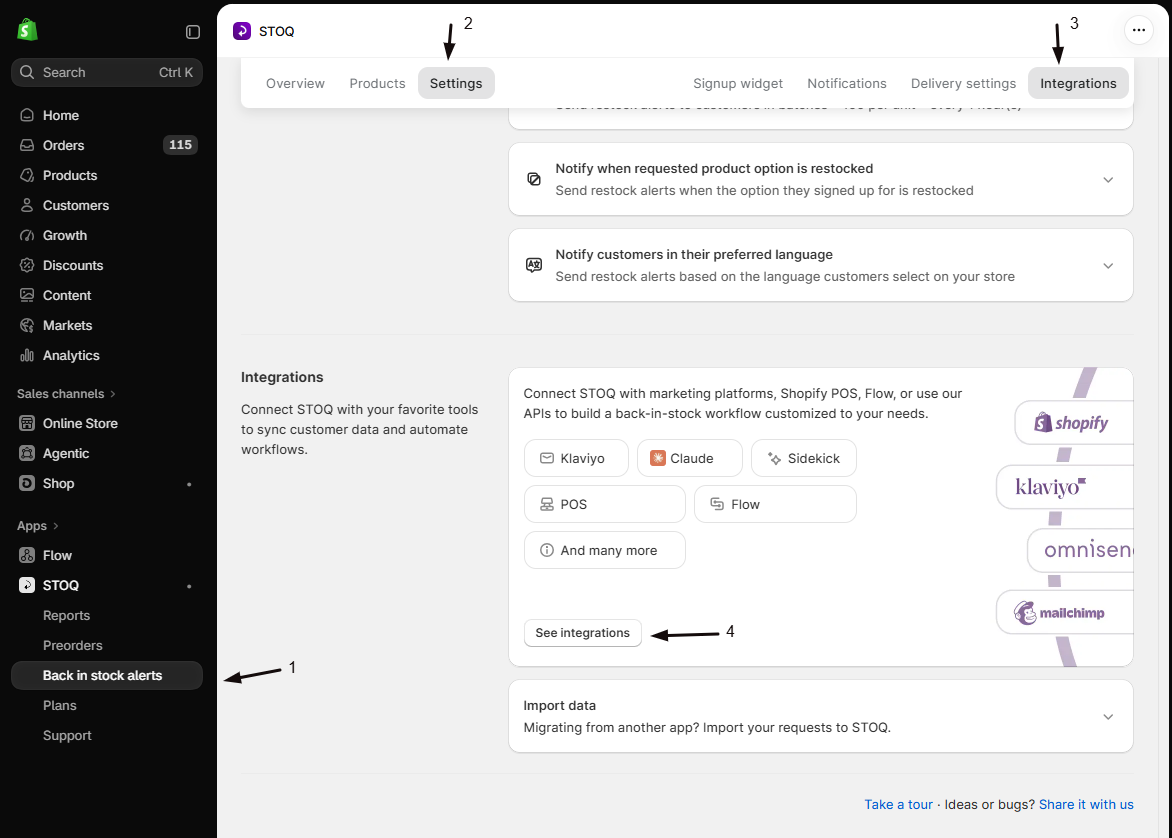
- In the left menu bar of the STOQ app, click Back in stock alerts.
- Click the Settings tab.
- Open the Integrations sub-tab, then click See integrations to open the full Integrations page.
You can also reach the same page from Preorders → Settings → Integrations. The Integrations page is shared across both products.
-
Find the AI connectors section
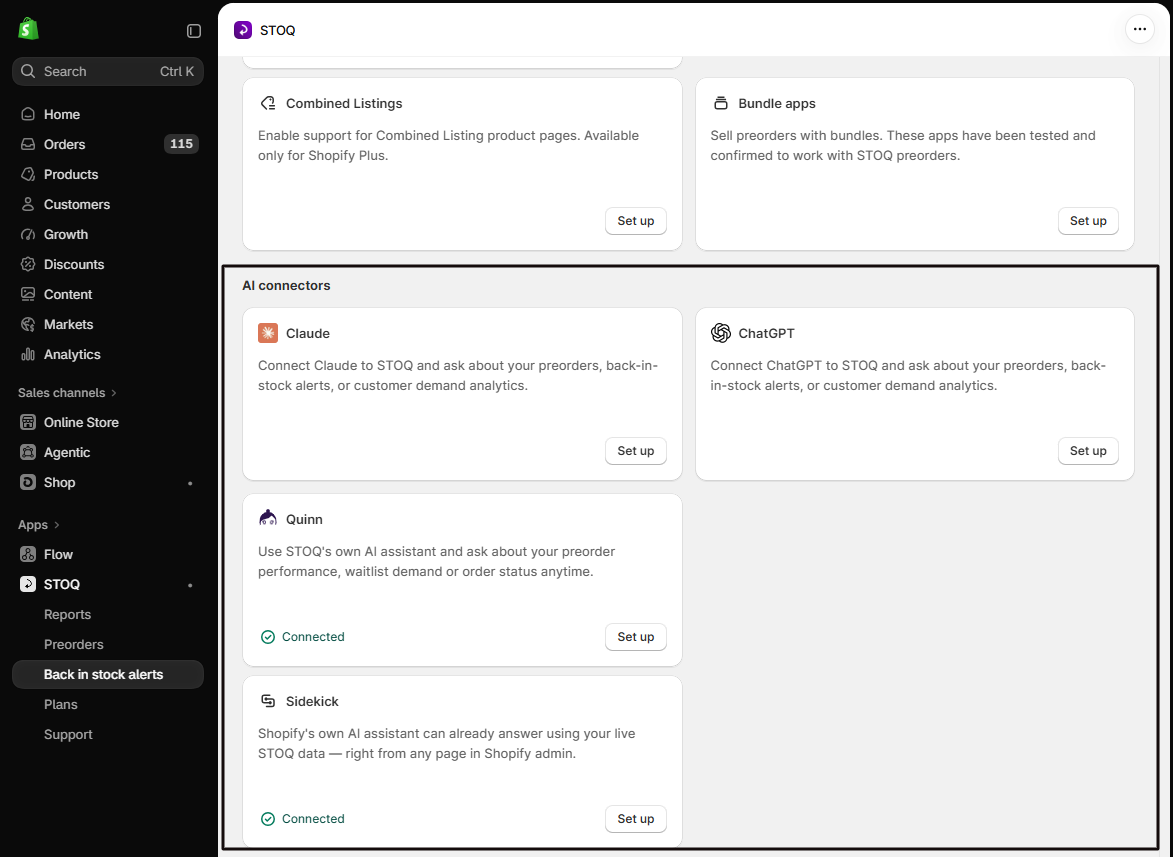
Scroll to the AI connectors section. It shows a card for Claude, ChatGPT, Quinn, and Sidekick, each with a Set up button. Quinn and Sidekick also show a Connected badge, since they need no setup.
Connect Claude
Section titled “Connect Claude”Connecting Claude adds STOQ to it as a custom connector, using the MCP server URL and connector key from the Claude card.
-
Open the Claude setup
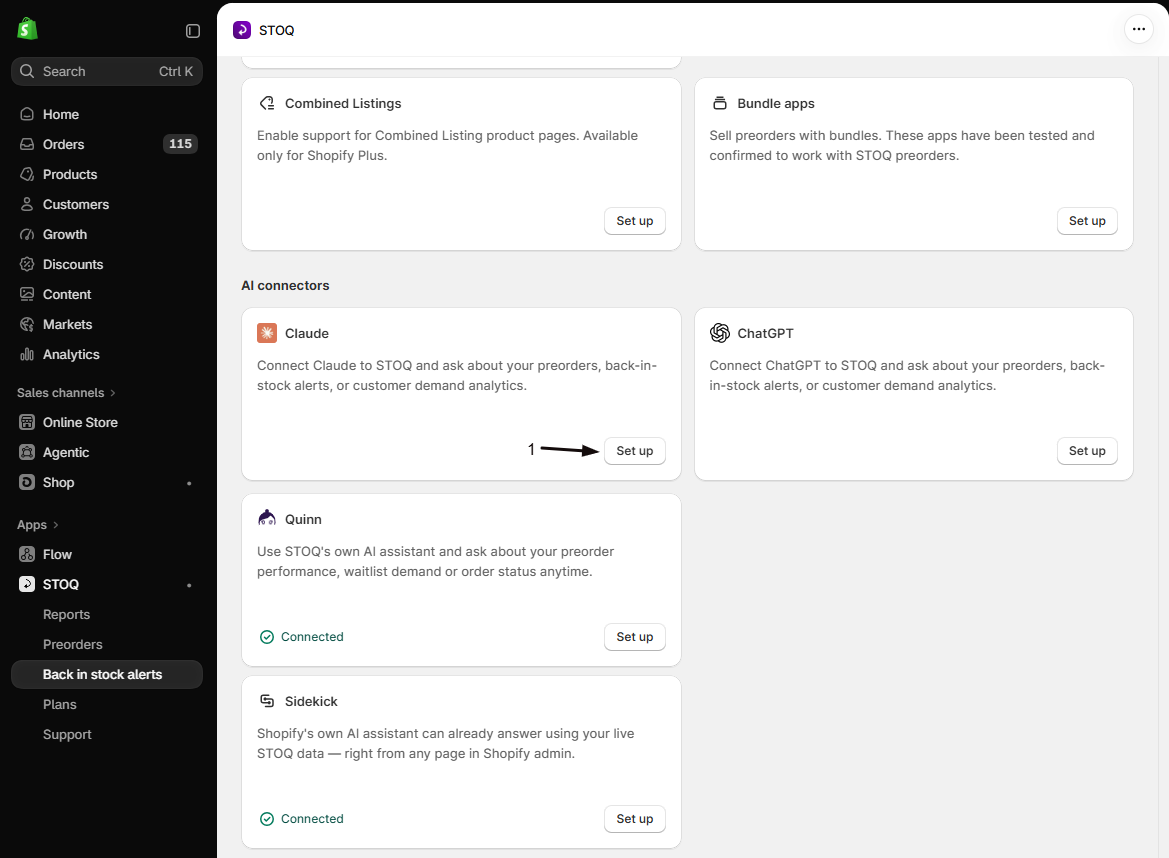
In the AI connectors section, click Set up on the Claude card. Its setup panel opens with two numbered steps.
-
Add STOQ as a custom connector in Claude
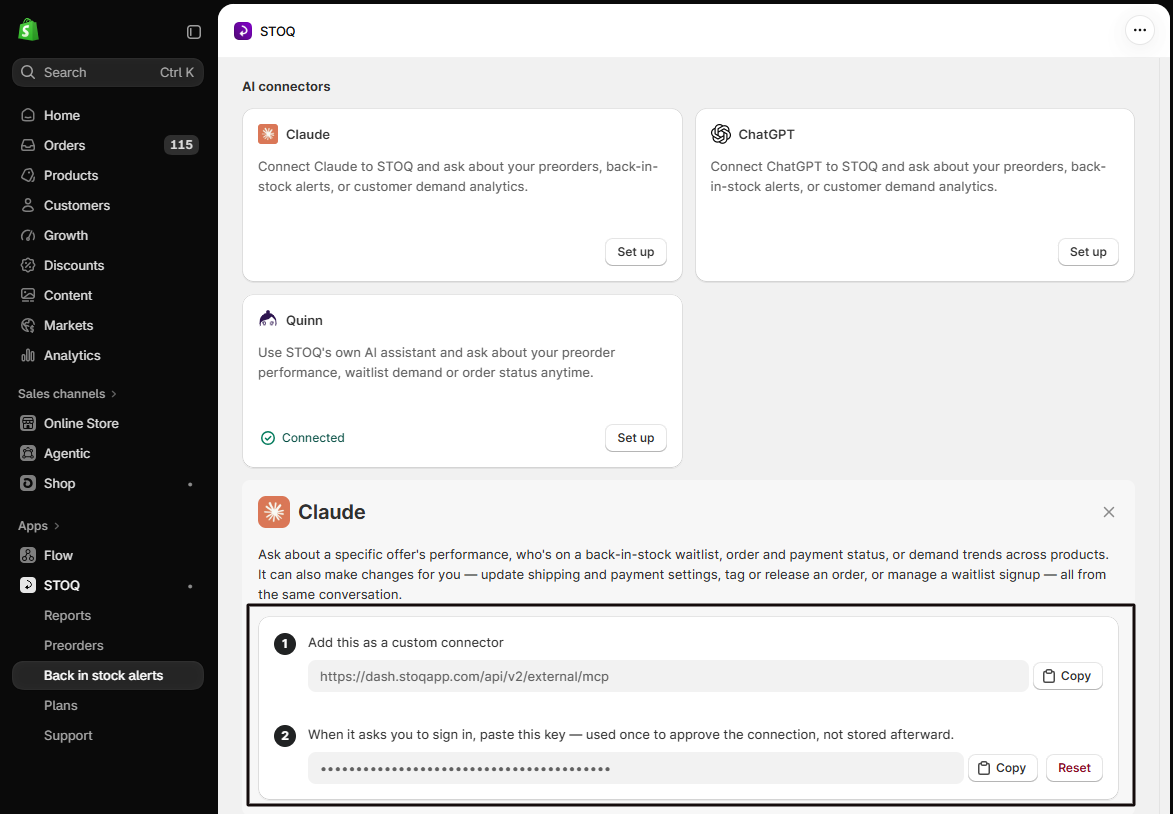
Under 1. Add this as a custom connector, click Copy next to the MCP server URL. In Claude, add a new custom connector from its connector settings and paste this URL.
-
Sign in with your connector key
When Claude asks you to sign in, come back to STOQ, click Copy next to the Connector key in step 2, and paste it in Claude. The key is used once to approve the connection and isn’t stored by Claude afterward.
Once approved, Claude can read your STOQ data and make the changes listed above, straight from your Claude chat.
Connect ChatGPT
Section titled “Connect ChatGPT”Connecting ChatGPT adds STOQ to it as a custom MCP app, using the MCP server URL and connector key from the ChatGPT card.
-
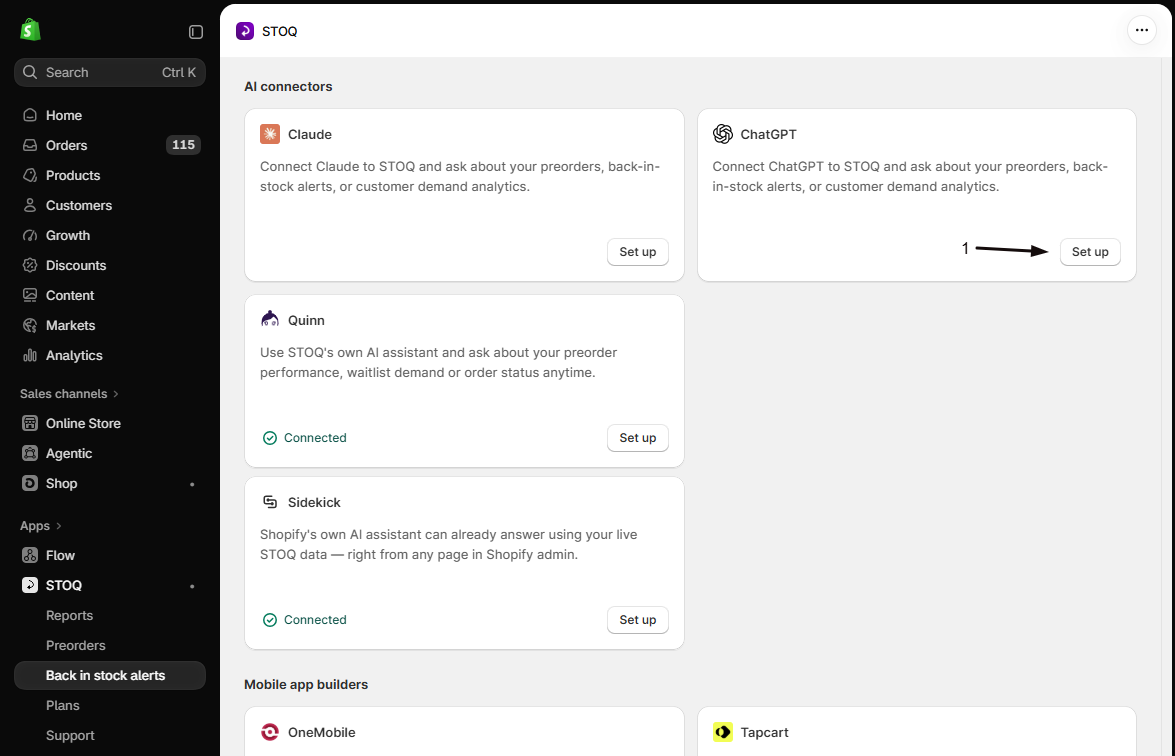
Open the ChatGPT setup in STOQ
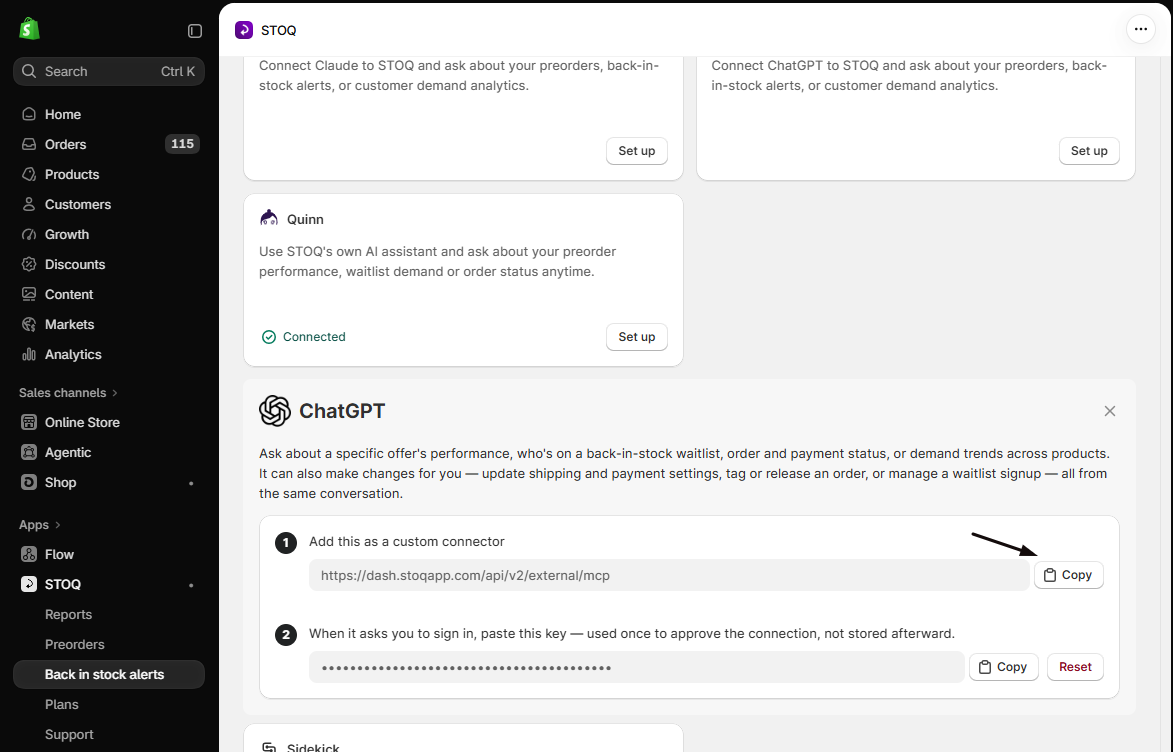
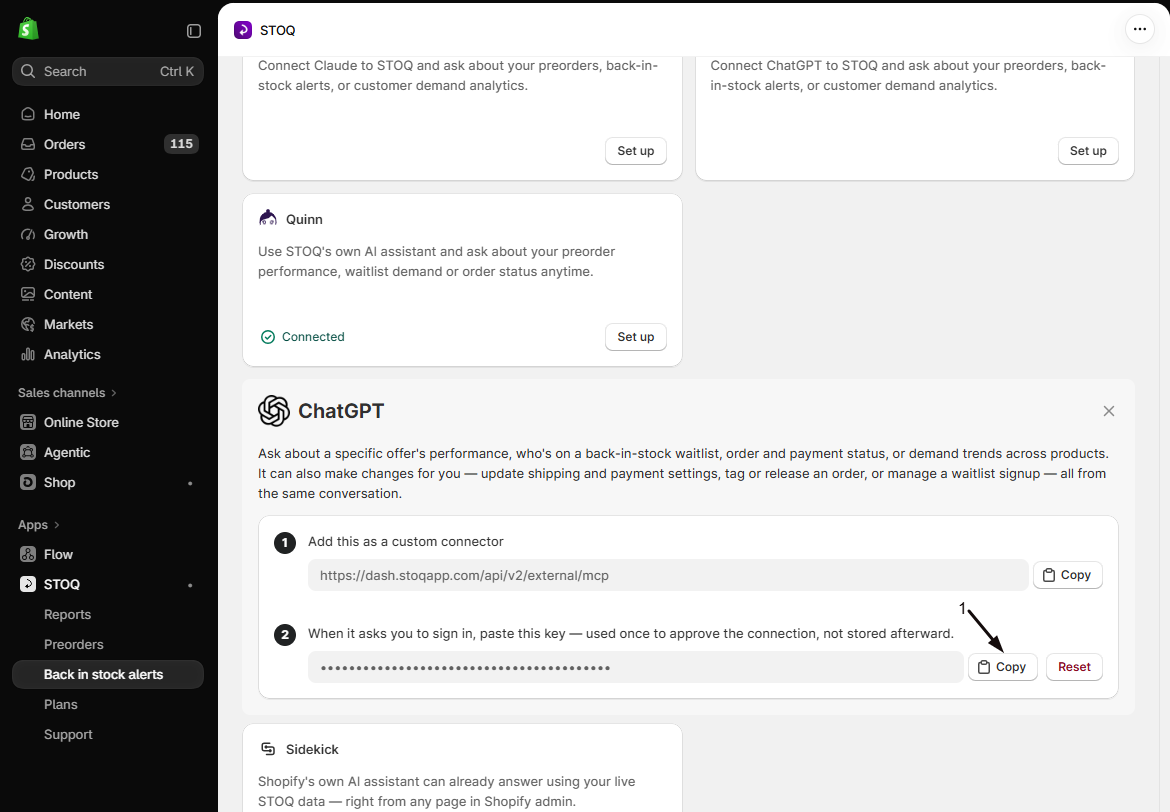
In the AI connectors section, click Set up on the ChatGPT card. Its panel opens with the MCP server URL (step 1) and the Connector key (step 2).
-
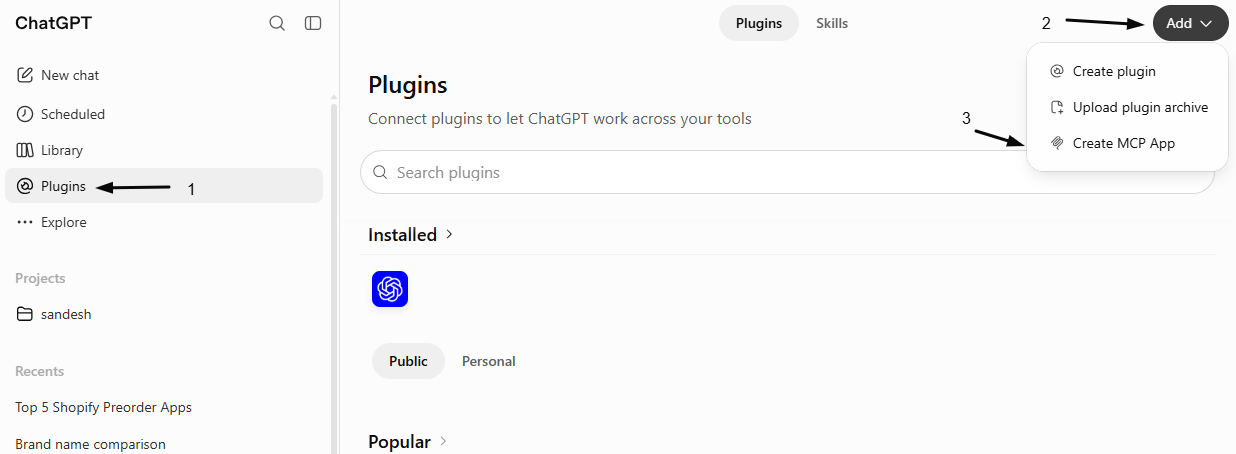
Create an MCP app in ChatGPT
In ChatGPT, click Plugins in the left menu, click Add at the top right, then choose Create MCP App.
-
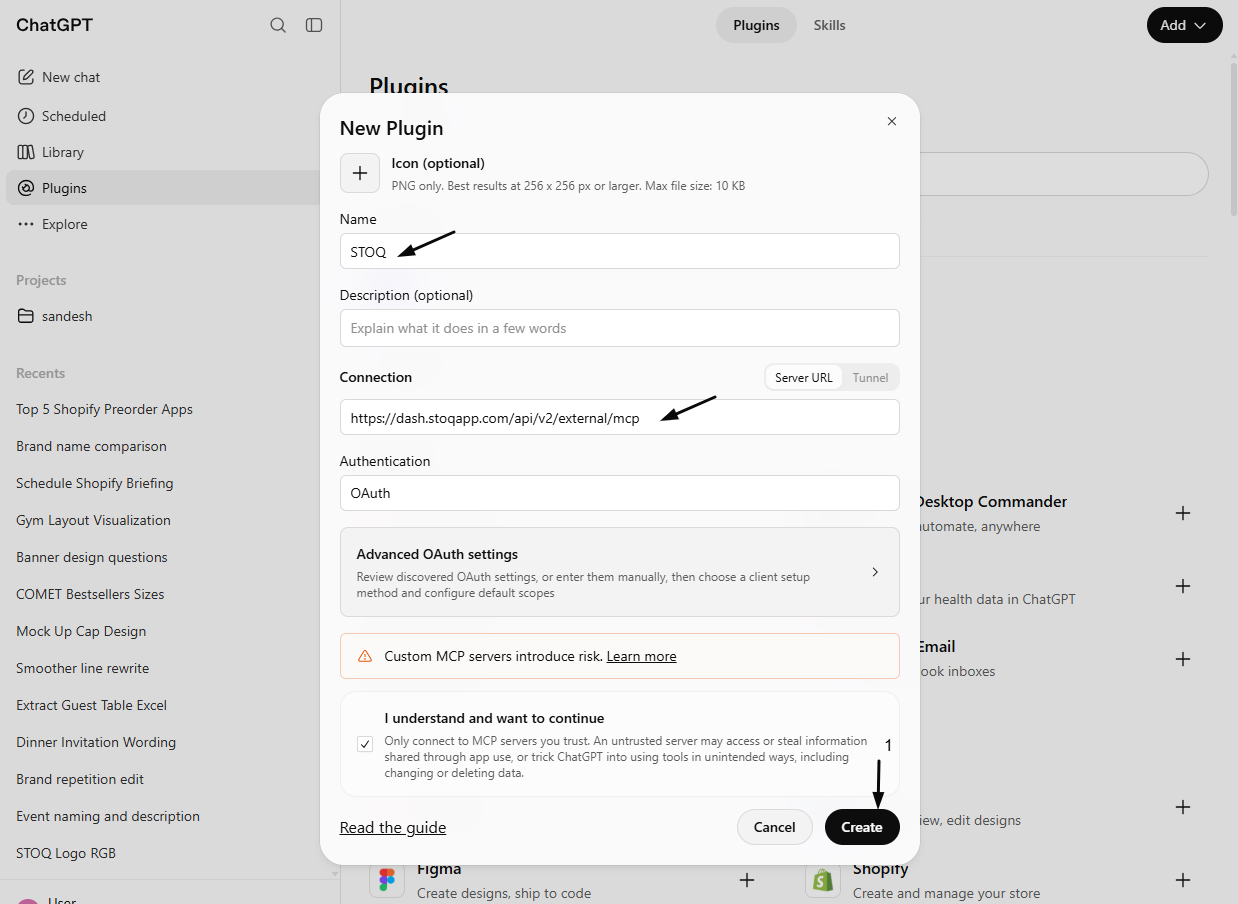
Fill in the New Plugin form
- Back in STOQ, click Copy next to the MCP server URL in step 1.
- In ChatGPT’s New Plugin dialog, enter a Name (for example, STOQ), then paste the URL into the Connection field (with Server URL selected).
- Leave Authentication set to OAuth.
- Tick I understand and want to continue, then click Create.
-
Approve the connection
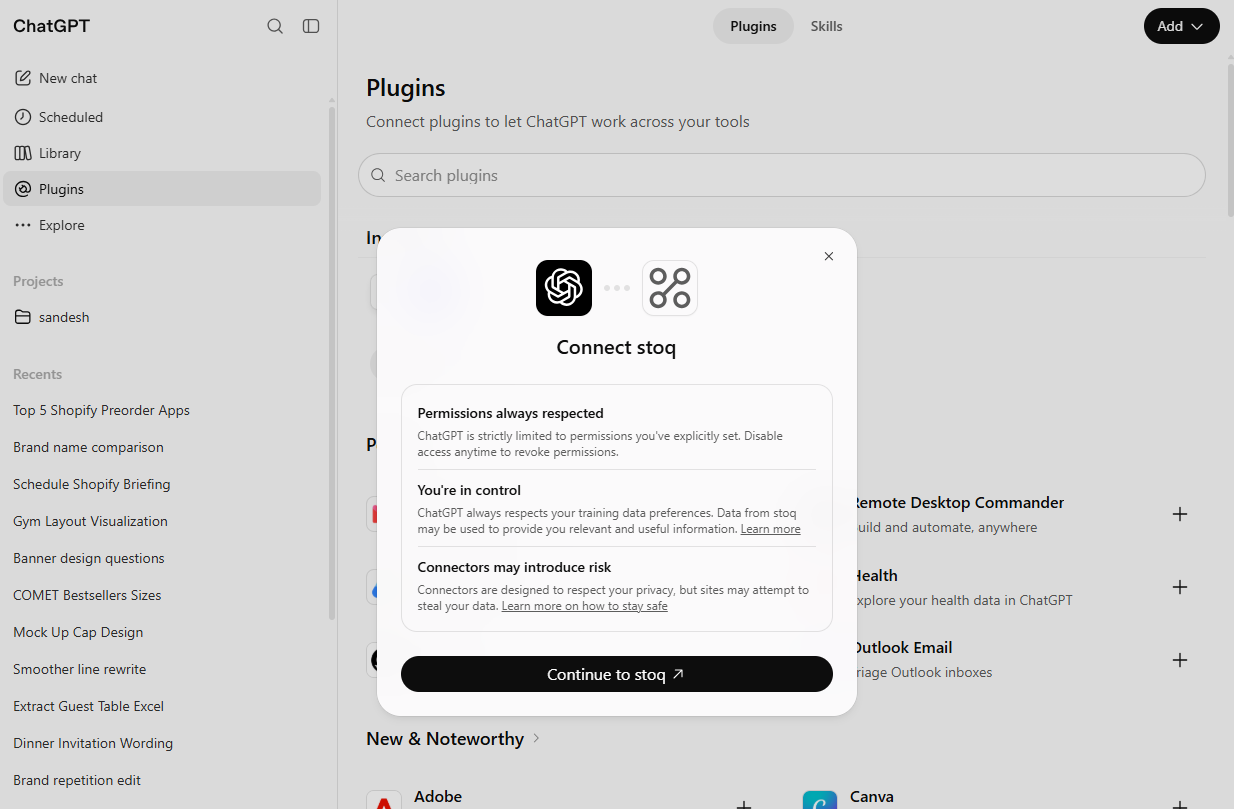
ChatGPT shows a Connect stoq screen listing what access it grants. Click Continue to stoq to approve it.
-
Paste your STOQ connector key
When prompted to sign in to STOQ, go back to STOQ, click Copy next to the Connector key in step 2, and paste it to complete the connection.
Use Quinn
Section titled “Use Quinn”Quinn is STOQ’s own assistant and is always available in your admin, so there’s nothing to connect: its card shows Connected. Click Set up on the Quinn card and then Chat with Quinn to open it, or use the Quinn chat bubble in the STOQ app.
Unlike Claude or ChatGPT, Quinn can open the exact settings screen for you, or suggest a change and apply it once you confirm. See Ask Quinn, your AI assistant for how to use it.
Use Sidekick
Section titled “Use Sidekick”Sidekick is Shopify’s own assistant and lives inside Shopify admin. It can already answer using your live STOQ data, so there’s nothing to connect: its card shows Connected. Click Set up on the Sidekick card, then Copy a question to copy a starter prompt, and paste it to Sidekick in Shopify admin to try it out.
Sidekick can also open a STOQ preorder offer or notification template with a change filled in, for you to save. See Ask Shopify Sidekick about your STOQ data for what to ask and how changes work.
Reset your connector key
Section titled “Reset your connector key”If you want to revoke access, or you shared the key by mistake, reset it. In the AI connectors section, click Set up on the Claude or ChatGPT card, click Reset next to the Connector key, then confirm.
Resetting generates a new key. Any AI assistant you haven’t finished connecting yet will need the new key. Assistants you’ve already connected keep working, since the key is only used to approve the connection. Resetting the connector key doesn’t affect your general STOQ API key or any other integration.
Do I need to connect Quinn or Sidekick?
No. Quinn is built into your STOQ admin and Sidekick lives in Shopify admin, so both show Connected and work without any setup. Only Claude and ChatGPT need connecting.
Is the connector key the same as my STOQ API key?
No. The connector key is only for connecting an AI assistant, and the API key is for custom integrations built on the STOQ API. Resetting one doesn’t affect the other.
Is my connector key stored inside Claude or ChatGPT?
No. It’s used once, when the assistant asks you to sign in, to approve the connection. After that the connection runs on its own secure token, not the key you pasted.
What can a connected assistant change in my store?
It can update shipping and payment settings, tag or release an order, and manage a waitlist signup, alongside answering questions from your live STOQ data.
What's the difference between Quinn and connecting Claude or ChatGPT?
Quinn runs inside STOQ and can open the exact settings screen or make a change with a live preview. Claude and ChatGPT connect from outside through the custom connector, and answer or act on your STOQ data from their own chat.
Claude or ChatGPT won't accept the connector
Check that you pasted the full MCP server URL into the custom connector, and the Connector key on the sign-in step, both copied with the Copy buttons. If you reset the key partway through, start again with the new one.
Related guides
Section titled “Related guides”Thanks for letting us know.
Still stuck? Ask Quinn or chat with support